how-to
Epoxy Flooring Over Painted Concrete: Prep & Application
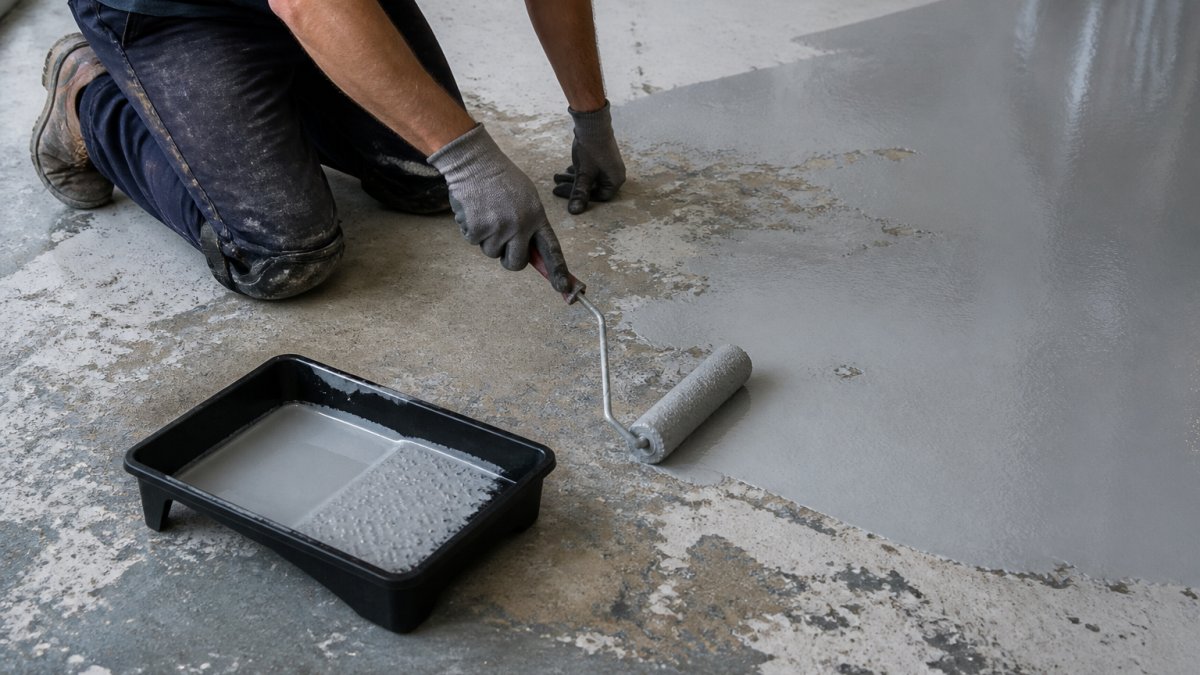
Table of Contents
- Can You Apply Epoxy Flooring Over Painted Concrete?
- How to Prepare Concrete for Epoxy Coating: Step-by-Step
- Epoxy Floor Coating Adhesion Test: Pass/Fail Criteria
- How to Remove Paint from Concrete Floor Safely
- Epoxy Floor Curing Time and Recoat Windows
- Moisture Testing and Vapor Barriers Before Coating
- Common Mistakes That Cause Epoxy to Peel on Painted Concrete
- Frequently Asked Questions
Last Updated: October 21, 2026
Can You Apply Epoxy Flooring Over Painted Concrete?
Yes, you can apply epoxy flooring over painted concrete, but only when the existing paint is sound, clean, and firmly bonded.
At Concrete-Enhancements, we've spent over 20 years coating concrete.
The core problem: epoxy doesn't bond to paint, it bonds to concrete. Coat over paint and your new floor is only as strong as the paint's grip on the slab.
How to Prepare Concrete for Epoxy Coating: Step-by-Step
Preparation is 80% of the job. Skip a step and the coating fails, no matter how good the epoxy is. Here's the sequence we follow on every project.
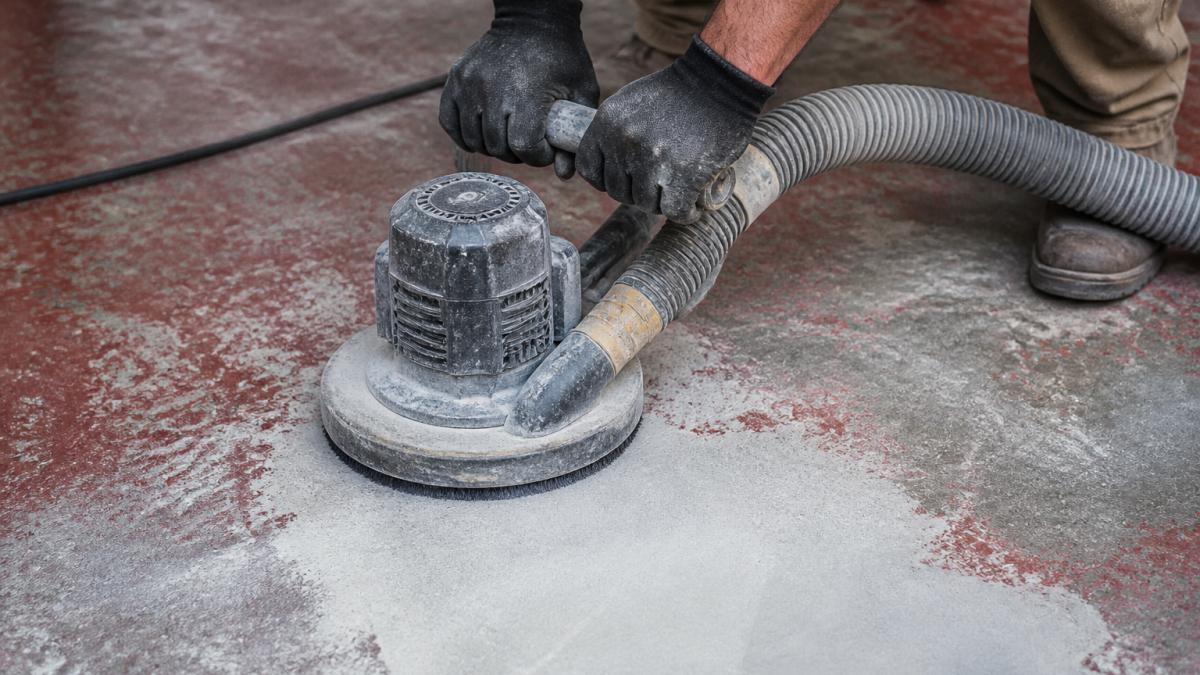
Step 1: Clean and Degrease the Surface
Oil, grease, and grime block the bond. Sweep or vacuum all dust, then scrub with a concrete cleaner or heavy-duty degreaser. Pay extra attention to garage floors, where oil drips collect.
- Scrub stubborn spots with a stiff brush
- Rinse thoroughly and let the floor dry completely
- Check for slick or dark patches, which signal leftover oil
Step 2: Remove Loose or Peeling Paint
This is non-negotiable. Scrape or grind away any paint that lifts, flakes, or powders under a fingernail. A floor scraper handles small areas. For larger jobs, a walk-behind grinder with a diamond cup wheel strips paint fast.
Step 3: Profile the Concrete
Surface profile is the roughness that gives epoxy something to grip. Even over sound paint, you want a dull, open texture. Diamond grinding or sanding creates this profile. Acid etching won't work over paint because the acid can't reach the concrete.
Epoxy Floor Coating Adhesion Test: Pass/Fail Criteria
The tape test tells you whether the paint is loosely bonded, not whether it's chemically compatible with epoxy. You need answers to both before buying a gallon of coating. Use this three-part assessment to decide whether to abrade and coat, spot-remove, or strip the floor.
Part 1: The Tape Test for Bond Strength
Clean a 1-square-foot area and let it dry completely. Press a strip of heavy-duty tape firmly onto the paint, then peel it back fast at a 90-degree angle.
Pass: The tape comes up clean, with no paint flakes attached. The paint is firmly bonded.
Fail: Paint lifts onto the tape, or the surface powders when scratched with a fingernail. The paint is failing and must be removed.
Part 2: Identify the Paint Type
Epoxy bonds poorly to latex and other water-based paints because they stay flexible and chalky at the surface. Oil-based and two-part epoxy paints are more receptive, but only if sound.
Here is how to identify an unknown coating:
- Solvent test: Rub a rag dampened with denatured alcohol or acetone on a hidden spot. Latex paint softens and lifts; oil-based paint resists.
- Scratch test: A fingernail that digs into a soft, rubbery film suggests latex or elastomeric coating. A hard, chalky scratch suggests a cured oil-based or epoxy paint.
- Water bead test: Water that beads on the surface suggests an oil-based or sealed coating. Water that soaks in or darkens the film suggests a porous latex paint.
- History: Newer garage floors are often coated with big-box latex garage floor paint, which is the least compatible with epoxy. Older floors may have oil-based porch and floor enamel, which is more receptive if sound.
If the paint is latex, plan to remove it. If it is oil-based and passes the tape test, you can usually abrade and coat. If you cannot identify it, run the test patch in Part 3.
Part 3: The Test Patch With Pass/Fail Criteria
The tape test checks the paint's bond to concrete; the test patch checks the epoxy's bond to the paint.
- Clean and abrade a 2-foot by 2-foot area using 80- to 120-grit sandpaper or a diamond hand block. Vacuum all dust.
- Apply the primer and epoxy exactly as the manufacturer specifies, including the recoat window and cure time.
- Let the patch cure for the full time stated on the technical data sheet, typically 24 to 72 hours depending on the product and temperature.
- Score a 1-inch by 1-inch grid through the coating with a utility knife. Press tape firmly over the grid and peel it back fast.
Pass: No coating lifts from the grid, and the epoxy remains firmly bonded to the paint. You can proceed with the full floor.
Fail: Coating lifts at the grid lines or peels away in sheets. The paint is incompatible or weakly bonded.
Decision Tree: Abrade, Spot-Remove, or Strip
Use the results together to choose your path:
- Tape test passes, paint is oil-based or epoxy, patch passes: Abrade the full floor and coat. This is the best-case scenario.
- Tape test passes, paint is latex, patch passes: Proceed with caution. Latex is a riskier substrate, so use a manufacturer-approved primer and expect a shorter service life than coating bare concrete.
- Tape test fails in isolated spots: Spot-remove the failing paint, feather the edges, and re-test those areas before coating.
- Tape test fails across the floor, or the patch fails: Strip the entire floor. No primer or epoxy will rescue a weak paint layer.
This decision tree is the step most guides skip, and it separates a floor that lasts from one that peels within a season.
How to Remove Paint from Concrete Floor Safely
When paint fails the adhesion test, it has to go. You have three main options, each suited to a different floor size, paint type, and budget. The table below compares them on the factors that drive the decision.
Call (919) 824-5403 or email craigrfear@gmail.com for a free estimate →
| Method | Best For | Speed | Dust Level | Relative Cost | Labor Intensity |
|---|---|---|---|---|---|
| Chemical stripper | Small areas, detail work, latex paint | Slow | Low | Moderate (product cost) | Moderate |
| Hand scraping | Loose, flaking paint | Slow | Low | Low (tool cost) | High |
| Diamond grinding | Large floors, tough coatings, oil-based paint | Fast | High (needs vacuum) | High (equipment rental or pro hire) | Moderate to high |
Chemical Stripping: When It Makes Sense
Chemical strippers work best on small areas and latex paint, which softens more readily than cured oil-based or epoxy coatings. Apply per the label, let it dwell, then scrape the softened paint into a container.
Chemical stripping is slow and generates hazardous waste, a poor choice for a full garage floor, but reasonable for a stairwell, utility room, or spot repairs around edges and drains.
Hand Scraping: For Loose and Flaking Paint
A floor scraper handles small areas of loose, flaking paint at the lowest cost and with little dust, but it won't remove tightly bonded paint. Remove what's already failing, then switch to grinding or chemical stripping.
Diamond Grinding: The Fastest Route on Large Floors
Diamond grinding is the fastest way to remove paint from concrete floor surfaces at scale, and the only method that also profiles the concrete in the same pass. A walk-behind grinder with a diamond cup wheel strips most coatings quickly.
Grinding removes the paint and leaves a dull, open texture that gives epoxy something to grip, the dual benefit that makes it the pro crew's default.
Product-Specific Preparation Checklist
Whichever removal method you choose, the manufacturer's technical data sheet controls the final prep steps. Before applying primer or epoxy, confirm each of these:
- Surface profile: The data sheet states the required profile, often a CSP 3 to CSP 5 for epoxy. Grinding achieves it; chemical stripping does not.
- Moisture limit: Most epoxy systems specify a maximum slab moisture content or require a moisture test. Test before coating.
- Temperature range: Air and slab temperature must fall within the manufacturer's window, commonly 50°F to 85°F, and the slab should be at least 5°F above the dew point.
- Recoat window: Note the minimum and maximum time between primer and epoxy coats. Miss the maximum and you must scuff the surface.
Following the data sheet is not optional. A wrong primer, missed recoat window, or coating outside the temperature range causes the same failure you removed the paint to prevent.
Cost and Labor Tradeoffs
DIY abrasion and grinding are the lowest-cost paths per square foot if you own or can rent the equipment, but they demand time and dust control. Chemical stripping carries moderate product cost plus hazardous-waste handling. Professional prep costs the most up front but removes the risk of a failed bond and the cost of tearing out a peeled floor later.
Epoxy Floor Curing Time and Recoat Windows
Epoxy floor curing time depends on the product and temperature. Most two-part systems let you recoat within a set window, often several hours; miss it and you must scuff the surface before the next coat.
Here's the general flow:
- Pot life: mix only what you can spread before it gels
- Recoat window: apply the next coat while the first is still slightly tacky
- Full cure: keep heavy traffic off until the manufacturer's stated time
Follow the mixing ratio exactly. A wrong ratio leaves a soft, sticky floor that never fully hardens.
Moisture Testing and Vapor Barriers Before Coating
Moisture is the silent killer of epoxy floors. Water vapor rising through a slab can push a coating right off the concrete, paint or no paint.
Test before you coat. Tape a square of plastic sheeting to the floor and leave it for 24 hours. Condensation under the plastic means moisture is moving through the slab. In that case, a moisture-tolerant primer or vapor barrier is required.
Common Mistakes That Cause Epoxy to Peel on Painted Concrete
Most failures trace back to a handful of avoidable errors:
- Coating over failing paint. The number one cause of peeling. Test first.
- Skipping the profile. A slick surface gives epoxy nothing to grip.
- Leftover oil or grease. The coating bonds to the grime, not the floor.
- Wrong mixing ratio. Soft, gummy floors that never cure.
- Ignoring moisture. Vapor pushes the coating up from below.
That's the difference between a floor that lasts and one that peels: prep and testing, not the brand on the can.
Frequently Asked Questions
Can you apply epoxy flooring over painted concrete?
Yes, but only if the existing paint is sound, well-bonded, and compatible with epoxy. You must test adhesion by applying a small patch of epoxy and checking bond strength after curing. If the paint is peeling, flaking, or fails the test, remove it completely before coating. Proper preparation of painted concrete is critical to prevent delamination.
How do you prepare painted concrete for an epoxy coating?
Start by cleaning and degreasing the surface. Remove any loose or peeling paint with a scraper or grinder. Then profile the concrete by diamond grinding or sanding to create a rough texture. Vacuum all dust and repair cracks. Finally, perform an adhesion test to confirm the paint will hold the epoxy. If the paint is incompatible, strip it entirely before proceeding.
How long should epoxy cure before you walk on the floor?
Most epoxy floor coatings are ready for light foot traffic after 24 hours, but full cure takes 3 to 7 days depending on the product, temperature, and humidity. Avoid heavy loads or vehicle traffic for at least 72 hours. Always follow the manufacturer's specific curing time and recoat window instructions for best results.
What should you do if the existing concrete paint is peeling?
If the paint is peeling, you must remove it completely before applying epoxy. Use a scraper, wire brush, or diamond grinder to strip the failing paint. Then clean and profile the bare concrete, repair any cracks, and test for moisture. Applying epoxy over peeling paint will lead to delamination and premature failure.
A failed epoxy floor is frustrating, and it's usually a prep problem, not a product problem. If you'd rather skip the guesswork, Concrete-Enhancements brings over 20 years of experience and CTi Certified Dealer standards to every job. We handle surface prep, adhesion testing, and full epoxy floor coatings built to last. Call (919) 824-5403 or email craigrfear@gmail.com for a free estimate and get your concrete transformation started.
Tags: painted concrete, epoxy flooring over painted concrete, how to prepare concrete for epoxy coating, epoxy floor coating adhesion test, remove paint from concrete floor, epoxy floor curing time
Frequently Asked Questions
Yes, but only if the existing paint is sound, well-bonded, and compatible with epoxy. You must test adhesion by applying a small patch of epoxy and checking bond strength after curing. If the paint is peeling, flaking, or fails the test, remove it completely before coating. Proper preparation of painted concrete is critical to prevent delamination.
Start by cleaning and degreasing the surface. Remove any loose or peeling paint with a scraper or grinder. Then profile the concrete by diamond grinding or sanding to create a rough texture. Vacuum all dust and repair cracks. Finally, perform an adhesion test to confirm the paint will hold the epoxy. If the paint is incompatible, strip it entirely before proceeding.
Most epoxy floor coatings are ready for light foot traffic after 24 hours, but full cure takes 3 to 7 days depending on the product, temperature, and humidity. Avoid heavy loads or vehicle traffic for at least 72 hours. Always follow the manufacturer's specific curing time and recoat window instructions for best results.
If the paint is peeling, you must remove it completely before applying epoxy. Use a scraper, wire brush, or diamond grinder to strip the failing paint. Then clean and profile the bare concrete, repair any cracks, and test for moisture. Applying epoxy over peeling paint will lead to delamination and premature failure.