how-to
How to Repair Peeling Epoxy Garage Floors
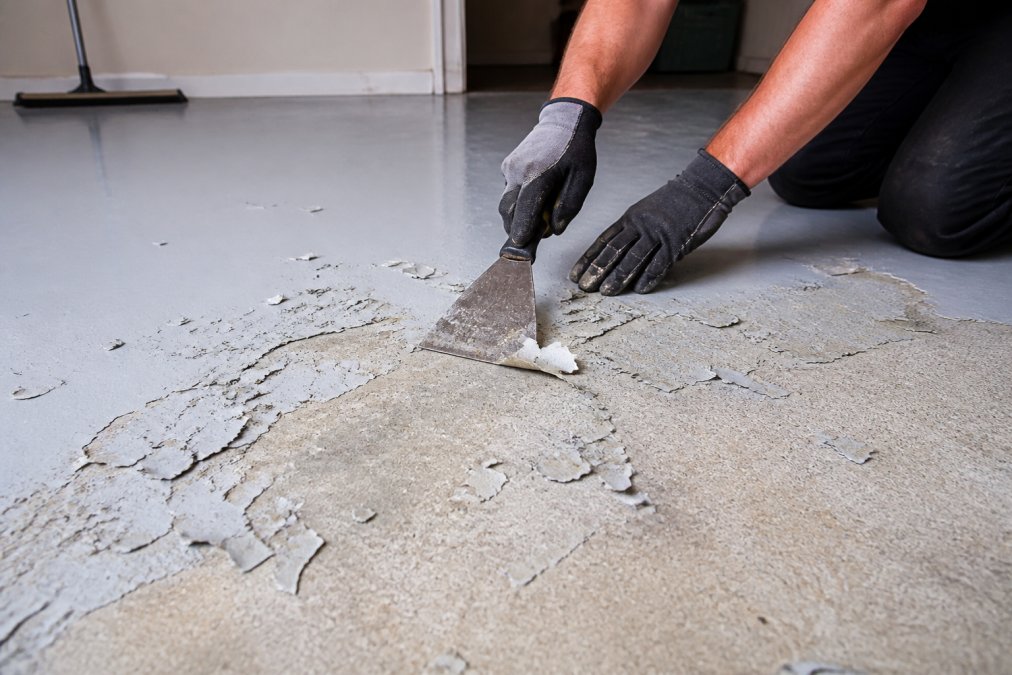
Table of Contents
- Why Epoxy Garage Floors Peel: Understanding the Root Causes
- Assessing the Damage: When to Repair vs. Strip
- Best Tools for Removing Peeling Epoxy
- Step-by-Step Repair Process for Peeling Epoxy
- How Long Does Epoxy Floor Repair Take?
- Preventing Epoxy Floor Failure: Long-Term Maintenance
- Frequently Asked Questions
Last Updated: September 19, 2026
Why Epoxy Garage Floors Peel: Understanding the Root Causes
Learning how to repair peeling epoxy garage floors is essential, as these problems don't happen by accident. Understanding what causes the failure helps you prevent it from happening again. Understanding what causes the failure helps you prevent it from happening again. Most peeling comes down to three core issues: moisture, poor preparation, or mixing mistakes. Most peeling comes down to three core issues: moisture, poor preparation, or mixing mistakes. Let's break down each one.
Moisture and Hydrostatic Pressure
Moisture is the number one enemy of epoxy coatings. Water trapped beneath the epoxy creates hydrostatic pressure that pushes the coating away from the concrete substrate. Over time, this pressure builds up and the epoxy delaminates, it literally separates from the floor.
The problem often starts before the epoxy is even applied. Concrete naturally absorbs water from the ground. If you coat a damp or wet concrete slab with epoxy, you're sealing in that moisture. As the water evaporates, it has nowhere to go. The pressure builds. The coating fails.
Many homeowners don't realize their concrete is wet. Concrete can feel dry to the touch but still contain moisture deep inside. This is why moisture vapor transmission testing matters. A simple test reveals whether your concrete is actually ready for coating.
Poor Surface Preparation and Substrate Contamination
The second major cause is skipping proper surface preparation. Epoxy bonds to concrete through mechanical adhesion, it needs a rough, clean surface to grip. If the concrete is smooth, dirty, or contaminated, the epoxy has nothing to hold onto.
Common contaminants include:
- Dust and dirt
- Oil and grease from vehicles
- Old paint or sealers
- Concrete curing compounds
- Mold or mildew
Even a thin layer of contamination breaks the bond.
Incorrect Resin-to-Hardener Ratio and Adhesion Failure
The third cause is mixing error. Epoxy kits contain two parts: resin and hardener. The ratio matters. Mix too much hardener and the coating becomes brittle. Mix too little and it stays soft and never fully cures. Either way, adhesion fails.
Assessing the Damage: When to Repair vs. Strip
Not every peeling epoxy floor needs to be completely removed and recoated. Sometimes a spot repair works. Sometimes you need to strip everything and start over. The key is understanding what you're dealing with.
Identifying Localized Peeling and Blistering
Look at the pattern of peeling. Is it one small area or multiple spots scattered across the floor? Are the edges lifting or is the entire coating separating?
Testing for Moisture Vapor Transmission
Before you repair or recoat, test for moisture. A concrete moisture test is inexpensive. You can buy a moisture meter online, or hire a professional to run a formal moisture vapor transmission test.
- Installing a vapor barrier under the concrete (if you can access it)
- Using a moisture-tolerant epoxy for the repair
- Improving drainage around the garage to keep water away from the foundation
Best Tools for Removing Peeling Epoxy
Removing failed epoxy is the hardest part of the repair. You need the right tools. Wrong tools waste time and money.
Mechanical Grinding and Diamond Grinding Equipment
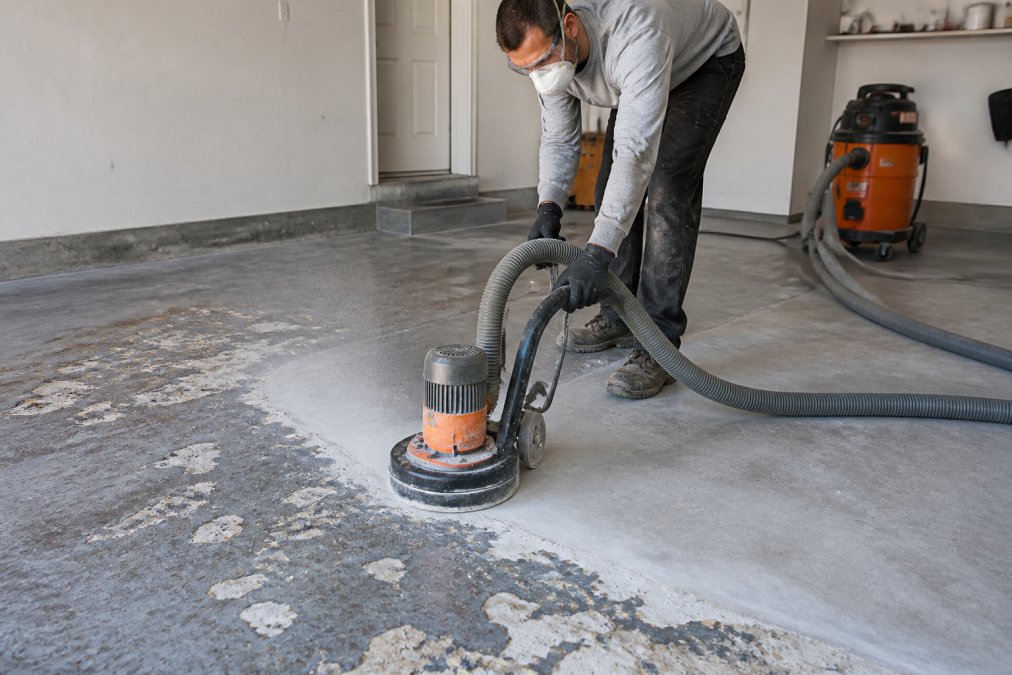
The fastest way to remove epoxy is mechanical grinding. A concrete grinder with diamond grinding wheels cuts through epoxy quickly. For small areas, a handheld angle grinder works. For larger sections, rent a floor grinder from a home improvement store.
Solvent Cleaning and Degreasing Supplies
After grinding, you need to clean the surface. Solvents remove residual epoxy, oils, and contaminants. Common choices include:
- Acetone (fast but expensive)
- Denatured alcohol (slower, cheaper, safer)
- Commercial concrete degreasers (effective for oil and grease)
Step-by-Step Repair Process for Peeling Epoxy
Here's the process professionals use to repair peeling epoxy floors. The key difference from DIY attempts is attention to substrate compatibility and bonding agent selection, two decisions that determine whether the repair lasts or fails again.
Step 1: Remove Loose and Delaminated Epoxy
Start by removing all loose epoxy. Use a putty knife or scraper to find edges that lift. If the epoxy peels off easily, remove it. If it's stuck, use the angle grinder to cut it away.
Step 2: Prepare and Profile the Concrete Substrate
Once loose epoxy is gone, grind the entire repair area. Use medium-grit sandpaper (60-80 grit) or a concrete grinder to create a rough surface profile. The concrete should feel like coarse sandpaper, not smooth.
Step 3: Clean and Degrease the Surface
Vacuum all dust from grinding. Then wipe the surface with denatured alcohol or acetone and a lint-free cloth. Remove all oil, grease, and contaminants.
Call (919) 824-5403 or email craigrfear@gmail.com for a free estimate →
Step 4: Determine Epoxy Compatibility and Select Bonding Agent
This is the step most DIY repairs skip, and it's why they fail.
If old epoxy remains on the floor:
- Check the original epoxy product name (look at old cans, receipts, or ask the previous owner)
- Contact the manufacturer of your new epoxy and ask if it bonds to the old system
- If compatibility is uncertain, assume they are incompatible
If epoxy systems are incompatible or you're unsure:
- Use a bonding agent (primer) specifically designed for epoxy-to-epoxy adhesion
- Common bonding agents include epoxy primers formulated for recoating (such as those labeled "epoxy primer for existing epoxy" or "recoat primer")
- Apply the bonding agent according to manufacturer instructions, typically 2-4 hours before the topcoat
- A good bonding agent covers 200-400 sq ft per gallon
If you stripped all old epoxy to bare concrete:
- You can use a standard epoxy primer or apply the repair epoxy directly if the product is rated for bare concrete
- Most two-part epoxy systems work well on bare, ground concrete without a separate primer
- However, a primer still improves adhesion and is recommended for maximum durability
Step 5: Apply Repair Epoxy and Topcoat
Mix the epoxy resin and hardener in the exact ratio specified by the manufacturer. Use a kitchen scale or graduated measuring cups, do not eyeball it. Incorrect ratios are a common cause of soft, uncured coatings.
Step 6: Cure and Return to Service
Do not walk on the floor or park vehicles on it until full cure is complete. Epoxy reaches initial set in 24 hours but full cure takes longer:
- Light foot traffic: 48-72 hours
- Vehicle traffic: 5-7 days
- Heavy equipment or hot tires: 7-14 days
How Long Does Epoxy Floor Repair Take?
The timeline depends on whether you're doing a spot repair or replacing the entire coating.
Timeline for Spot Repairs vs. Full Coating Replacement
A small spot repair (under 50 square feet) typically takes 2-3 days from start to finish:
- Day 1: Remove loose epoxy and grind the area
- Day 2: Clean, apply primer and patch coat
- Day 3: Cure and apply topcoat (if needed)
A full floor replacement takes longer. The grinding step alone can take 1-2 days depending on floor size. Then add 2-3 days for cleaning, priming, and coating. Total time is usually 4-7 days.
Curing Times and When to Return to Normal Use
Don't rush curing times. Epoxy reaches initial set in 24 hours but full cure takes longer. Most epoxy coatings need 48-72 hours before light foot traffic is safe. Heavy traffic, cars driving on the floor, requires 5-7 days.
Preventing Epoxy Floor Failure: Long-Term Maintenance
Once your floor is repaired, keep it in good shape. Prevention is easier than repair.
Moisture Testing and Substrate Compatibility
Test for moisture every few years. If you notice new peeling starting, run a moisture test immediately. Catching moisture problems early prevents major failures.
Routine Cleaning and Hot Tire Pickup Prevention
Clean the floor regularly. Dust and dirt trap moisture and degrade the coating. Sweep weekly and mop monthly with a mild detergent.
Hot tire pickup happens when tires stick to the epoxy on hot days. This pulls pieces of coating off. Prevent it by:
- Parking in shade when possible
- Using a UV-resistant topcoat
- Allowing cars to cool before parking on fresh epoxy
Frequently Asked Questions
What causes epoxy garage floors to peel in the first place?
Peeling epoxy typically results from moisture vapor transmission through the concrete substrate, poor surface preparation, or substrate contamination that prevents adhesion. Hydrostatic pressure from below, incorrect resin-to-hardener ratios during installation, and incompatible epoxy systems can also cause adhesion failure. If the concrete wasn't properly profiled or degreased before the original coat was applied, the epoxy coating cannot bond effectively, leading to delamination and peeling edges.
Can you put new epoxy over old epoxy garage floor?
You can apply new epoxy over old epoxy, but only if the existing coating is in good condition and properly prepared. The old epoxy must be mechanically ground or sanded to create a surface profile that allows the new coating to bond. If the old epoxy is peeling, blistering, or showing adhesion failure, you must remove all loose material and delaminated sections first. Compatibility between the old and new epoxy systems matters, some polyaspartic or epoxy resin formulations bond better to existing coatings than others.
How long does epoxy floor repair take from start to finish?
Spot repairs for small peeling sections typically take 2-3 days including surface preparation, grinding, cleaning, and curing time. Full floor recoating takes 5-7 days depending on floor size and curing requirements. Concrete moisture tests add 24-48 hours if you're testing for moisture vapor transmission before repair. Most epoxy systems require 24-48 hours of curing before light foot traffic and 5-7 days before heavy use or vehicle traffic.
What's the best way to prevent epoxy floor failure after repair?
Test the concrete substrate for moisture before applying any new epoxy coating, moisture vapor transmission is the leading cause of recurring failure. Ensure proper surface profile through mechanical grinding and diamond grinding techniques. Use a quality bonding agent compatible with your epoxy resin and curing agent. Maintain the floor with regular degreasing to prevent hot tire pickup and contamination buildup. Avoid sealing the concrete before epoxy application, as this can trap moisture and cause future delamination.
Tags: repair peeling epoxy, how to repair peeling epoxy garage floors, epoxy floor delamination causes, best tools for removing peeling epoxy, how long does epoxy floor repair take
Frequently Asked Questions
Peeling epoxy typically results from moisture vapor transmission through the concrete substrate, poor surface preparation, or substrate contamination that prevents adhesion. Hydrostatic pressure from below, incorrect resin-to-hardener ratios during installation, and incompatible epoxy systems can also cause adhesion failure. If the concrete wasn't properly profiled or degreased before the original coat was applied, the epoxy coating cannot bond effectively, leading to delamination and peeling edges.
You can apply new epoxy over old epoxy, but only if the existing coating is in good condition and properly prepared. The old epoxy must be mechanically ground or sanded to create a surface profile that allows the new coating to bond. If the old epoxy is peeling, blistering, or showing adhesion failure, you must remove all loose material and delaminated sections first. Compatibility between the old and new epoxy systems matters—some polyaspartic or epoxy resin formulations bond better to existing coatings than others.
Spot repairs for small peeling sections typically take 2-3 days including surface preparation, grinding, cleaning, and curing time. Full floor recoating takes 5-7 days depending on floor size and curing requirements. Concrete moisture tests add 24-48 hours if you're testing for moisture vapor transmission before repair. Most epoxy systems require 24-48 hours of curing before light foot traffic and 5-7 days before heavy use or vehicle traffic.
Test the concrete substrate for moisture before applying any new epoxy coating—moisture vapor transmission is the leading cause of recurring failure. Ensure proper surface profile through mechanical grinding and diamond grinding techniques. Use a quality bonding agent compatible with your epoxy resin and curing agent. Maintain the floor with regular degreasing to prevent hot tire pickup and contamination buildup. Avoid sealing the concrete before epoxy application, as this can trap moisture and cause future delamination.