comparison
Acid Etching Concrete vs Grinding for Epoxy (2026 Guide)
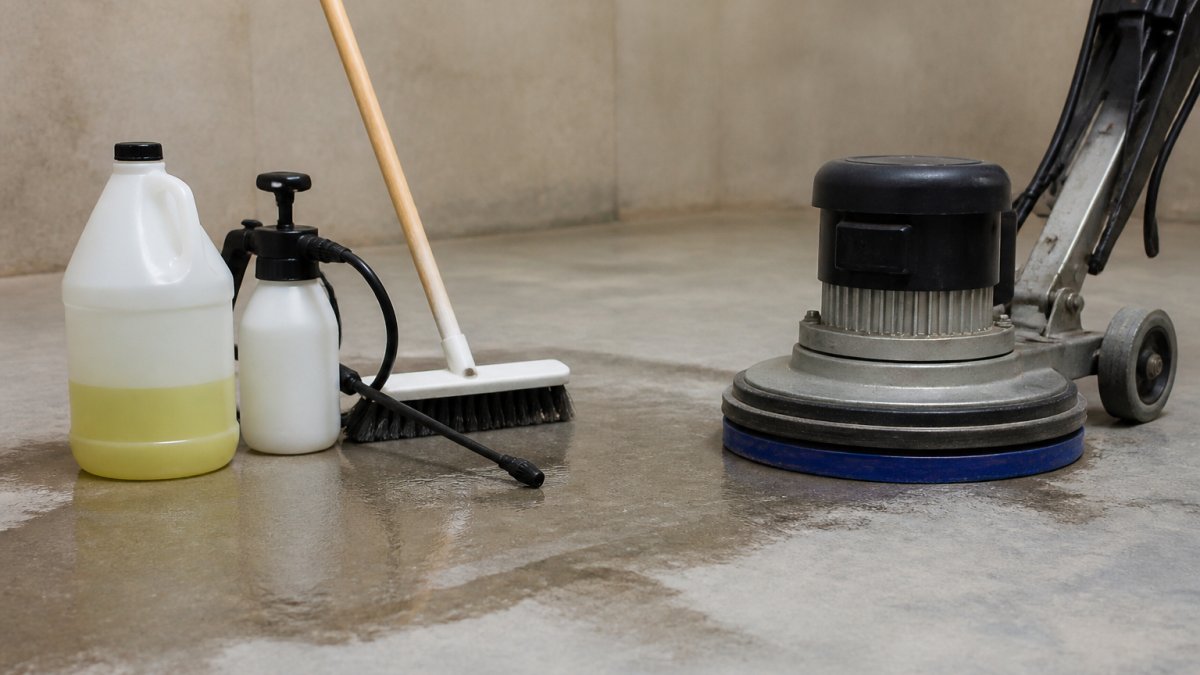
Table of Contents
- Acid Etching Concrete vs Grinding for Epoxy: A Side-by-Side Comparison
- How to Prepare a Concrete Floor for Epoxy: Step-by-Step
- Concrete Surface Profile for Epoxy: What CSP Do You Need?
- Diamond Grinding Concrete for Epoxy: Why Contractors Prefer It
- Concrete Moisture Testing Before Epoxy: The Step Most Homeowners Skip
- Safety Hazards, Cost, and Project Logistics
- How to Verify Preparation Before Coating
- Frequently Asked Questions
Last Updated: October 8, 2026
Acid Etching Concrete vs Grinding for Epoxy: A Side-by-Side Comparison
Acid etching concrete is a chemical prep method that opens the pores of a slab so epoxy can grip; diamond grinding is a mechanical method that shaves off the top layer entirely.
Here is the core problem. The American Concrete Institute's surface preparation guidance treats mechanical profiling as the baseline for coating adhesion, and that matches what we see on job sites.
Below, we compare both methods on measurable criteria, walk through the preparation sequence, and show you how to verify the surface before epoxy goes down.
How Each Method Preps the Surface
Acid etching is a chemical process: apply a diluted acid solution, let it react with the cement paste, then rinse and neutralize. The acid opens concrete pores, creating a texture epoxy can bond to.
Diamond grinding is mechanical: a walk-behind grinder with diamond tooling shaves off the top layer, removing sealers, curing compounds, and surface contaminants in one pass, leaving a clean, roughened surface with a consistent profile.
Measurable Criteria: Profile, Uniformity, and Bond Strength
The two methods diverge sharply on the criteria that decide whether a coating stays down or peels.
| Criteria | Acid Etching | Diamond Grinding |
|---|---|---|
| Surface profile | Opens pores, depth varies | Consistent, controllable profile |
| Uniformity | Uneven on hard or sealed slabs | Uniform across the slab |
| Bond strength | Good on bare, clean concrete | High and repeatable |
| Contaminant removal | Poor on oil, sealer, dirt | Removes top layer entirely |
| Risk of peeling | Higher on dense or sealed concrete | Low when profile is correct |
| Safety | Hazardous acid handling | Dust control required |
| Best for | Clean, unsealed, new concrete | Most epoxy projects |
Grinding wins on uniformity and bond strength. Etching can hold its own on a clean, bare slab, but the margin for error is thin.
How to Prepare a Concrete Floor for Epoxy: Step-by-Step
Preparation is where epoxy jobs succeed or fail. Follow this sequence to remove most of the risk before the coating arrives.
- Clear the slab and inspect for cracks, spalling, and previous coatings.
- Clean oil, dirt, and contaminants first (details below).
- Test for moisture and address any vapor issues.
- Choose your prep method: grind, etch, or shot blast.
- Grind or etch to achieve the target surface profile.
- Remove all dust and residue, then let the slab dry fully.
- Verify the profile and bond before mixing epoxy.
Cleaning Oil, Dirt, and Contaminants First
Oil, grease, dirt, and old sealer block epoxy from bonding no matter which prep method you use. Grinding removes most of them in the top layer; acid etching does not. Acid cannot cut through oil, and it will not touch a sealed surface at all.
Degrease first with a concrete-safe cleaner, scrub, rinse, and let the slab dry. Only then does etching have a chance of working. If the slab has been sealed or coated, skip etching and go straight to grinding.
Concrete Surface Profile for Epoxy: What CSP Do You Need?
The concrete surface profile (CSP) is a standardized measure of surface roughness, rated from CSP 1 (nearly smooth) to CSP 9 (very rough). It tells you whether the surface has enough texture for the coating to grip.
For most epoxy floor coatings, the target is CSP 2 to CSP 3, a light-to-medium profile with visible texture and open pores.
The International Concrete Repair Institute's surface profile guidance publishes the reference chips contractors use to match a slab to the spec.
Diamond Grinding Concrete for Epoxy: Why Contractors Prefer It
Diamond grinding concrete for epoxy is the prep method most contractors reach for because it is predictable: the grinder removes the top layer, opens the pores, and leaves a uniform profile across the whole slab, with no guessing about how the acid reacted.
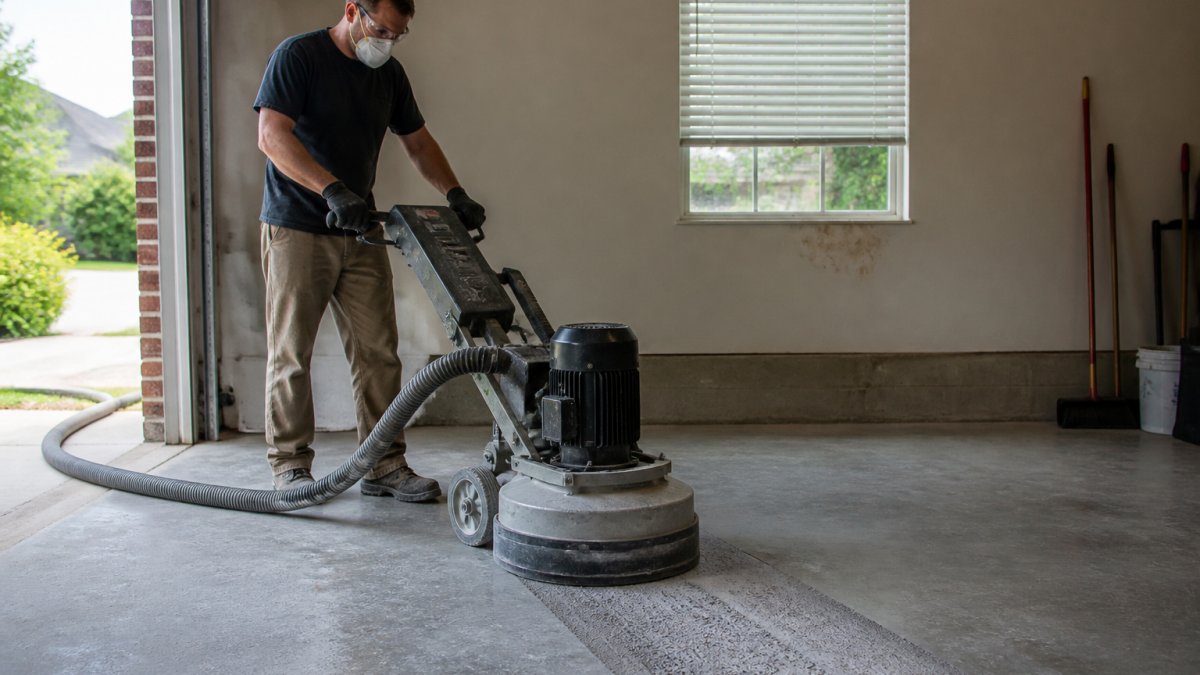
It also handles the surfaces etching cannot: sealed slabs, oil-stained garage floors, and dense, hard-troweled concrete. Grinding dust is the trade-off. You need dust collection and a respirator, but that is a manageable problem. An uneven etch is not.
Shot Blasting and Other Mechanical Preparation Options
Shot blasting fires steel shot at the slab to strip the surface and create a profile. It is fast on large commercial floors and removes coatings well, but less controllable on thin residential slabs and can leave a more aggressive texture than epoxy needs.
Other mechanical options include scarifying for heavy coating removal and planetary grinding for a finer finish. For most residential garage floors and patios, a walk-behind diamond grinder is the right tool. For large warehouses, shot blasting often wins on speed.
Concrete Moisture Testing Before Epoxy: The Step Most Homeowners Skip
Concrete moisture testing before epoxy separates coatings that last from coatings that bubble and peel. Moisture vapor rising through a slab is one of the most common causes of epoxy failure, and no amount of surface prep fixes it.
Test the slab before you coat. A calcium chloride test or an in-situ relative humidity probe will tell you whether the slab is dry enough for your coating system. If moisture is high, you need a vapor barrier or a moisture-tolerant primer, not more grinding.
Call (919) 824-5403 or email craigrfear@gmail.com for a free estimate →
Safety Hazards, Cost, and Project Logistics
Both methods carry real hazards, and the cost gap between them is smaller than most people assume once you account for labor, equipment, cleanup, disposal, and the risk of a failed prep.
Handling Acid Safely and Disposing of Rinse Water
Acid etching uses a hazardous chemical. Most practitioners use a diluted phosphoric or muriatic acid solution, and both demand chemical-resistant gloves, splash goggles or a face shield, and respiratory protection. Work in a ventilated space and keep a neutralizing agent on hand.
Grinding hazards are different: crystalline silica dust. You need a grinder with a shroud and a HEPA-filtered vacuum, plus a respirator rated for the job. Without dust collection, you are spreading fine silica through the workspace and into the air.
Cost and Project Logistics
On cost, published estimates put acid etching in the range of a few cents to about a dollar per square foot depending on the slab and any coloring added later, per Idaho Epoxy's preparation comparison.
| Cost factor | Acid etching | Diamond grinding |
|---|---|---|
| Equipment | Plastic sheeting, brushes, acid, neutralizer | Walk-behind grinder, diamond tooling, HEPA vacuum |
| Rental or purchase | Low upfront, consumables add up | Higher upfront, tooling wears with square footage |
| Labor time | Application, dwell, rinse, neutralize, dry | Grinding passes, edge work, dust cleanup |
| Cleanup | Rinse water collection and disposal | Dust containment and vacuum filter changes |
| Disruption | Wet process, drying time | Dry process, noise and dust |
| Risk cost | Higher chance of uneven profile and redo | Lower when profile is verified |
For a typical two-car garage, a contractor will usually grind rather than etch because the labor to etch, rinse, neutralize, and dry often approaches the labor to grind, and the grind result is more predictable.
Environmental and Disposal Considerations
Acid rinse water is the disposal problem most homeowners underestimate. It is acidic, carries dissolved solids, and may be regulated as a trade waste. Collect it, neutralize it, and dispose of it according to local rules.
Grinding dust is the other disposal issue.
For both methods, personal protective equipment is not optional. Acid demands chemical-resistant gloves, eye protection, and respiratory protection; grinding demands eye protection, hearing protection, and a respirator rated for silica.
How to Verify Preparation Before Coating
Do not trust the surface by looking at it. Verify it with checks that measure what actually matters: profile, cleanliness, moisture, and bond. This is the step most DIY guides skip, and it separates a coating that lasts from one that peels.
Water-Break and Absorption Checks
A water-break test tells you whether the surface is clean and open. Drop water on the slab: if it soaks in within a few minutes, the pores are open; if it beads up or sits on the surface, the slab is sealed, contaminated, or too smooth. If it beads, your prep failed or the slab is contaminated.
Surface Profile Verification
The concrete surface profile (CSP) is a standardized measure of surface roughness, rated from CSP 1 (nearly smooth) to CSP 9 (very rough). For most epoxy floor coatings, the target is CSP 2 to CSP 3. That is a light-to-medium profile with visible texture and open pores. The International Concrete Repair Institute's surface profile guidance publishes the reference chips contractors use to match a slab to the spec.
Dust and Residue Checks
After grinding, dust is the enemy. Wipe a dark cloth across the slab; if it comes up gray, vacuum again and repeat until the cloth stays clean. For acid etching, residue is the enemy: after rinsing and neutralizing, check the surface pH and rinse again if it is still acidic. Coating over dust or acid residue is a recipe for bond failure.
Adhesion Test
Apply a small patch of epoxy, let it cure per the manufacturer's instructions, and try to pry it up. If it lifts cleanly, your prep failed; if it grips and breaks the concrete instead, you are ready. A small adhesion test on a representative area is the most reliable check before committing to the full floor.
Moisture Testing and Vapor-Related Coating Failure
Moisture is the gap most preparation comparisons miss. Neither acid etching nor grinding resolves excessive moisture vapor or hydrostatic pressure; if moisture is high, you need a vapor barrier or a moisture-tolerant primer, not more grinding.
These checks take minutes and save thousands. If any one fails, re-grind and test again. Never coat a slab you have not verified.
Frequently Asked Questions
Is grinding or acid etching better for preparing concrete for epoxy?
Diamond grinding is generally the better choice for epoxy because it creates a uniform, roughened profile that epoxy can grip. Acid etching opens pores on bare concrete, but results vary with concrete hardness and surface condition, and dense or sealed slabs may barely react. Grinding also removes contaminants, curing compounds, and old sealer in the same pass. For most garage floors and commercial slabs, mechanical preparation gives more predictable epoxy adhesion and less risk of peeling.
Can you apply epoxy after acid etching without grinding?
You can, but only if the concrete is bare, unsealed, and properly etched. The surface must be rinsed thoroughly and neutralized so no acid residue remains, then fully dried. Test a small area first: water should soak in quickly rather than bead up. If the slab was ever sealed, coated, or treated with a curing compound, etching alone will not open the surface enough, and the epoxy may delaminate. Grinding is the safer route in those cases.
Can acid etching remove paint, oil, or old coatings from concrete?
No. Acid etching only reacts with the cement paste at the surface. It will not strip paint, epoxy, or other coatings, and it cannot remove deep oil saturation. Oil and grease must be removed with a degreaser before any prep method, and existing coatings need mechanical removal. If contaminants stay in the concrete, the new epoxy bonds to the contaminant instead of the slab, which leads to peeling and coating failure.
How do you know if concrete is properly prepared for epoxy?
Two checks matter most. First, the concrete surface profile for epoxy should match the coating manufacturer's recommendation, often a CSP 2 to 3 for standard epoxy, which you can compare against a visual profile card. Second, perform a water absorption test: sprinkle water on the surface and confirm it soaks in within a few minutes instead of beading. For critical commercial jobs, an adhesion test patch gives the clearest confirmation before full application.
How long should concrete dry after acid etching before applying epoxy?
Plan on at least 24 to 72 hours of drying after the final rinse, depending on humidity, temperature, and airflow. The surface must be completely dry with no visible moisture before epoxy goes down. Drying time is separate from moisture testing, though. If the slab has no vapor barrier underneath, run a calcium chloride or plastic sheet test to confirm moisture vapor emission is low enough for the coating system you plan to use.
Tags: acid etching concrete, acid etching concrete vs grinding for epoxy, how to prepare a concrete floor for epoxy, concrete surface profile for epoxy, diamond grinding concrete for epoxy
Frequently Asked Questions
Diamond grinding is generally the better choice for epoxy because it creates a uniform, roughened profile that epoxy can grip. Acid etching opens pores on bare concrete, but results vary with concrete hardness and surface condition, and dense or sealed slabs may barely react. Grinding also removes contaminants, curing compounds, and old sealer in the same pass. For most garage floors and commercial slabs, mechanical preparation gives more predictable epoxy adhesion and less risk of peeling.
You can, but only if the concrete is bare, unsealed, and properly etched. The surface must be rinsed thoroughly and neutralized so no acid residue remains, then fully dried. Test a small area first: water should soak in quickly rather than bead up. If the slab was ever sealed, coated, or treated with a curing compound, etching alone will not open the surface enough, and the epoxy may delaminate. Grinding is the safer route in those cases.
No. Acid etching only reacts with the cement paste at the surface. It will not strip paint, epoxy, or other coatings, and it cannot remove deep oil saturation. Oil and grease must be removed with a degreaser before any prep method, and existing coatings need mechanical removal. If contaminants stay in the concrete, the new epoxy bonds to the contaminant instead of the slab, which leads to peeling and coating failure.
Two checks matter most. First, the concrete surface profile for epoxy should match the coating manufacturer's recommendation, often a CSP 2 to 3 for standard epoxy, which you can compare against a visual profile card. Second, perform a water absorption test: sprinkle water on the surface and confirm it soaks in within a few minutes instead of beading. For critical commercial jobs, an adhesion test patch gives the clearest confirmation before full application.
Plan on at least 24 to 72 hours of drying after the final rinse, depending on humidity, temperature, and airflow. The surface must be completely dry with no visible moisture before epoxy goes down. Drying time is separate from moisture testing, though. If the slab has no vapor barrier underneath, run a calcium chloride or plastic sheet test to confirm moisture vapor emission is low enough for the coating system you plan to use.