how-to
Apply Epoxy Over Tile: A Complete Guide
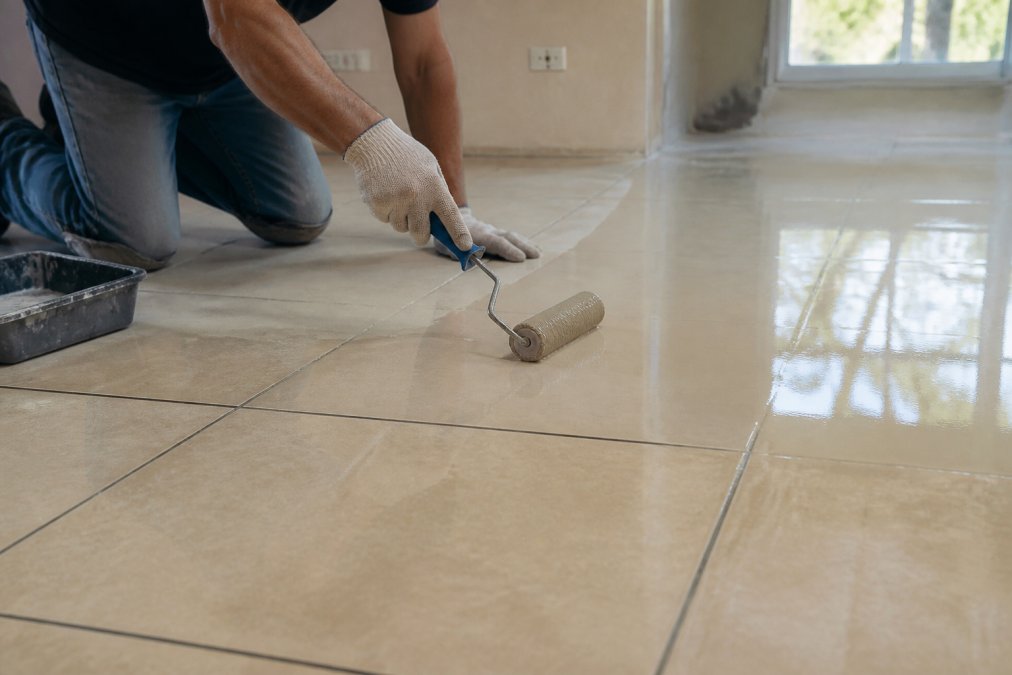
Table of Contents
- Can You Apply Epoxy Floor Coating Over Tile?
- Epoxy Floor Preparation for Tile: What You Need to Know
- How to Grind Tile for Epoxy Application
- Step-by-Step Application Process
- Epoxy Over Tile: Pros and Cons
- When to Avoid Epoxy Over Tile
- Common Mistakes to Avoid
- Conclusion
Last Updated: August 30, 2026
Can You Apply Epoxy Floor Coating Over Tile?
Yes, you can apply epoxy floor coating over existing tile, but success depends entirely on how thoroughly you prepare the substrate. This guide from Concrete-Enhancements covers what separates a durable epoxy installation from one that fails within months.
The short answer: epoxy bonds well to tile when the surface is properly prepared. The long answer is more nuanced. Many homeowners and facility managers attempt this upgrade expecting a simple coat-and-go process. They skip critical preparation steps, and the epoxy peels within a year. The difference between a job that lasts decades and one that fails comes down to substrate preparation, mechanical abrasion, and understanding when tile is simply the wrong substrate for epoxy.
Tile presents specific challenges that smooth concrete doesn't. Glazed ceramic and porcelain surfaces are inherently slick. Grout lines create elevation changes that telegraph through the epoxy coating. Moisture can trap beneath the tile and cause adhesion failure. Understanding these obstacles before you start is what separates a successful epoxy over tile project from a costly mistake.
Epoxy Floor Preparation for Tile: What You Need to Know
Preparation accounts for 80% of epoxy success (peer-reviewed research). This is not an exaggeration. A rushed prep phase will haunt you through every subsequent step. With tile, preparation is even more critical because you're working against the tile's inherent properties: low surface profile, glazed finish, and the grout line complications it introduces.
Substrate Preparation and Mechanical Abrasion
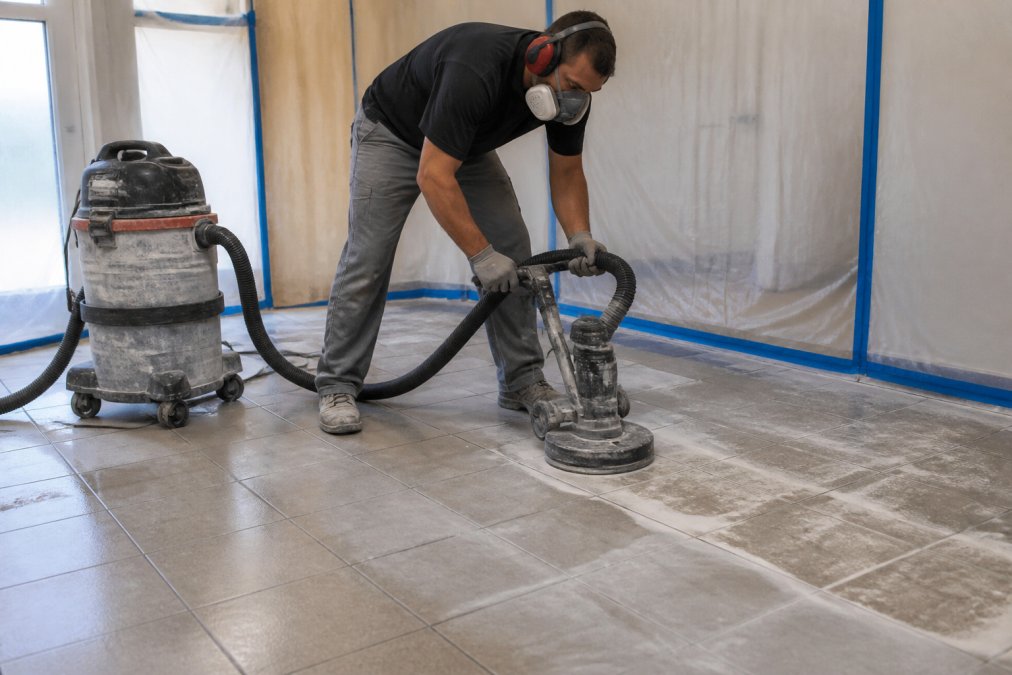
The tile surface must be stripped of its glaze and protective coatings. This process, called unglazing, creates the mechanical profile necessary for epoxy adhesion. Without it, epoxy sits on top of the glaze like water on waxed paper, it will eventually peel.
Mechanical abrasion is the tool that makes unglazing possible. Diamond tooling, grinding equipment, and abrading machinery remove the glazed finish and expose the porous substrate beneath. The goal is a surface profile rough enough that epoxy can mechanically lock into it. This isn't about making the tile rough to the touch; it's about creating microscopic peaks and valleys that the epoxy resin can flow into and cure against.
A common mistake is using light sanding or floor buffers expecting them to do the work. They won't. You need industrial-grade grinding equipment with diamond abrasives. A single pass with the wrong tool leaves the glaze intact, and your epoxy will fail. The grinding process also generates significant dust, asbestos tile, common in older installations, poses a serious health risk if not handled properly. If your tile predates 1980, professional testing and removal by certified contractors is mandatory.
Moisture Testing and Hydrostatic Pressure
Moisture is the silent killer of epoxy coatings. Tile sits directly on concrete, and that concrete can wick moisture from the ground below. Hydrostatic pressure, water pressure pushing up from the substrate, can force moisture through the epoxy coating and cause it to bubble and peel.
Moisture testing must happen before any epoxy application. The calcium chloride test or relative humidity test measures moisture vapor in the concrete beneath the tile. If levels exceed the epoxy manufacturer's specifications, the installation will fail. There are no exceptions and no shortcuts here.
Many installers skip this step or perform it inadequately. They assume tile that feels dry is ready for epoxy. Tile can feel completely dry while the substrate beneath it is saturated. The only reliable way to know is to test. If moisture levels are too high, you have two options: install a moisture barrier beneath the epoxy, or find a different flooring solution.
How to Grind Tile for Epoxy Application
Grinding tile requires the right equipment and technique. The goal is uniform surface profile across the entire floor without creating low spots or uneven wear patterns.
Unglazing and Surface Profile Requirements
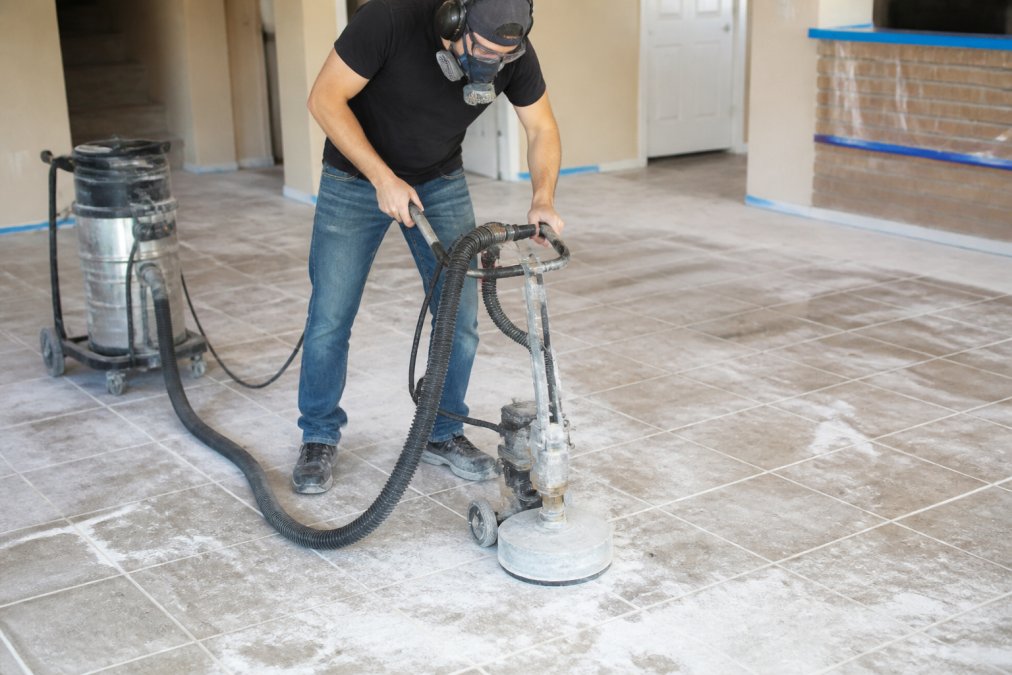
Unglazing removes the glazed ceramic or porcelain finish that prevents epoxy adhesion. A concrete grinder with diamond abrasive tooling is the standard approach. The grinding process creates a surface profile, measured in mils, the depth of microscopic peaks and valleys, that allows epoxy to bond mechanically.
The target surface profile for epoxy over tile typically ranges from 2 to 4 mils (astm.org). This is not deep; it's barely visible to the eye. But it's deep enough that epoxy resin flows into the profile, cures, and locks mechanically to the substrate. Without adequate profile, adhesion fails.
Porcelain tile is harder than ceramic and requires more aggressive diamond tooling. Ceramic tile grinds more easily but can still resist lighter abrasives. Testing a small area first tells you whether your equipment and technique are generating the necessary profile. A simple test: after grinding, water should bead on the surface rather than sit flat. If water sits flat and spreads, the profile is adequate. If it beads, you need more grinding.
Managing Grout Lines and Telegraphing
Grout lines are the biggest challenge when applying epoxy over tile. They create elevation changes, the grout sits below the tile surface or slightly above it, and these differences will show through the epoxy coating. This phenomenon is called telegraphing.
The solution is filling grout lines with a leveling compound or epoxy-compatible filler before applying the topcoat. This brings the grout line flush with the tile surface, creating a uniform plane. Without this step, the grout lines remain visible as ridges or depressions in the final epoxy surface.
Some installers use self-leveling epoxy primer to fill grout lines. The primer flows into the gaps and levels itself. This approach works if the grout lines are relatively narrow and uniform. Wide or irregular grout lines may require a dedicated grout filler or leveling compound applied before the epoxy primer.
The time investment here is significant. Filling every grout line across a large floor is tedious work. But it's the difference between a professional-looking finish and a visibly flawed one. Skipping this step is a common mistake that becomes obvious once the epoxy cures.
Step-by-Step Application Process
Step 1: Degreasing and Final Surface Cleaning
After grinding, the floor must be cleaned thoroughly. Dust from grinding, old floor wax, oils, and contaminants will prevent epoxy adhesion. Degreasing removes oils and residue. A high-powered vacuum with HEPA filtration removes grinding dust without redistributing it into the air.
Clean the floor with a degreaser appropriate for tile. Many tile floors have accumulated wax, soap residue, or other buildup over years. The degreaser breaks down these coatings. Follow with clean water rinses until the water runs clear. The surface should feel gritty to the touch, that's the exposed substrate with its mechanical profile intact.
Allow the floor to dry completely before moving to the primer stage. Moisture on the surface will interfere with epoxy bonding. In humid conditions, this can take 24 hours or more.
Step 2: Primer Application and Bond Strength
The epoxy primer is the critical layer for adhesion. It's formulated to flow into the surface profile and cure to create a mechanical bond between the tile and the epoxy topcoat. Primer is thinner than topcoat epoxy, allowing it to penetrate small surface irregularities.
Apply primer with a roller, working in manageable sections. The goal is even coverage without puddles or thin spots. A thin, even coat bonds better than a thick one. If the primer is too thick, it won't penetrate the surface profile properly. If it's too thin, it won't provide adequate bond strength.
Primer curing time varies by product and temperature. Most epoxy primers cure to walkable condition in 4-8 hours but take 24 hours to full hardness. Follow the manufacturer's specifications exactly. Walking on partially cured primer damages the bond.
Step 3: Epoxy Coating and Curing Time
The epoxy topcoat provides color, durability, and the finished appearance. Two-part epoxy systems mix resin and hardener immediately before application. The chemical reaction begins the moment they combine, so you must work quickly and efficiently.
Apply epoxy with a roller in thin, even coats. Most epoxy systems require two coats for adequate coverage and durability. The first coat soaks into the primer layer and the surface profile. The second coat builds thickness and provides the final wear surface.
Curing time for epoxy is temperature-dependent. At 70°F, most epoxy systems cure to walkable condition in 24 hours but don't reach full hardness for 7 days (the EPA). Cold temperatures slow curing significantly. At 50°F, curing can take twice as long. Heat accelerates curing but can introduce application problems like rapid flash-off and bubbling.
Step 4: Topcoat and UV Stability
Some epoxy systems benefit from a clear polyurethane or polyaspartic topcoat. This layer protects the epoxy from UV damage, which causes yellowing and surface degradation in sunlit areas. Epoxy without UV protection will fade and chalk in outdoor or bright indoor environments.
Call (919) 824-5403 or email craigrfear@gmail.com for a free estimate →
The topcoat also provides additional chemical resistance and impact resistance. It's a thin layer, typically 2-3 mils, that cures faster than epoxy and hardens to a harder surface.
Allow full curing before subjecting the floor to heavy traffic, moisture, or chemical exposure. This typically means 7 days minimum, though some systems require 14 days for full cure. Rushing this timeline is a common cause of premature failure.
Epoxy Over Tile: Pros and Cons
Pros:
Epoxy over tile creates a seamless, durable surface that's easier to clean than grout lines. The coating is chemical-resistant and impact-resistant, making it suitable for garages, warehouses, and commercial spaces. Epoxy provides a finished aesthetic that can transform a dated tile floor into a modern surface. It's more affordable than complete tile removal and replacement. The application process, when done correctly, takes days rather than weeks.
Cons:
The preparation phase is labor-intensive and requires specialized equipment. Moisture issues beneath the tile can cause failure despite proper preparation. Grout line telegraphing requires careful management. The epoxy coating is permanent, removal is difficult and expensive if you want to restore the original tile. Epoxy can be slippery when wet unless a non-slip additive is included. In outdoor or bright sunlit applications, UV stability is a concern without a polyurethane topcoat.
When to Avoid Epoxy Over Tile
Epoxy over tile is not the right solution in every situation. Certain tile types and substrate conditions make epoxy application impractical or likely to fail.
Avoid epoxy over tile if:
The tile is glazed porcelain and the glaze cannot be adequately removed. Some high-quality porcelain resists grinding and will not accept epoxy. Testing a small area first is essential.
Moisture levels beneath the tile are elevated and a moisture barrier cannot be installed. If hydrostatic pressure is pushing water up through the concrete, epoxy will fail regardless of application quality.
The tile is asbestos-containing and removal by certified contractors is not feasible. Asbestos tile must be professionally handled and cannot be ground in place.
The floor has structural cracks or movement. Epoxy will crack along with the substrate. If the concrete beneath the tile is failing, address the concrete first.
The grout lines are very deep or irregular. Extremely wide grout lines may be impractical to fill, and the telegraphing will be visible.
The tile is installed over radiant heating systems. The heat cycling can stress the epoxy and cause adhesion failure.
Common Mistakes to Avoid
Insufficient surface preparation: This is the most common mistake. Installers rush the grinding phase or use inadequate equipment. The result is poor adhesion and premature failure. Budget adequate time and use proper diamond tooling.
Ignoring moisture testing: Assuming the floor is dry without testing is a recipe for failure. Moisture can hide beneath the surface.
Skipping grout line filling: Leaving grout lines unfilled results in visible telegraphing that's obvious once the epoxy cures.
Applying epoxy in cold temperatures: Epoxy cures slowly below 60°F and may not cure properly. Wait for warmer conditions or heat the space.
Walking on partially cured epoxy: Epoxy must cure fully before heavy traffic. Partial cure means weak adhesion and potential failure.
Using the wrong epoxy system: Not all epoxy is suitable for tile. Some systems are formulated for concrete and may not adhere properly to tile substrates. Verify the epoxy is rated for tile application.
Inadequate ventilation during application: Epoxy fumes are strong and can be hazardous. Ensure proper air circulation during application and curing.
Epoxy over tile is achievable and, when done correctly, creates a durable, attractive surface that transforms a space. The key is respecting the preparation phase and understanding the specific challenges tile presents. Moisture testing, proper grinding, grout line management, and adequate curing time are non-negotiable steps.
If you're uncertain about any phase of the process, professional installation is the safer choice. At Concrete-Enhancements, we provide professional installation services for epoxy over tile projects. Our team handles substrate preparation, moisture testing, and application with the precision required for lasting results. We're a CTi Certified Dealer with over 20 years of experience transforming concrete and tile surfaces. Call (919) 824-5403 or email craigrfear@gmail.com for a free estimate and professional assessment of your specific floor conditions.
Frequently Asked Questions
Q: What are the pros and cons of epoxy over tile?
A: Epoxy over tile offers durability, chemical resistance, and impact resistance when properly applied, plus aesthetic appeal and easier maintenance than bare tile. The main drawbacks include adhesion challenges if substrate preparation is inadequate, grout line telegraphing that can show through the coating, and difficulty removing epoxy if you want to change it later. Success depends heavily on correct surface preparation and grinding to achieve proper bond strength.
Q: Do I need to remove existing tile before installing epoxy?
A: No, you can apply epoxy over existing tile without removal if the tile is structurally sound and properly prepared. However, the tile must be mechanically abraded through unglazing and grinding to create adequate surface profile for adhesion. Ceramic and porcelain tiles work better than asbestos tile (which requires professional removal). If tile is cracked, loose, or has underlying moisture issues, removal is the safer choice.
Q: How do you prepare tile surfaces for epoxy adhesion?
A: Tile preparation involves mechanical abrasion using diamond tooling to remove the glaze and create surface profile, degreasing to eliminate contaminants, and moisture testing to check for hydrostatic pressure. Grout lines must be filled or leveled to prevent telegraphing. The substrate must be clean, dry, and properly profiled before primer application. Moisture vapor testing is critical, epoxy will fail if applied over damp tile or high moisture conditions.
Q: When should you not use epoxy flooring on tile?
A: Avoid epoxy over tile if moisture testing reveals high hydrostatic pressure, if the tile is severely cracked or loose, or if asbestos tile is present (requires professional remediation). Do not apply epoxy over glazed tile without proper unglazing, over contaminated surfaces, or in areas with active water infiltration. Epoxy is also not ideal over uneven tile with deep grout lines unless leveling compound is used, as telegraphing will be visible through the coating.
This article was written using GrandRanker
Frequently Asked Questions
A: Epoxy over tile offers durability, chemical resistance, and impact resistance when properly applied, plus aesthetic appeal and easier maintenance than bare tile. The main drawbacks include adhesion challenges if substrate preparation is inadequate, grout line telegraphing that can show through the coating, and difficulty removing epoxy if you want to change it later. Success depends heavily on correct surface preparation and grinding to achieve proper bond strength.
A: No, you can apply epoxy over existing tile without removal if the tile is structurally sound and properly prepared. However, the tile must be mechanically abraded through unglazing and grinding to create adequate surface profile for adhesion. Ceramic and porcelain tiles work better than asbestos tile (which requires professional removal). If tile is cracked, loose, or has underlying moisture issues, removal is the safer choice.
A: Tile preparation involves mechanical abrasion using diamond tooling to remove the glaze and create surface profile, degreasing to eliminate contaminants, and moisture testing to check for hydrostatic pressure. Grout lines must be filled or leveled to prevent telegraphing. The substrate must be clean, dry, and properly profiled before primer application. Moisture vapor testing is critical—epoxy will fail if applied over damp tile or high moisture conditions.
A: Avoid epoxy over tile if moisture testing reveals high hydrostatic pressure, if the tile is severely cracked or loose, or if asbestos tile is present (requires professional remediation). Do not apply epoxy over glazed tile without proper unglazing, over contaminated surfaces, or in areas with active water infiltration. Epoxy is also not ideal over uneven tile with deep grout lines unless leveling compound is used, as telegraphing will be visible through the coating.