how-to
Concrete Surface Profile for Epoxy: CSP Guide
Last Updated: October 22, 2026
Quick Summary
Concrete surface profile for epoxy is the measure of how rough a concrete floor is after preparation, creating the mechanical grip the coating needs to bond. The ICRI Technical Guideline No. 310.2 defines 10 profiles, from CSP 1 to CSP 10. The wrong profile is the number one reason epoxy fails early.
- CSP measures texture depth, not flatness or cleanliness, so you need all three before epoxy.
- Thin-film epoxy under 10 mils needs CSP 2-3, while standard build of 10-20 mils calls for CSP 3-5.
- The CSP number is a minimum, not a maximum, so always follow the manufacturer's data sheet.
- Test in three or four spots per room because slabs vary from power-troweled corners to room centers.
- Test moisture before you prep, since vapor drive blisters epoxy no matter how good the profile is.
Table of Contents
- What Concrete Surface Profile (CSP) Means for Epoxy
- Why Surface Profile Matters for Coating Adhesion
- Concrete Surface Profile (CSP) Chart: ICRI Grades 1-10
- Matching CSP to Epoxy Type and Film Thickness
- How to Test Concrete Surface Profile in the Field
- Concrete Grinding for Epoxy: Methods and Equipment
- Concrete Moisture Testing Before Epoxy Application
- Troubleshooting Coating Failures Linked to Surface Preparation
- Frequently Asked Questions
What Concrete Surface Profile (CSP) Means for Epoxy
Concrete surface profile for epoxy is the measure of how rough a concrete floor is after preparation. That roughness creates the mechanical grip an epoxy coating needs to stay bonded for years instead of peeling in months.
The scale comes from the ICRI Technical Guideline No. 310.2, which defines 10 profiles, from CSP 1 (barely roughened) to CSP 10 (very rough, with amplitude greater than 0.25 in.). Think of it as a numbered ladder of texture, not a measure of cleanliness. A floor can be spotless and still fail because the profile is too smooth.
At Concrete-Enhancements, we have spent over 20 years preparing and coating concrete across the Raleigh-Durham Triangle, NC Triad, and Coastal SC. Here is the short version: the wrong profile is the number one reason epoxy fails early.
Why Surface Profile Matters for Coating Adhesion
Epoxy does not soak into concrete like a stain. It grips by locking into the microscopic peaks and valleys of the surface. That lock is called a mechanical bond, and it is the whole game.
The U.S. Bureau of Reclamation's best practices guide names key physical characteristics of the concrete substrate as a deciding factor in whether repairs and overlays last. Surface roughness sits at the top of that list.
A smooth, troweled slab gives epoxy almost nothing to hold. The coating looks fine for a season, then lifts at the edges. We see this constantly on DIY jobs where someone skipped prep and went straight to the roller.
- Too smooth: coating peels, especially under traffic or moisture
- Too rough: coating sags into valleys and needs extra material
- Right profile: full contact, full bond, full service life
Concrete Surface Profile (CSP) Chart: ICRI Grades 1-10
The concrete surface profile (CSP) chart is a visual and tactile scale of 10 reference grades. Each grade describes a distinct texture, and CSP reference chips let you compare a real floor to a known standard by eye and by touch.
| CSP Grade | Texture | Typical Prep Method |
|---|---|---|
| CSP 1-2 | Nearly smooth, light texture | Light grinding, acid etching |
| CSP 3-4 | Fine to medium texture | Grinding, light abrasive blasting |
| CSP 5-6 | Medium to coarse texture | Abrasive blasting, heavy grinding |
| CSP 7-9 | Coarse to very rough | Shot blasting, scarifying |
| CSP 10 | Very rough, over 0.25 in. amplitude | Heavy mechanical scarifying |
Grades 1 through 3 suit thin-film coatings. Grades 4 through 6 fit most standard epoxy systems. Higher grades serve high-build and mortar-grade products where the coating is thick enough to fill the valleys.
Matching CSP to Epoxy Type and Film Thickness
There is no single correct CSP for every epoxy. The right profile depends on the coating system, how thick it goes on, and what the manufacturer's data sheet says.
Start with the product data sheet, not a chart. The data sheet states the required surface profile, the dry film thickness range, and any substrate moisture or temperature limits.
Here is how the common epoxy families sort out:
- Thin-film epoxy (under 10 mils): CSP 2-3. A thin coat cannot bridge deep valleys, so a coarse profile leaves pinholes and thin spots over the peaks.
- Standard build (10-20 mils): CSP 3-5. This is the workhorse range for most floor coatings and the one most data sheets call out.
- High-build (20+ mils): CSP 4-6. Thick material needs more bite and can fill valleys without sagging.
- Urethane cement and MMA systems: often CSP 4-6, but follow the maker's spec, because these systems vary widely in build and cure.
- Mortar-grade and trowel-applied overlays: CSP 5-7 or higher, since the material is thick enough to key into a coarse surface.
The trap is treating the CSP number as a target to hit exactly. It is a minimum, not a maximum. A floor at CSP 5 satisfies a CSP 4 requirement; a floor at CSP 3 does not.
Film thickness and profile also interact with coverage. A coarse profile has more surface area, so the same gallon covers less floor than it would on a smooth slab. Budget material for the profile you produce, not the profile on the label.
A practical check before full prep: coat a small test patch at the specified build over your chosen profile, let it cure, and pull a sample or inspect the bond.
How to Test Concrete Surface Profile in the Field
Testing concrete surface profile means comparing the prepared floor against CSP reference chips, then confirming with a measurement tool when the spec is tight.
Visual comparison is the standard field method. KTA's guide to measuring CSP describes CSP chips as a qualitative visual assessment and also covers an epoxy-putty impression method for a physical record. DeFelsko's digital measurement guide explains depth micrometers as an alternative to visual chips.
A field workflow that holds up:
Call (919) 824-5403 or email craigrfear@gmail.com for a free estimate →
- Prepare a small test patch with your chosen method before prepping the whole floor.
- Clean all dust off the surface, because dust fills valleys and makes a coarse floor read smooth.
- Compare a CSP chip beside the patch in good, raking light, not overhead shadow.
- Run your fingertips across both to feel the difference, since touch catches texture that glare hides.
- Take a putty impression or micrometer reading at each sample location for the project file.
- Record the location, method, and result, then adjust the method before full prep if the patch misses the spec.
Sampling is where most field checks fail. Test in three or four spots per room, not one.
Lighting matters more than people expect. Raking light from a low angle exaggerates peaks and valleys and makes comparison easier; flat overhead light flattens texture and can make a CSP 3 floor look like CSP 5. Compare chip and floor under the same light, at the same angle.
Documentation is the part competitors skip. Photograph the chip beside the floor at each sample location, log the readings, and note the date, method, and who took them. If a coating fails later, that record is what separates a prep defect from a product claim.
Finally, remember what a profile test does not tell you. It does not measure cleanliness, moisture, or flatness. A floor can pass the CSP check and still fail because of dust, laitance, or vapor drive, so pair the profile check with the moisture and cleanliness checks covered elsewhere in this guide.
Concrete Grinding for Epoxy: Methods and Equipment
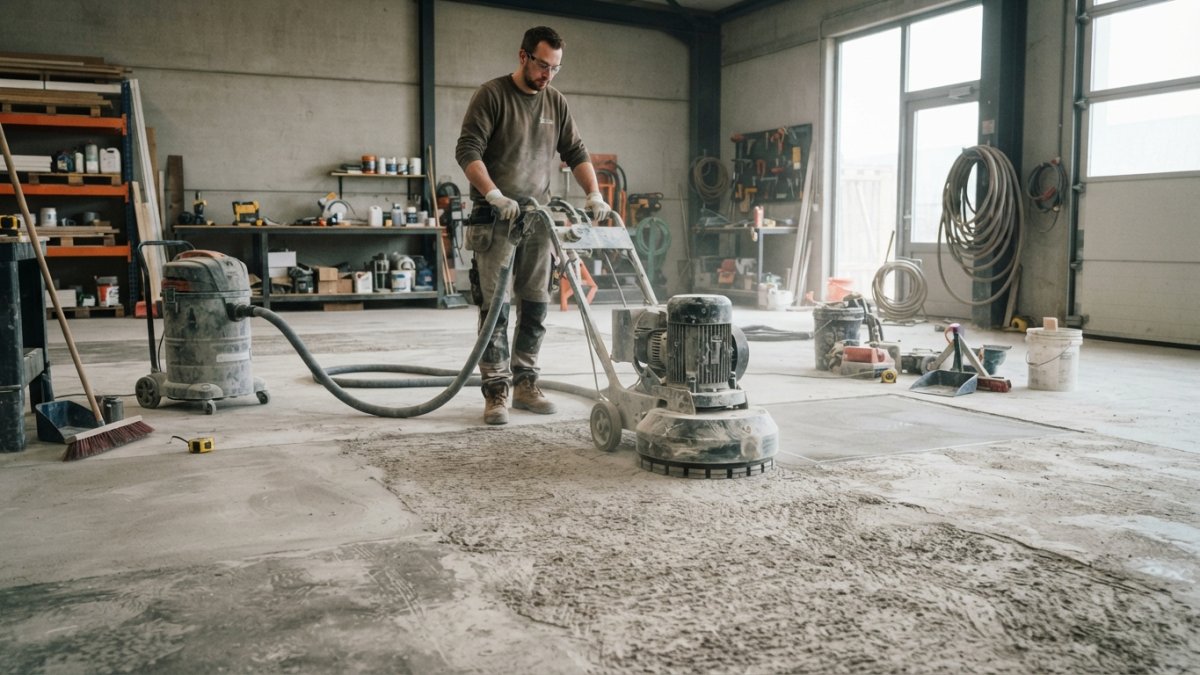
Concrete grinding for epoxy uses diamond tooling on a walk-behind machine to cut a consistent profile and remove surface laitance. It is the most controllable method for indoor slabs.
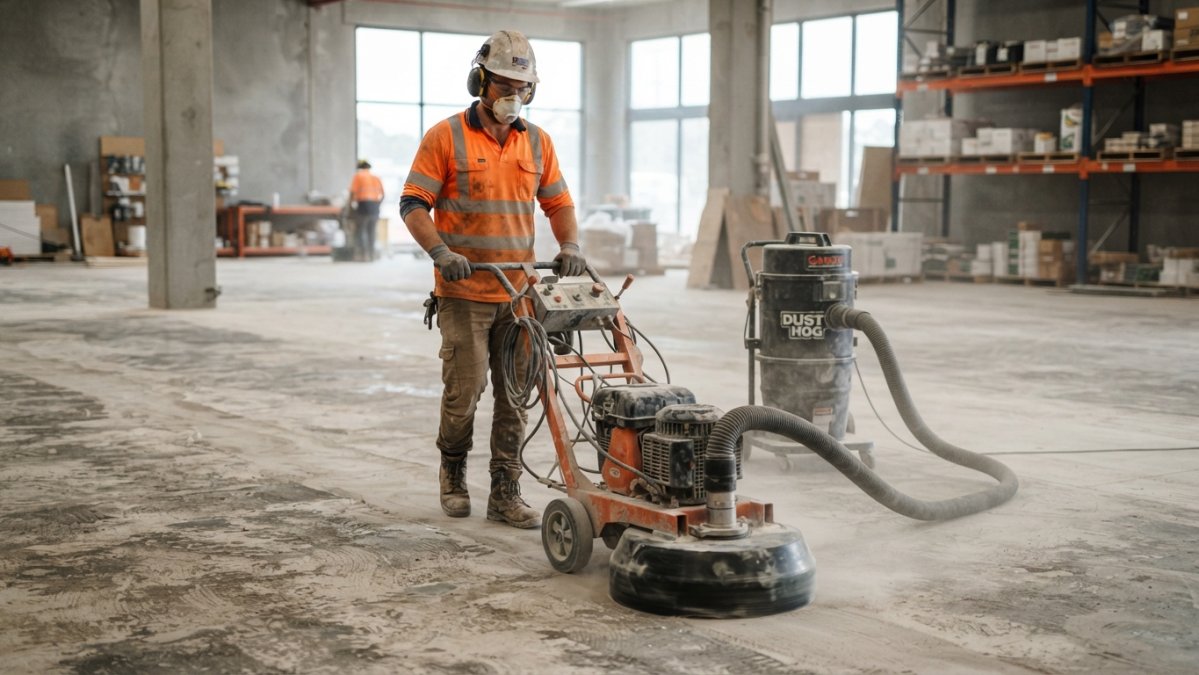
Other concrete preparation methods include:
- Abrasive blasting: fast, aggressive, good for large open floors
- Shot blasting: consistent profile, excellent for warehouses
- Scarifying: for heavy coatings and rough surfaces
- Waterblasting: removes contaminants without dust
- Acid etching: light profile only, and hard to control
Whatever the method, dust control matters. A grinder with a shroud and vacuum keeps silica dust out of the air, and that is a safety requirement, not an option.
Concrete Moisture Testing Before Epoxy Application
Concrete moisture testing before epoxy tells you whether the slab will push vapor up into the coating. If it will, the epoxy blisters no matter how good the profile is.
Test before you prep, not after. Common field methods include plastic sheet tests and calcium chloride or in-situ probe testing, and the coating maker's data sheet states the moisture limit for that product. Sealed concrete and slabs on grade deserve extra attention.
- Check for standing water and damp patches
- Test in multiple locations across the floor
- Record readings and compare them to the product limit
- Fix moisture issues before any coating goes down
Troubleshooting Coating Failures Linked to Surface Preparation
Most epoxy failures trace back to prep, not product. Peeling at edges usually means the profile was too smooth. Blisters point to moisture. Fish eyes and craters come from oil, grease, or curing compounds left on the surface.
Contaminants are the quiet killer. Dust, laitance, and old sealers block the mechanical bond, and no amount of coating thickness fixes that. Clean and profile go together.
A common mistake is coating over a floor that was only cleaned, never roughened. It looks great for a few months, then lifts under traffic.
That is where a CTi Certified Dealer earns their keep. Concrete-Enhancements handles the full sequence, from grinding and moisture checks to the final coat, for homes and commercial facilities alike. If your last epoxy peeled within a year, the prep is almost certainly why.
Frequently Asked Questions
What concrete surface profile is needed for epoxy?
The required concrete surface profile for epoxy depends on the coating system and its dry film thickness. Thin-film coatings (4-5 mils) often need CSP 3, while high-build systems (15-40 mils) typically require CSP 3-5. Always check the manufacturer's technical data sheet for the exact specification. ICRI Technical Guideline No. 310.2 defines 10 profiles, from CSP 1 (minimal roughness) to CSP 10 (very rough, with amplitude greater than 0.25 in.).
How do you measure a concrete surface profile before applying epoxy?
To test concrete surface profile, start with visual and tactile comparison using ICRI CSP reference chips. For a more quantitative check, use an epoxy-putty impression method or a digital depth micrometer. KTA describes CSP chips as a qualitative visual assessment, while DeFelsko discusses digital depth micrometers as an alternative. No single method is universally superior, so combine visual comparison with a physical measurement for reliable conformance.
What happens if concrete is too smooth for epoxy?
If concrete is too smooth, the epoxy has no mechanical key to grip, which can lead to peeling or delamination. A common cause is inadequate surface preparation, such as acid etching instead of mechanical grinding. The fix is to create the correct profile with diamond grinding or abrasive blasting before coating. For example, a 100% solids epoxy applied to a slab prepared to CSP 2 instead of CSP 4 may not bond as intended, so always follow the manufacturer's minimum CSP.
Can a concrete surface be too rough for epoxy?
Yes, a surface can be too rough. Excessively deep profiles can leave pinholes or require more coating to fill, and they may indicate a weak substrate. ICRI Technical Guideline No. 310.2 sets CSP 10 at amplitude greater than 0.25 in. (6 mm), which is far rougher than most epoxy systems need. Match the CSP to the coating's specified range, and repair spalled or weak concrete before preparation.
How long should concrete dry before applying epoxy?
New concrete should cure for at least 28 days before epoxy application, and moisture testing is essential. Perform concrete moisture testing before epoxy to confirm the slab is dry enough; excess moisture can cause bubbles, blistering, or adhesion failure. Follow the epoxy manufacturer's moisture limits and test method.
Epoxy only performs as well as the concrete beneath it. If you want a floor that holds up to traffic, moisture, and time, the profile has to be right before the first coat. Concrete-Enhancements brings 20+ years of experience, CTi Certified Dealer status, and a full prep-to-finish process for decorative overlays, epoxy coatings, and concrete repair. Call (919) 824-5403 or email craigrfear@gmail.com for a free estimate and get your floor done right the first time.
Tags: concrete surface profile, concrete surface profile for epoxy, concrete surface profile (csp) chart, how to test concrete surface profile, concrete grinding for epoxy
Frequently Asked Questions
The required concrete surface profile for epoxy depends on the coating system and its dry film thickness. Thin-film coatings (4-5 mils) often need CSP 3, while high-build systems (15-40 mils) typically require CSP 3-5. Always check the manufacturer's technical data sheet for the exact specification. ICRI Technical Guideline No. 310.2 defines 10 profiles, from CSP 1 (minimal roughness) to CSP 10 (very rough, with amplitude greater than 0.25 in.).
To test concrete surface profile, start with visual and tactile comparison using ICRI CSP reference chips. For a more quantitative check, use an epoxy-putty impression method or a digital depth micrometer. KTA describes CSP chips as a qualitative visual assessment, while DeFelsko discusses digital depth micrometers as an alternative. No single method is universally superior, so combine visual comparison with a physical measurement for reliable conformance.
If concrete is too smooth, the epoxy has no mechanical key to grip, which can lead to peeling or delamination. A common cause is inadequate surface preparation, such as acid etching instead of mechanical grinding. The fix is to create the correct profile with diamond grinding or abrasive blasting before coating. For example, a 100% solids epoxy applied to a slab prepared to CSP 2 instead of CSP 4 may not bond as intended, so always follow the manufacturer's minimum CSP.
Yes, a surface can be too rough. Excessively deep profiles can leave pinholes or require more coating to fill, and they may indicate a weak substrate. ICRI Technical Guideline No. 310.2 sets CSP 10 at amplitude greater than 0.25 in. (6 mm), which is far rougher than most epoxy systems need. Match the CSP to the coating's specified range, and repair spalled or weak concrete before preparation.
New concrete should cure for at least 28 days before epoxy application, and moisture testing is essential. Perform concrete moisture testing before epoxy to confirm the slab is dry enough; excess moisture can cause bubbles, blistering, or adhesion failure. Follow the epoxy manufacturer's moisture limits and test method.