how-to
Epoxy Flake Floor Installation Guide: DIY Steps
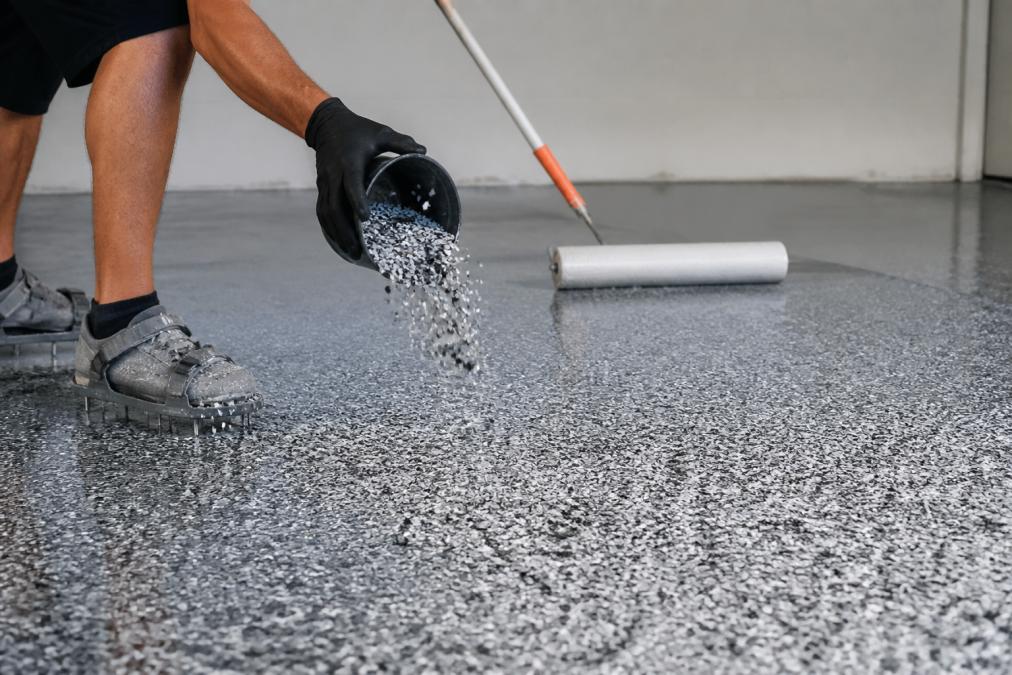
Table of Contents
- Epoxy Flake Floor Installation: What You Need to Know
- Project Planning and Concrete Floor Preparation for Epoxy
- Surface Preparation: Grinding, Cleaning, and Repair
- Mixing and Applying the Epoxy Primer
- Epoxy Flake Coverage Rate and Broadcasting Technique
- Epoxy Flake Floor Drying Time and Top Coat Application
- DIY Epoxy Flake Floor Mistakes to Avoid
- Long-Term Maintenance and Climate Considerations
- Frequently Asked Questions
Last Updated: September 24, 2026
Epoxy Flake Floor Installation: What You Need to Know
An epoxy flake floor installation transforms concrete surfaces into durable, attractive finishes that resist chemicals, moisture, and heavy traffic. Whether you're resurfacing a garage, warehouse, or commercial space, understanding the installation process helps you make smart decisions about DIY versus professional work.
This guide walks you through each critical step, from surface prep to final curing. We'll cover the mistakes that lead to peeling, the moisture issues that destroy new floors, and the specific techniques that make installations last decades instead of months.
The difference between a floor that fails in a year and one that lasts 10 years often comes down to three things: concrete preparation, proper mixing ratios, and understanding how climate affects curing times. Most DIY failures happen because one of these gets rushed or overlooked.
Project Planning and Concrete Floor Preparation for Epoxy
Success starts before you open a can of epoxy. Poor planning and inadequate surface prep cause more failures than any other factor. You need to assess your concrete condition, test for moisture, and understand your timeline.
Assessing Your Concrete and Setting Up
Begin by examining your concrete surface closely. Look for cracks, spalling, or areas where the concrete is breaking apart. Check for existing coatings or sealers that need removal. If your floor has been sealed before, stripping those old coatings is non-negotiable, new epoxy won't bond to glossy surfaces.
Measure your space accurately. Calculate square footage by multiplying length times width. This determines how much epoxy primer, flakes, and topcoat you'll need. Add 10% extra for waste and application overlap.
Set up your timeline. Epoxy installation requires multiple days of curing between coats. Plan for at least 5-7 days total, longer in cold or humid conditions. If you're doing this yourself, block out time when foot traffic won't interrupt the process.
Gather your equipment before starting. You'll need:
- Concrete grinder with diamond tooling
- Shop vacuum with HEPA filter
- Squeegee or notched trowel
- Mixing drill with paddle attachment
- Protective equipment: respirator, gloves, safety glasses
- Tack cloth or acetone for final cleaning
Moisture Testing Protocols
Moisture is the silent killer of epoxy floors. Even if concrete looks and feels dry, trapped moisture vapor can cause the coating to blister, peel, and fail within months. Testing is mandatory, not optional.
The calcium chloride test is the standard approach. You place a moisture meter on the concrete surface and measure vapor transmission rate. Most epoxy systems require readings below 3 pounds per 1,000 square feet per 24 hours. If your reading is higher, the concrete isn't ready yet.
If moisture readings are elevated, you have options. Wait for drier weather and retest. Improve ventilation to allow concrete to dry. In some cases, install a moisture vapor barrier before applying epoxy. Don't skip this step hoping the epoxy will seal the moisture in, it won't. Trapped moisture will eventually force the coating off.
Test multiple spots across the floor, especially low areas where water collects. One high reading means the whole floor needs attention.
Surface Preparation: Grinding, Cleaning, and Repair
Surface preparation determines whether your epoxy bonds properly or peels within months. This step cannot be rushed or skipped.
Concrete Grinding and Diamond Tooling
Grinding opens the concrete's pores so epoxy can penetrate and bond mechanically. Without proper surface profile, the coating sits on top and eventually fails.
Use a concrete grinder with diamond tooling. Start with a coarser grit (typically 40-80 grit) to remove old coatings, sealers, and surface contaminants. Make multiple passes until the surface feels uniformly rough, like 120-grit sandpaper. This creates the right surface profile for epoxy adhesion.
Work in overlapping passes. Don't stay in one spot, move the grinder steadily across the floor. Grind until you see uniform concrete color and texture. Shiny or smooth spots mean you haven't ground enough.
Dust control is critical. Use a shop vacuum with HEPA filter connected to your grinder. Concrete dust contains silica, which damages lungs. Wear a respirator rated for silica dust (P100 or better).
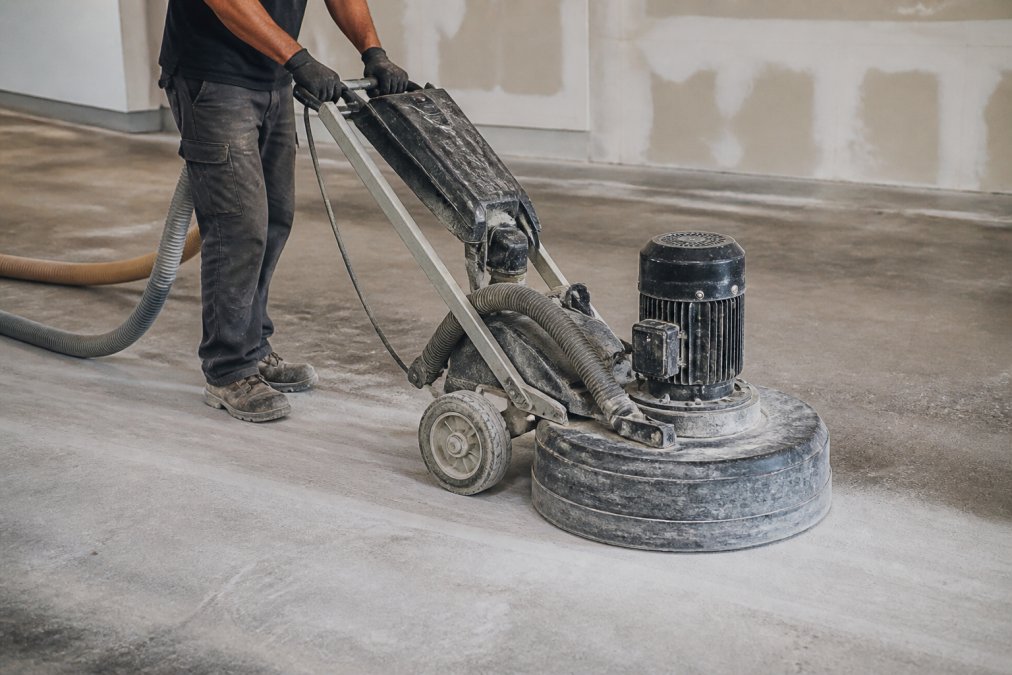
After grinding, the concrete will be covered in fine dust. Vacuum thoroughly. Then wipe the entire surface with acetone and a clean cloth. This removes remaining dust and primes the concrete for epoxy adhesion. Let the acetone evaporate completely before proceeding.
Repairing Cracks and Imperfections
Small cracks and holes need repair before epoxy application. Epoxy won't fill deep voids, it flows into cracks but doesn't bridge them structurally.
For hairline cracks (less than 1/8 inch wide), no repair is necessary. Epoxy will seal them. For wider cracks, use a concrete crack filler or epoxy-based repair compound. Apply it with a putty knife, overfilling slightly. Once cured, sand it level with the surrounding concrete.
For spalling or pitted areas, use a concrete patching compound. Clean out loose material first. Apply the patch material according to product instructions. Sand smooth once cured.
These repairs don't need to be perfect, they just need to prevent epoxy from flowing into deep voids where it can't cure properly.
Mixing and Applying the Epoxy Primer
Mixing is where precision matters. The resin-to-hardener ratio must be exact. Most epoxy systems specify a ratio like 2:1 or 4:1 by volume. Use measuring containers, not guesses.
Call (919) 824-5403 or email craigrfear@gmail.com for a free estimate →
Pour the correct amount of resin into a clean bucket. Add the hardener slowly while stirring. Mix for 2-3 minutes until the color is uniform. Scrape the bucket sides and bottom, unmixed material will cause curing problems.
Check the pot life on your epoxy's label. This is how long you have before the mixture becomes too thick to apply. Pot life typically ranges from 20-45 minutes depending on temperature. Work efficiently but don't rush.
Apply the primer with a squeegee or notched trowel. Spread it in thin, even coats. The primer creates a bonding layer for the flakes and topcoat. Uneven application leads to inconsistent adhesion.
Let the primer cure to tack-free time before applying flakes. This typically takes 2-4 hours, but check your product specifications. The surface should feel dry but slightly tacky, flakes will stick to this.
Epoxy Flake Coverage Rate and Broadcasting Technique
Flakes are what give the floor its appearance and texture. The broadcast rate determines how densely the flakes cover the surface.
Calculating Your Broadcast Rate
Broadcast rate is measured in pounds per 100 square feet. Most installations use 1-3 pounds per 100 square feet, depending on the look you want.
Calculate your floor area in square feet. Divide by 100. Multiply by your target broadcast rate. For example, a 500-square-foot floor with a 2-pound broadcast rate needs 10 pounds of flakes.
Higher broadcast rates create a fuller, more colorful appearance. Lower rates show more of the base coat color. Full broadcast (3+ pounds per 100 square feet) creates a dense, uniform look. Partial broadcast (1-2 pounds per 100 square feet) creates a more subtle, speckled appearance.
Full Broadcast vs. Partial Broadcast
Full broadcast means flakes cover 90-100% of the primer surface. This creates a consistent, polished look. It requires more flakes and more precision in application. The floor looks uniform and hides any primer imperfections.
Partial broadcast leaves some primer visible between flakes, creating a speckled or terrazzo-like appearance. This uses fewer flakes and is more forgiving during application. The final look is less uniform but still attractive.
Choose based on your aesthetic preference and budget. Full broadcast costs more in materials but creates a more finished appearance. Partial broadcast is economical and still looks professional.
Apply flakes while the primer is tacky but not wet. Spread them evenly across the surface using a broadcast spreader or by hand. Work in sections to maintain consistency. Once flakes are applied, let them cure per the manufacturer's instructions, typically 4-8 hours before the next coat.
Epoxy Flake Floor Drying Time and Top Coat Application
Timing between coats is critical. Apply the topcoat too early and it won't bond properly. Apply it too late and dust will settle on the flakes.
Tack-Free Time and Walk-On Time
Tack-free time is when the surface feels dry but the epoxy hasn't fully cured. This is when you can safely apply the next coat. Tack-free time typically occurs 2-4 hours after application, depending on temperature and humidity.
Walk-on time is when someone can walk on the floor without damaging it.
DIY Epoxy Flake Floor Mistakes to Avoid
Understanding common failures helps you prevent them. Most mistakes happen during surface prep or application.
Long-Term Maintenance and Climate Considerations
An epoxy flake floor installation requires minimal maintenance but benefits from proper care. Regular cleaning extends the floor's life and keeps it looking new.
Frequently Asked Questions
How many pounds of flake do I need for an epoxy floor?
The amount depends on your broadcast rate and floor size. A full broadcast typically requires 1.5 to 2 pounds per 100 square feet, while partial broadcast uses 0.75 to 1.5 pounds per 100 square feet. Calculate your total square footage and multiply by your target broadcast rate to determine flake quantity. Always order 10-15% extra to account for waste and uneven application.
What is the best way to prepare concrete for epoxy flake installation?
Proper substrate preparation is critical. Start with concrete grinding using diamond tooling to achieve the correct surface profile (typically 60-90 mils). Remove all dust and debris with acetone cleaning, then perform moisture testing to ensure hydrostatic pressure is below acceptable limits. Repair any cracks or imperfections with concrete filler. Poor preparation is the leading cause of epoxy peeling and delamination within the first year.
How long does an epoxy flake floor take to dry before I can walk on it?
Epoxy flake floor drying time varies by product and temperature. Tack-free time typically ranges from 4 to 8 hours, meaning the surface feels dry but remains soft. Walk-on time is usually 24 to 48 hours, depending on ambient temperature and humidity. Full curing can take 5 to 7 days before the floor reaches maximum compressive strength. Always follow your product's specific pot life and curing guidelines.
Do I need a topcoat over epoxy flake flooring?
Yes, a polyaspartic topcoat or clear epoxy coat is essential. The topcoat protects the flakes from UV damage, enhances slip resistance, and provides chemical resistance. It also seals the floor and improves durability, especially in high-traffic areas. Without a topcoat, your flakes are exposed to wear, discoloration, and potential delamination over time.
Tags: epoxy flake floor installation, epoxy flake floor installation guide, epoxy flake coverage rate, concrete floor preparation for epoxy, epoxy flake floor drying time
Frequently Asked Questions
The amount depends on your broadcast rate and floor size. A full broadcast typically requires 1.5 to 2 pounds per 100 square feet, while partial broadcast uses 0.75 to 1.5 pounds per 100 square feet. Calculate your total square footage and multiply by your target broadcast rate to determine flake quantity. Always order 10-15% extra to account for waste and uneven application.
Proper substrate preparation is critical. Start with concrete grinding using diamond tooling to achieve the correct surface profile (typically 60-90 mils). Remove all dust and debris with acetone cleaning, then perform moisture testing to ensure hydrostatic pressure is below acceptable limits. Repair any cracks or imperfections with concrete filler. Poor preparation is the leading cause of epoxy peeling and delamination within the first year.
Epoxy flake floor drying time varies by product and temperature. Tack-free time typically ranges from 4 to 8 hours, meaning the surface feels dry but remains soft. Walk-on time is usually 24 to 48 hours, depending on ambient temperature and humidity. Full curing can take 5 to 7 days before the floor reaches maximum compressive strength. Always follow your product's specific pot life and curing guidelines.
Yes, a polyaspartic topcoat or clear epoxy coat is essential. The topcoat protects the flakes from UV damage, enhances slip resistance, and provides chemical resistance. It also seals the floor and improves durability, especially in high-traffic areas. Without a topcoat, your flakes are exposed to wear, discoloration, and potential delamination over time.