how-to
Epoxy Flooring Over Radiant Heat: What Works
Last Updated: October 28, 2026
Quick Summary
Epoxy flooring over radiant heat works when the slab stays within the coating's substrate temperature range, typically about 60°F to 80°F, and the heat is shut off before prep and application. Shut the system down for at least 24 hours, or 48 to 72 hours for a thick hydronic slab, then restart gradually after full cure.
- Measure slab surface temperature in at least five spots, since air temperature tells you almost nothing about a heated slab.
- Most manufacturers require the slab surface to be at least 5°F above the dew point before and during cure.
- Grind to a CSP 3 to CSP 4 profile instead of acid etching, which leaves residue and an uneven profile.
- Most systems need 24 hours before foot traffic and several days before full chemical cure.
- Polyaspartic coatings stay more flexible than standard epoxy, making them a strong fit over heated slabs.
Table of Contents
- How Radiant Heat and Epoxy Flooring Work Together
- Epoxy Flooring Temperature Requirements Before You Start
- Epoxy Floor Moisture Testing and Substrate Readiness
- Step-by-Step Installation Over a Heated Slab
- Epoxy Floor Curing Time and the Gradual Heat Restart
- Choosing Floor Coatings for Radiant Heat Systems
- Troubleshooting Failures and Preventing Them
- Get a Free Estimate for Your Heated Floor Project
- Frequently Asked Questions
How Radiant Heat and Epoxy Flooring Work Together
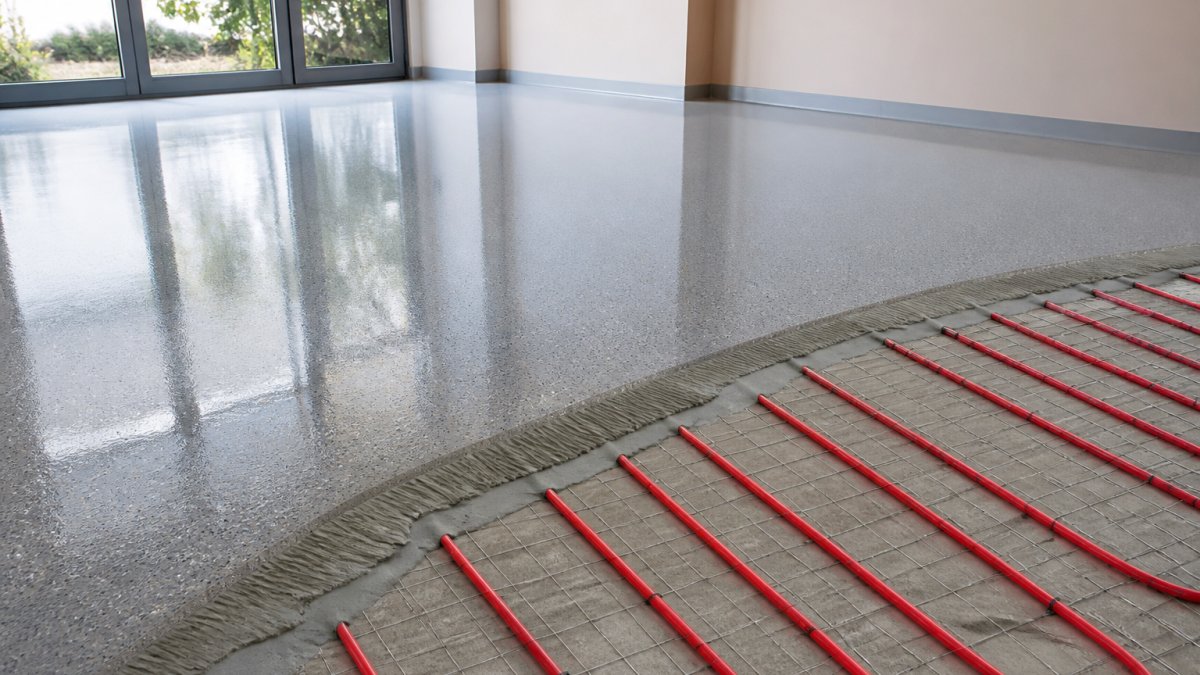
Epoxy flooring over radiant heat works when the slab stays warm enough to cure the coating but cool enough to keep it from softening.
At Concrete-Enhancements, we've spent more than 20 years transforming and resurfacing concrete.
Does the heat help or hurt? It depends on your system, your slab, and your timing. Here's how to sequence an install so the heat works with you instead of against you.
Hydronic Versus Electric Radiant Systems
Two systems feed heat into a slab, and they behave differently under a coating.
Hydronic radiant heating pushes warm water through tubing buried in the concrete.
Electric radiant heating runs cables or mats that heat and cool fast. Heat concentrates near the wires, so surface temperatures can spike above the average reading.
The key difference: hydronic tubing sits deep in the slab, while electric mats often sit closer to the surface.
Where Epoxy Over Radiant Heat Goes Wrong
The biggest mistake is coating a slab that's still warm from the heating system. Epoxy cures through a chemical reaction, and heat speeds it up.
A second failure comes from thermal cycling. Heat the slab, cool it, heat it again, and the concrete expands and contracts. A rigid coating with poor adhesion will crack or delaminate along those stress lines.
The third mistake is skipping prep because the floor "looks fine." Heated slabs often carry a laitance layer and trapped moisture that only show up after the coating fails. National Bureau of Standards feasibility study on radiant heating in seamless flooring examined how these systems interact with seamless floor finishes decades ago, and the core lesson still holds: the finish has to be matched to the heat source, not the other way around.
Epoxy Flooring Temperature Requirements Before You Start
Epoxy flooring temperature requirements are strict, and on a heated slab they are the most common reason a job fails before the first roller stroke.
Most epoxy systems want the concrete surface between roughly 60°F and 80°F, with ambient air in a similar band. But that range is a starting point, the binding numbers are on the manufacturer's technical data sheet and vary by product line.
How to Read the Technical Data Sheet
Before you buy a kit, pull the current technical data sheet (TDS) and the safety data sheet (SDS) for the exact product. Look for these fields and write the numbers down:
- Minimum and maximum substrate temperature, often stated as a surface temperature, not air temperature
- Minimum and maximum ambient temperature and how long those conditions must hold (some products require the range to be maintained through the full cure, not just application)
- Relative humidity limit, commonly capped around 85%, but check the sheet
If the TDS lists a substrate temperature range that conflicts with your slab reading, the TDS wins. Do not average, and do not assume a warm slab is automatically safe.
Measuring Slab Temperature Correctly
Air temperature tells you almost nothing about a heated slab. Concrete holds heat, and a cool room can sit over a warm slab for hours.
A common pattern is a 10°F to 15°F difference between the warm center and the cooler perimeter. If the coolest reading is below the product minimum, the whole slab is too cold to coat, even if the center looks perfect.
What Heat Does to Pot Life and Cure
Above roughly 80°F at the surface, epoxy pot life drops fast. A product that gives 30 minutes at 70°F may gel in half that at 85°F, leaving less time to roll, more bubbles, and a cloudy, uneven finish.
Cold is just as bad. Below about 60°F, the reaction slows to a crawl and the coating may stay tacky for days.
The Pre-Start Checklist
Run this before you open a bucket:
Call (919) 824-5403 or email craigrfear@gmail.com for a free estimate →
- Slab surface temperature in at least five locations, recorded
- Ambient air temperature and relative humidity, recorded
- Dew point, and confirmation that the slab is at least 5°F above it
If any reading falls outside the TDS range, stop. Warm the room, cool the slab, or reschedule.
Epoxy Floor Moisture Testing and Substrate Readiness
Epoxy floor moisture testing comes before anything else on a heated slab. Heat drives moisture vapor up through concrete, and a coating that seals it in will blister from below.
Test with a calcium chloride kit or an in-situ relative humidity probe. Both tell you how much moisture is moving through the slab right now.
Prep comes next. Grinding gives you the mechanical profile epoxy needs to grab.
If your slab reads high on moisture, don't coat over it. Our guide to epoxy floor moisture barrier solutions walks through the barrier options that let you coat a damp slab safely. And if you're still deciding between prep methods, this comparison of acid etching concrete vs grinding for epoxy explains which one gives you the adhesion profile a heated slab needs.
Step-by-Step Installation Over a Heated Slab
Most guidance on epoxy over radiant heat stops at "turn the heat off first." That is not a procedure. See our proven concrete overlay & epoxy installation process to book it.
Phase 1: Shut Down and Stabilize
- Shut the heat off at the thermostat and, for hydronic systems, at the circulator and boiler control. Confirm the pump has stopped.
- Wait at least 24 hours for a thin slab or electric mat system; 48 to 72 hours for a thick hydronic slab. Thick concrete holds heat, and the surface can read cool while the core is still warm.
- Verify with instruments, not the thermostat. Take surface readings in a grid: center, edges, over tubing runs, and near exterior walls. The slab is ready to prep only when the coolest reading is inside the product's substrate range and the spread has stabilized.
Phase 2: Moisture and Substrate Readiness
- Test for moisture with a calcium chloride kit or an in-situ relative humidity probe, with the heat off and the slab at its resting temperature. Record the result against the coating's moisture limit.
- Grind the concrete to an even, open profile. A common target is a CSP 3 to CSP 4 profile for standard epoxy. Acid etching leaves residue and an uneven profile that shows up later as peeling.
- Vacuum and wipe every trace of dust. Dust is the enemy of adhesion, and a heated slab's surface can hold fine dust in its open pores.
- Repair cracks and pits with a compatible patch material and let it cure per the patch TDS.
If the moisture reading is above the coating's limit, stop and address it before coating. A moisture barrier or a different coating system may be required.
Phase 3: Application
- Confirm conditions again, slab, air, humidity, and dew point, immediately before mixing.
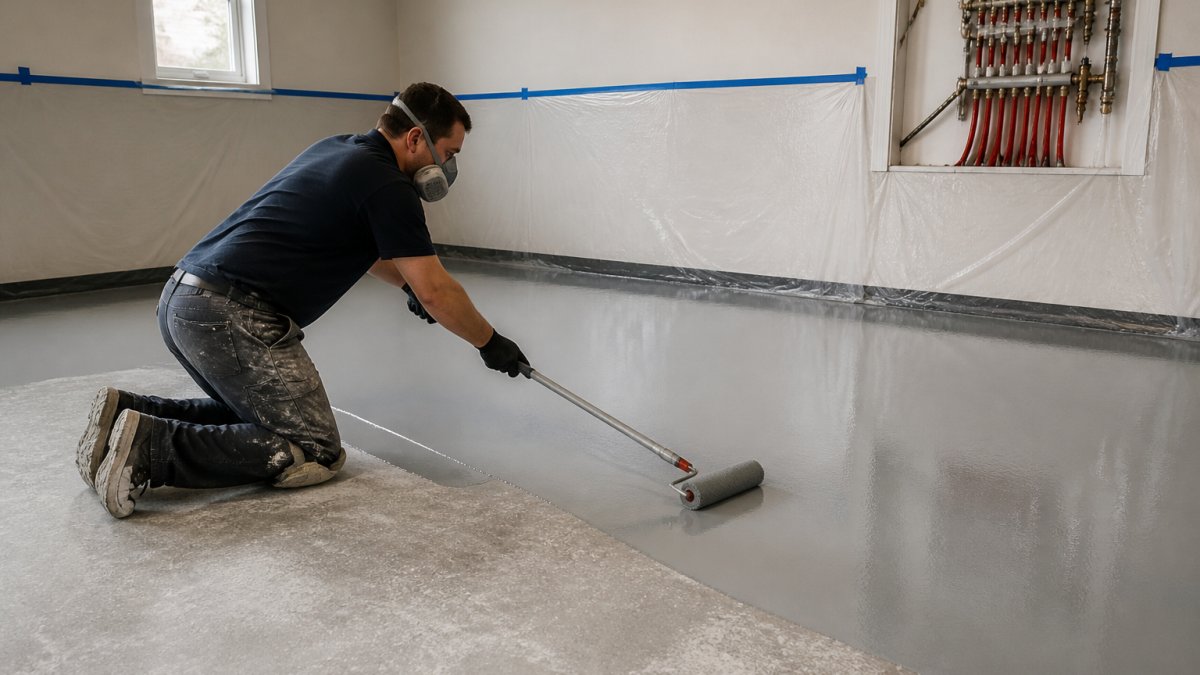
- Roll the base coat at the manufacturer's spread rate. Do not stretch it to save material; film thickness drives adhesion and wear.
- Broadcast aggregate if you are adding texture or slip resistance, while the base is still wet.
- Apply the topcoat inside the recoat window stated on the TDS. If you miss the window, abrade the surface before recoating.
Phase 4: Cure and Gradual Restart
- Keep traffic off until the TDS foot-traffic time, and keep the space within the product's temperature range through the full cure. Do not restart the heat to speed cure.
- Restart the heat slowly. Raise the setpoint a few degrees at a time over a couple of days rather than jumping to full temperature. A fast ramp shocks the coating and the slab at the same moment, and the bond underneath may still be forming while the surface looks cured.
- Inspect before full service. Look for bubbles, blisters, dull patches, or edge lifting, and fix them before the system runs at full temperature.
Expected result: a uniform, fully bonded coating with no bubbles or dull patches, and a slab that reaches full temperature without stress cracking.
Epoxy Floor Curing Time and the Gradual Heat Restart
Epoxy floor curing time depends on temperature, but most systems need 24 hours before foot traffic and several days before full chemical cure. On a heated slab, the restart matters as much as the cure: bring the heat back a few degrees at a time over a couple of days. Restarting too early is the fastest way to ruin a good install, the coating may look cured on top while the bond underneath is still forming.
Choosing Floor Coatings for Radiant Heat Systems
Floor coatings for radiant heat need flexibility and stable adhesion under thermal cycling. Standard epoxy is rigid, it handles heat well once cured but doesn't love constant expansion and contraction.
Polyaspartic coatings cure faster and stay more flexible, which makes them a strong fit over heated slabs. Our breakdown of polyaspartic vs epoxy garage floor coatings compares cure time, durability, and UV stability side by side.
A quick way to decide:
| Coating | Best For | Watch Out For |
|---|---|---|
| Standard epoxy | Interior slabs with stable heat | Rigid under heavy cycling |
| Polyaspartic | Heated garages, fast turnaround | Higher material cost |
| Cementitious microtopping | Encapsulating mats, leveling | Needs full cure before coating |
| Polished concrete | High-traffic commercial floors | Different maintenance routine |
Troubleshooting Failures and Preventing Them
Most heated-slab failures trace back to three causes: too much heat at application, too much moisture in the slab, or too little surface profile. Bubbles and blisters usually mean moisture vapor pushing up; peeling at the edges points to poor prep or a cold slab; cracks along heat lines come from a rigid coating over a moving surface. Prevention is boring and effective: test the moisture, grind the surface, control the temperature, and restart the heat slowly.
Get a Free Estimate for Your Heated Floor Project
Coating a heated slab rewards patience and punishes shortcuts.
Concrete-Enhancements is a CTi Certified Dealer with more than 20 years of experience in epoxy coatings and decorative overlays. Check whether we serve your area on our service areas page, then reach out.
Call (919) 824-5403 or email craigrfear@gmail.com for a free estimate.
Frequently Asked Questions
Can epoxy flooring be installed over radiant heat?
The answer depends on the coating product and the radiant-heat system. Consult the product's technical data sheet and a qualified flooring professional before proceeding.
How long should radiant heat stay off while epoxy cures?
Plan on keeping the system off for at least 24 to 72 hours after the final coat, depending on the product's cure schedule and the room temperature. Most epoxy manufacturers publish a full-cure window, often 7 days, before the floor should take heavy traffic or heat. When you restart, raise the slab temperature gradually, roughly 5°F per day, to avoid thermal stress on a coating that is still hardening.
What are the epoxy flooring temperature requirements for a heated slab?
The slab and the room should stay between 60°F and 80°F during application and cure, and the concrete should be at least 5°F above the dew point. Surface temperature must stay below the product's stated limit, often around 80°F for standard epoxy and higher for novolac or polyaspartic systems. Check the technical data sheet for your specific coating before you schedule the pour.
Will radiant heat cause epoxy flooring to crack or peel?
Heat alone rarely causes failure. Cracking and peeling usually trace back to moisture vapor pushing up through the slab, poor surface preparation, or restarting the heat before the coating has fully cured. A moisture test, a proper profile on the concrete, and a gradual restart schedule prevent most of these problems. If a coating does fail over a heated slab, the repair starts with diagnosing moisture and adhesion, not just recoating.

Tags: epoxy flooring over radiant heat, epoxy flooring temperature requirements, epoxy floor moisture testing, epoxy floor curing time, floor coatings for radiant heat
Frequently Asked Questions
The answer depends on the coating product and the radiant-heat system. Consult the product's technical data sheet and a qualified flooring professional before proceeding.
Plan on keeping the system off for at least 24 to 72 hours after the final coat, depending on the product's cure schedule and the room temperature. Most epoxy manufacturers publish a full-cure window, often 7 days, before the floor should take heavy traffic or heat. When you restart, raise the slab temperature gradually, roughly 5°F per day, to avoid thermal stress on a coating that is still hardening.
The slab and the room should stay between 60°F and 80°F during application and cure, and the concrete should be at least 5°F above the dew point. Surface temperature must stay below the product's stated limit, often around 80°F for standard epoxy and higher for novolac or polyaspartic systems. Check the technical data sheet for your specific coating before you schedule the pour.
Heat alone rarely causes failure. Cracking and peeling usually trace back to moisture vapor pushing up through the slab, poor surface preparation, or restarting the heat before the coating has fully cured. A moisture test, a proper profile on the concrete, and a gradual restart schedule prevent most of these problems. If a coating does fail over a heated slab, the repair starts with diagnosing moisture and adhesion, not just recoating.