how-to
How Do You Repair a Cracked Epoxy Countertop?
Last Updated: November 6, 2026
Quick Summary
To repair cracked epoxy, clean the damaged area with isopropyl alcohol, mix a small batch of two-part repair epoxy at the exact label ratio, and fill the crack in thin layers. Let it cure fully, which often means at least 24 hours, then sand lightly and polish to match the surrounding finish.
- Hairline cracks are surface-level; press a fingernail across the line to check for depth.
- Structural splits that move or feel hollow may need professional help rather than a simple fill.
- Clean the area with isopropyl alcohol so contamination does not stop the new resin from bonding.
- Mix only a small batch and measure both parts exactly as the label says.
- Apply thin layers, since they cure more evenly than thick ones.
Table of Contents
- Why Epoxy Countertops Crack and What the Damage Really Is
- Gathering an Epoxy Countertop Repair Kit and Supplies
- How to Repair Cracked Epoxy Countertop Surfaces Step by Step
- How to Repair Cracked Epoxy Countertop Without Sanding
- Can You Put New Epoxy Over Old Epoxy on a Damaged Top?
- How to Fix Epoxy Resin Mistakes Before They Set
- When to Call a Professional About Your Epoxy Countertop
- Frequently Asked Questions
Cracked epoxy countertops are frustrating, but most of them can be fixed at home with a small repair kit and a few careful steps. This guide from Concrete-Enhancements walks you through how to repair cracked epoxy countertop surfaces, from assessing the damage to deciding when a professional should take over. Epoxy is a thermosetting resin, which means it hardens permanently once it cures and cannot simply be melted back into shape.
The repair itself is usually simple. A thin hairline crack calls for a different approach than a chip that has broken off a piece of the surface.
Why Epoxy Countertops Crack and What the Damage Really Is
Epoxy is a thermosetting resin: once it cures, it cannot be melted or reflowed, so every repair is a mechanical and chemical bond to the existing surface. A repair that fills a gap without addressing why the gap opened can reappear in the same spot.
Most countertop cracks fall into one of four categories, and each points to a different repair strategy.
- Impact damage: A dropped pot, a heavy tool, or a struck edge creates a localized crack or chip with a clear point of origin. The surrounding epoxy is sound, and the repair is a straightforward fill and blend.
- Topcoat or finish failure: Fine, shallow lines that appear in certain light, often described as crazing, usually sit in the clear topcoat rather than the build layer. They are cosmetic and often respond to a light sand and recoat rather than a structural fill.
- Movement or substrate flex: Cracks that run along a seam, follow a straight line, or reappear after repair often trace to movement in the substrate, an under-supported overhang, or a cabinet that shifts. Filling these without stabilizing the base is a temporary fix.
- Poor pour or bonding failure: If the original epoxy was poured over a damp, dusty, or incompatible substrate, or mixed at the wrong ratio, the coating can debond. Signs include hollow sounds when tapped, lifting at edges, and cracks that widen from the perimeter inward.
Hairline Cracks Versus Structural Splits
Hairline cracks are thin, surface-level lines. They often look like scratches in the finish and may only show up in certain light. Press a fingernail across the line: if it catches, the crack has depth; if it glides over, the damage is likely in the topcoat.
Structural splits go deeper. They may widen, feel uneven to the touch, or show a gap where the epoxy has pulled away from the substrate. Tap the area with a coin or the handle of a screwdriver. A sharp, solid click suggests the epoxy is bonded; a dull, hollow thud suggests debonding underneath.
- Hairline crack: thin line, smooth edges, no movement when pressed
- Chip: a missing piece of epoxy, usually at an edge or corner
- Structural split: a deep or widening gap, or a section that lifts or flexes
- Debonded area: hollow sound when tapped, lifting at edges, crack that widens from the perimeter
If you see movement or a gap you can feel with a fingernail, a simple filling repair may not hold. Treat that as a sign to look at the problem more carefully before you start. Cracks that run toward a sink cutout, a seam between two slabs, or the edge of an overhang deserve extra caution, because water intrusion and flexing at those points can turn a cosmetic crack into a substrate problem.
A practical diagnostic sequence: clean the area, photograph the crack with a straightedge or coin for scale, press and tap along its length, and note whether it changes with temperature or after heavy use. That record tells you whether you are filling a surface defect or chasing a movement problem, and it gives a professional useful information if you decide to hand the job off.
Gathering an Epoxy Countertop Repair Kit and Supplies
Most DIY repairs need a few basic items. A typical epoxy countertop repair kit includes a two-part repair epoxy, mixing cups, and a small applicator. You will also need supplies for cleaning and sanding.
Check that any repair product you buy is labeled for countertop use, and read the label to confirm whether it is suitable for food-contact surfaces. Avoid common food-safety mistakes when choosing and curing repair epoxy for a kitchen counter.
Here is a quick list of what to gather:
- Two-part repair epoxy matched to your countertop type
- Clean mixing cups and a stir stick (wood or plastic)
- Toothpicks or a small putty knife for applying the resin
- Isopropyl alcohol and lint-free cloths for cleaning
- Sandpaper in a fine grit range for smoothing
- Nitrile gloves and painter's tape to protect nearby surfaces
- A bright light so you can see the crack clearly
Keep the work area ventilated, since epoxy fumes can be strong.
Most DIY repairs need only a few basic items, and the article lists what to gather before you start.
| Item | Purpose | Note |
|---|---|---|
| Two-part repair epoxy | Fills the crack | Match to your countertop type |
| Mixing cups and stir stick | Mixes the resin | Use clean, dry tools |
| Isopropyl alcohol and lint-free cloths | Cleans the area | Remove dust and grease |
| Fine-grit sandpaper | Smooths the repair | Use after curing |
| Nitrile gloves and painter's tape | Protects surfaces | Limits spills |
| Bright light | Shows the crack clearly | Helps spot damage |
How to Repair Cracked Epoxy Countertop Surfaces Step by Step
Work in a clean, dry spot with stable room temperature. Temperature and humidity can change how the epoxy cures, so give yourself a clear window of time.
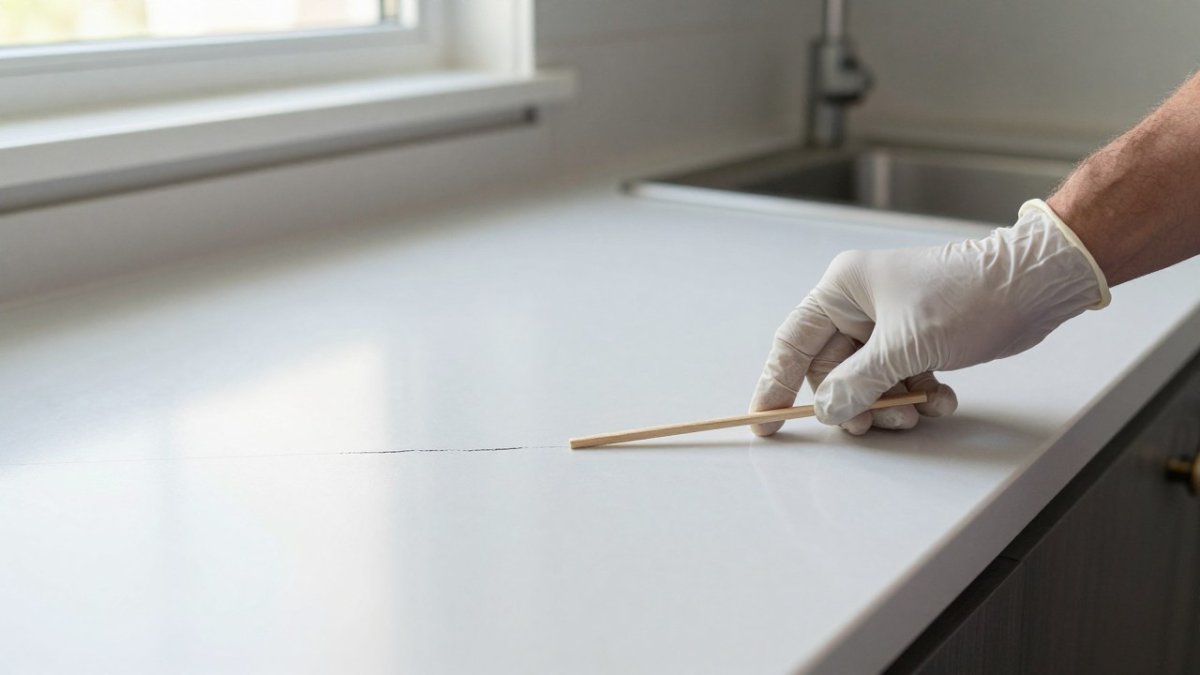
!Close-up of a homeowner's hands in nitrile gloves filling a hairline crack on a glossy epoxy kitchen countertop with a wooden stick, under bright natural light
Cleaning, Prepping, and Mixing a Small Batch
Start by cleaning the damaged area with isopropyl alcohol. Remove dust, grease, and any residue, since contamination stops the new resin from bonding.
Next, tape off the area around the crack so spills stay controlled. Then mix only a small batch of epoxy. Measure the two parts exactly as the label says, because the mixing ratio decides whether the repair cures properly.
Stir slowly for the full time listed on the label. Scrape the sides and bottom of the cup so no unmixed resin remains.
Filling, Smoothing, and Curing the Repair
Apply a thin layer of mixed epoxy into the crack with a toothpick or small applicator. Press it in so it fills the gap, then wipe away any excess before it sets. Thin layers cure more evenly than thick ones.
Smooth the surface with the applicator so the repair sits level with the countertop. Let it cure for the full time on the label, which often means at least 24 hours before light use.
Once cured, sand the repair lightly with fine sandpaper and polish or recoat as needed to match the surrounding finish. If the old epoxy is cured and bonded and needs to come off before any repair can take hold, learn how to remove old epoxy from concrete safely.
How to Repair Cracked Epoxy Countertop Without Sanding
Some people want to avoid sanding, especially on glossy finishes. You can often fill a hairline crack without sanding, as long as the repair sits flush with the surface.
Apply the epoxy carefully and keep it confined to the crack. Use painter's tape to define the edges so you have less cleanup to do. Expect a slightly different sheen where the repair sits, since a fill without sanding rarely matches the gloss perfectly.
A common mistake is adding too much resin at once. That creates a raised bead that looks worse than the original crack. Build the repair up in thin passes instead.
Can You Put New Epoxy Over Old Epoxy on a Damaged Top?
In many cases, yes, you can apply a new topcoat over a cured epoxy surface. The key is preparation. The old surface needs to be cleaned, lightly sanded to give the new layer something to grip, and free of any loose or peeling areas.
If the old epoxy is lifting, flaking, or pulling away, a new coat will not fix the root problem. Remove the failing sections first so the new layer bonds to a stable base.
Check the product label for recoat windows, since some epoxies need to be applied within a set time after the previous coat.
How to Fix Epoxy Resin Mistakes Before They Set
Mistakes happen, especially on a first repair. The best time to fix them is before the resin cures.
- Drips or runs: wipe them quickly with a cloth dampened with alcohol, if the label allows
- Air bubbles: pop them with a toothpick while the resin is still liquid
- Uneven fill: add a thin second layer to build up low spots
- Wrong color or clarity: scrape off uncured material and start over
Once epoxy has set, fixes get harder. Sanding and recoating can work for minor issues, but large problems may need a professional.
When to Call a Professional About Your Epoxy Countertop
Some cracks are too deep, too wide, or too widespread for a simple repair. Call a professional if the crack moves when you press on it, if the countertop feels loose or hollow, or if the damage keeps spreading after you have tried to fix it. You can find answers to common questions about epoxy coating projects and the process.
A professional can also help when the countertop is in a food-prep area and you are unsure whether a repair product is food-safe. Safety and durability are worth a second opinion.
If you want expert help with damaged epoxy or concrete surfaces, you can contact Concrete-Enhancements for a free estimate. Call (919) 824-5403 or email craigrfear@gmail.com to talk through your project.
Frequently Asked Questions
How can I fix a damaged epoxy countertop?
Start by cleaning the chipped or cracked area with isopropyl alcohol so no grease or dust remains. Mix a small batch of two-part repair epoxy at the exact ratio printed on the kit, then fill the damage with a toothpick or small applicator in thin layers. Let each layer cure fully before adding the next. Once cured, sand lightly and apply a topcoat if the surface was glossy. Expect the repair to be visible up close, since color and gloss matching is difficult on a DIY fix.
Can you put new epoxy over old epoxy?
Yes, but only if the existing epoxy is well bonded and free of loose or peeling areas. Lightly scuff the old surface so the new coat has something to grip, then clean away all dust and residue. Thin coats bond far better than one thick pour. If the old layer is lifting or the damage runs deep, a surface overlay will not hold, and the old epoxy should be removed or the countertop professionally assessed.
How long does epoxy countertop repair take to cure?
Cure times vary by product, and the product's label or technical data sheet gives the exact timing. Cooler rooms and thick applications slow the process. Check the product's technical data sheet for the exact curing and drying times, and avoid placing heavy items or using the counter until the repair is fully hard.

Tags: repair cracked epoxy, how to repair cracked epoxy countertop, how to repair cracked epoxy countertop without sanding, epoxy countertop repair kit, can you put new epoxy over old epoxy
Frequently Asked Questions
Start by cleaning the chipped or cracked area with isopropyl alcohol so no grease or dust remains. Mix a small batch of two-part repair epoxy at the exact ratio printed on the kit, then fill the damage with a toothpick or small applicator in thin layers. Let each layer cure fully before adding the next. Once cured, sand lightly and apply a topcoat if the surface was glossy. Expect the repair to be visible up close, since color and gloss matching is difficult on a DIY fix.
Yes, but only if the existing epoxy is well bonded and free of loose or peeling areas. Lightly scuff the old surface so the new coat has something to grip, then clean away all dust and residue. Thin coats bond far better than one thick pour. If the old layer is lifting or the damage runs deep, a surface overlay will not hold, and the old epoxy should be removed or the countertop professionally assessed.
Cure times vary by product, and the product's label or technical data sheet gives the exact timing. Cooler rooms and thick applications slow the process. Check the product's technical data sheet for the exact curing and drying times, and avoid placing heavy items or using the counter until the repair is fully hard.