how-to
How to Remove Old Epoxy from Concrete
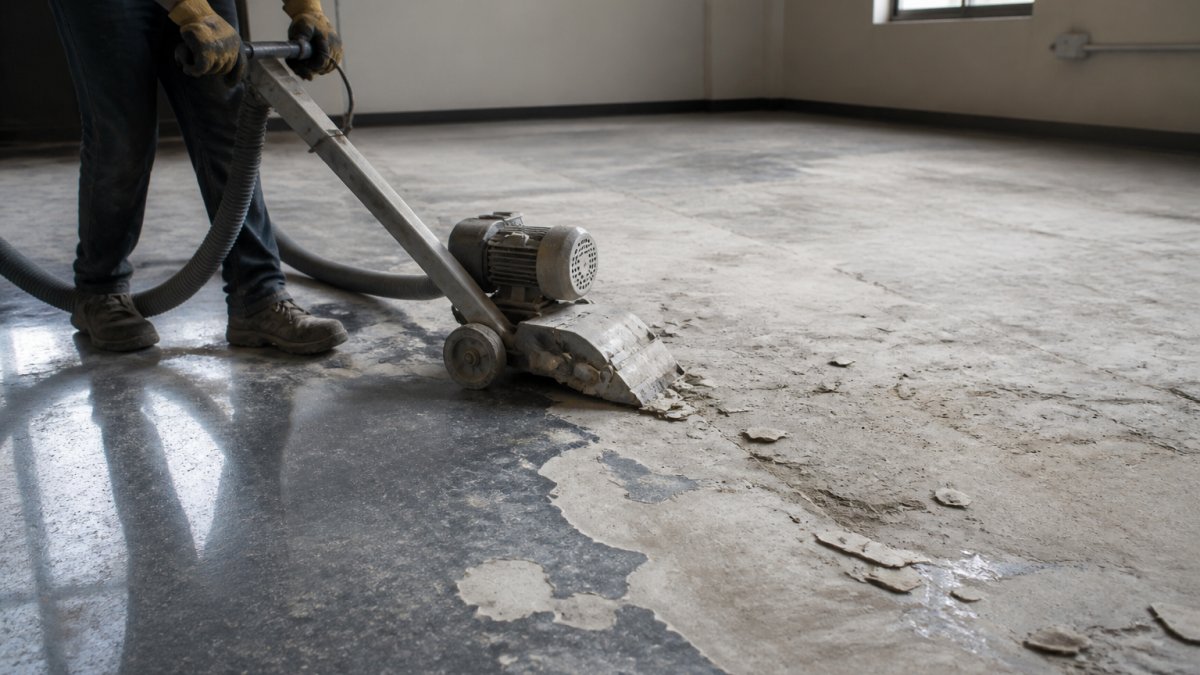
Table of Contents
- Assess Your Epoxy Condition Before Removal
- Removing Uncured or Wet Epoxy
- Chemical Epoxy Stripper for Concrete
- Grinding Epoxy Off Concrete
- Tools for Removing Epoxy from Concrete
- Concrete Preparation After Epoxy Removal
- When to Hire a Professional
- Frequently Asked Questions
Last Updated: October 10, 2026
Assess Your Epoxy Condition Before Removal
Before you start to remove epoxy from concrete, you need to assess its condition. Fresh, wet epoxy requires different removal methods than years-old, hardened coatings. This assessment determines your entire approach.
Uncured vs. Cured Epoxy
Uncured epoxy is still soft and hasn't fully hardened, far easier to remove than cured epoxy. Cured epoxy has fully hardened and bonds tightly to concrete, making removal difficult.
Your removal method depends on which type you have. Fresh epoxy can be wiped away with cloth and solvent; cured epoxy requires grinding, scraping, heat, or chemical strippers.
Coating Thickness and Coverage
Thick coatings take longer to remove than thin ones. Also assess the area: a small garage spill differs greatly from stripping an entire warehouse floor.
Removing Uncured or Wet Epoxy
Fresh epoxy hasn't cured yet and sits on top of concrete rather than bonding permanently. Act fast before it hardens.
Wipe wet epoxy with a clean cloth immediately. If wiping doesn't remove it all, use acetone or isopropyl alcohol on a cloth and rub the area in small sections. Ventilate well, open doors and windows to prevent fume buildup.
For larger spills, scrape gently with a plastic scraper or putty knife (avoid metal tools). Use solvent and cloth to clean remaining residue. This works best within the first few hours before epoxy sets.
Chemical Epoxy Stripper for Concrete
Chemical stripping is highly effective for cured epoxy. A chemical stripper breaks down the bond between epoxy and concrete, making it easier to scrape away.
How Chemical Stripping Works
Chemical strippers contain solvents or alkaline compounds that soften cured epoxy and weaken its adhesion. Most require 2 to 8 hours of dwell time before the epoxy begins to lift.
The epoxy will bubble, blister, or soften once the stripper works. This is when scraping becomes possible and the epoxy peels away more easily.
Application and Safety Steps
Clear the area and ensure good ventilation by opening doors, windows, and using fans. Wear chemical-resistant gloves, eye protection, and a respirator. Read the product label for specific safety requirements.
Apply stripper with a brush or roller, coating evenly. Avoid puddles. Let it sit for the recommended time, then scrape with a plastic scraper or putty knife. Work in sections and reapply as needed for stubborn areas.
After removal, clean the concrete with water or neutralizing solution to remove chemical residue. Allow complete drying before applying new coatings.
Grinding Epoxy Off Concrete
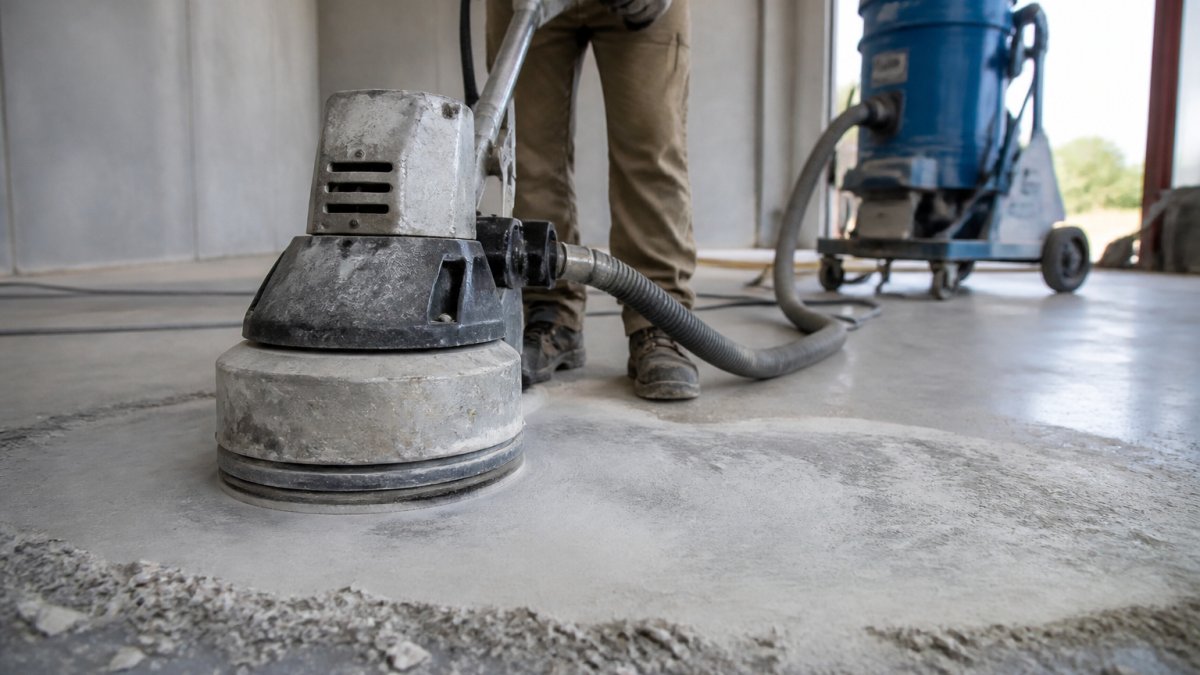
Grinding is the most effective method for thick or heavily cured epoxy. A floor grinder with a diamond cup wheel cuts through the coating mechanically.
Grinding Process and Technique
Start with a coarse-grit diamond cup wheel in overlapping passes. Keep the grinder moving to avoid gouging the concrete. Switch to a finer-grit wheel to clean up residue and smooth the surface.
Grinding works on any epoxy thickness and is faster than chemical stripping for large areas. It generates significant dust and noise but leaves a rougher surface beneficial for new coatings.
Dust Control and Ventilation
Grinding creates hazardous dust. Wear a NIOSH-approved respirator. Use a wet grinder or one with an attached dust collection system to suppress particles.
Ventilate aggressively by opening doors and windows and using exhaust fans. If grinding indoors, seal off the area and use a negative air machine. Keep the area clear of people and pets.
Tools for Removing Epoxy from Concrete
Choose tools based on removal method and trade-offs between speed, cost, concrete damage risk, and labor intensity.
Method Comparison: Effectiveness, Time, Cost, and Concrete Risk
| Factor | Chemical Stripper | Grinding | Heat Gun | Scraping Alone |
|---|---|---|---|---|
| Effectiveness on Cured Epoxy | High (2-8 hr dwell) | Very High (fastest removal) | Moderate (thin coatings only) | Low (labor-intensive) |
| Time to Remove 500 sq ft | 8-16 hours (including dwell) | 4-6 hours | 12-20 hours | 20+ hours |
| Equipment Cost | $30-150 (stripper product) | $150-400 (rental/day) | $50-200 (heat gun) | $0 (hand tools) |
| Concrete Surface Damage Risk | Very Low | Moderate (gouging if misused) | Low | Very Low |
| Dust/Fume Hazard | High (respiratory) | Very High (dust) | Low | None |
| Best For | Moderate thickness, indoor spaces | Heavy industrial coatings, large areas | Thin coatings, small repairs | Spot removal, final cleanup |
Chemical stripping suits moderate-thickness epoxy (¼ inch or less) when minimizing concrete damage is important. It works indoors with proper ventilation and is gentler on concrete, though chemical disposal requires care.
Grinding is fastest for large areas and thick coatings but generates dust and risks gouging if misused. Rental costs add up for multi-day projects. It's standard for commercial spaces but overkill for thin residential coatings.
Heat guns soften epoxy for scraping but work best on thin coatings and small areas. They're slow for large projects and risk scorching concrete.
Scraping alone is free and safe but practical only for small spills, uncured epoxy, or final cleanup after another method.
Equipment Selection by Method
For uncured epoxy, you need cloths, plastic scrapers, and solvent (acetone or isopropyl alcohol). Cost is under $20.
For chemical stripping, add a brush or roller, plastic scraper, and protective gear (nitrile gloves, eye protection, NIOSH-approved respirator). Total cost: $100-300.
Call (919) 824-5403 or email craigrfear@gmail.com for a free estimate →
For grinding, rent a floor grinder with diamond cup wheels ($150-400/day depending on size). Add dust collection equipment ($100-200 to rent) and protective gear (P100 respirator, safety glasses, hearing protection, work gloves).
For heat removal, a heat gun ($50-150) or propane torch ($30-100) with plastic scrapers and gloves is sufficient. Cost is minimal but labor is high.
Choosing Based on Project Scale
Small projects (under 100 sq ft): Chemical stripper or scraping is most cost-effective. Grinding rental fees don't justify the speed gain.
Medium projects (100-500 sq ft): Chemical stripper or heat removal if epoxy is thin. Grinding becomes competitive if epoxy is thick or heavily cured.
Large projects (500+ sq ft): Grinding is fastest and most economical per square foot, despite higher upfront rental cost. Chemical stripping requires multiple applications and long dwell times, multiplying labor hours.
Commercial or industrial spaces: Grinding or professional removal is standard. Dust control and safety compliance are non-negotiable, making DIY risky.
Concrete Preparation After Epoxy Removal
Once epoxy is removed, assess and prepare the concrete thoroughly before applying new coatings. A poorly prepared surface causes new epoxy to fail within months. Professional standards require moisture testing, contamination checks, and damage repair.
Cleaning and Initial Inspection
Wash the concrete with water and a stiff-bristled brush to remove stripper residue, dust, and loose particles. For chemical stripper residue, rinse twice. Allow 24 to 72 hours for complete drying, longer in humid climates.
Inspect for damage: small pits (less than ⅛ inch) are normal; larger spalls must be repaired. Cracks wider than ⅛ inch or longer than 12 inches should be sealed. Remove discoloration or staining. Grinding leaves ideal rough texture; chemical stripping may need light sanding or etching for adhesion.
Moisture Testing and Readiness Criteria
Moisture is the leading cause of epoxy failure. Test using: Calcium chloride test: readings must be below 3 lbs/1,000 sq ft/24 hr (above 5 lbs requires additional drying or moisture-barrier primer). Relative humidity test: epoxy requires RH below 85%. Visual test: tape plastic sheet for 24 hours; moisture beads indicate the concrete is too wet.
If moisture readings are high, allow 7-14 days additional drying or use a moisture-reducing primer designed for epoxy.
Contamination Checks
Check for contamination: Stripper residue (wipe with white cloth; rinse if color appears). Oil or grease (clean with degreaser). Efflorescence (brush away; address moisture source). Mold (clean with dilute bleach; resolve humidity issues).
Surface Profile and Etching
Epoxy bonds best to a rough surface. After chemical stripping, test adhesion with a small epoxy sample. If it peels, etch with dilute acid (muriatic acid) or light-grind with fine-grit diamond wheel (120-150 grit).
Repairing Damage Before New Coatings
Fill small cracks and pits with concrete patching compound or epoxy filler. For cracks wider than ⅛ inch, use crack filler or epoxy injection. For pits deeper than ¼ inch, apply patching compound in layers.
For deeper damage, use a concrete resurfacer or self-leveling overlay. Allow 24-48 hours curing before applying epoxy.
For extensive damage or areas larger than 10 square feet, consider professional concrete repair. Improper patching creates weak spots where new epoxy will fail.
Final Readiness Checklist
Before applying new epoxy or coating, confirm:
- ☐ Concrete is clean and free of dust, residue, and contaminants
- ☐ Surface is dry (moisture test passed)
- ☐ Cracks and pits are repaired and cured
- ☐ Surface profile is appropriate (rough enough for adhesion)
- ☐ Efflorescence, mold, or stains are removed or treated
- ☐ Ambient temperature is within the new coating's application range (typically 50-85°F)
- ☐ Humidity is below 85% RH
When to Hire a Professional
Some epoxy removal jobs are too big or too risky for DIY work. Large commercial spaces, thick industrial coatings, or projects where concrete damage is a concern call for professional expertise.
Professionals have industrial-grade equipment that works faster and more efficiently than rental tools. If your project covers more than a few hundred square feet, or if the epoxy is extremely thick or old, hiring a professional saves time and prevents costly mistakes.
Concrete-Enhancements has over 20 years of experience preparing concrete for new coatings. Our CTi Certified team handles everything from assessment to final surface preparation.
Removing old epoxy from concrete is challenging but manageable with the right approach. Whether you're dealing with fresh spills, chemical stripping, or grinding thick coatings, success depends on understanding your epoxy's condition and choosing the right removal method.
Frequently Asked Questions
What is the easiest way to remove old epoxy from concrete?
The easiest method depends on whether your epoxy is cured or uncured. For wet or uncured epoxy, chemical strippers or acetone-based solvents work quickly with minimal surface damage. For cured epoxy, mechanical grinding with a diamond cup wheel is most effective but requires proper equipment and safety precautions. Small areas may respond to heat guns followed by scraping. For large commercial spaces, professional grinding is often required to remove epoxy efficiently without damaging the concrete substrate.
Can you remove epoxy from concrete without grinding?
Yes, you can remove epoxy without grinding using chemical stripping solutions or solvents like acetone or isopropyl alcohol, which work best on uncured or thin coatings. Heat guns can soften cured epoxy enough to scrape away, though this method is labor-intensive and works only on smaller areas. However, grinding is often considered the most reliable method for thick, fully cured epoxy coatings because it removes residue completely and prepares the surface for new applications. Chemical-only removal may leave epoxy residue that interferes with new coatings.
What chemical removes epoxy from concrete?
Acetone and isopropyl alcohol are effective solvents for fresh or uncured epoxy. Commercial epoxy strippers formulated for concrete work on both cured and uncured coatings by breaking down the epoxy's chemical bonds. Always check product labels to ensure compatibility with your concrete and follow manufacturer safety instructions, including proper ventilation and protective equipment. For cured epoxy, chemical strippers may require extended dwell time or multiple applications, making mechanical removal more practical for thick coatings.
How do you prepare concrete after removing epoxy?
After epoxy removal, thoroughly clean the concrete surface with a pressure washer or degreaser to eliminate all chemical residue and epoxy flakes. Allow the surface to dry completely, then inspect for cracks, spalling, or damage caused during removal. Repair any damaged areas with concrete patching compound before applying new coatings. Test surface adhesion using a concrete bonding agent to ensure the new coating will adhere properly. Proper preparation prevents premature peeling and extends the life of your new epoxy or overlay system.
Tags: remove epoxy from concrete, removing old epoxy from concrete, chemical epoxy stripper for concrete, grinding epoxy off concrete, tools for removing epoxy from concrete
Frequently Asked Questions
The easiest method depends on whether your epoxy is cured or uncured. For wet or uncured epoxy, chemical strippers or acetone-based solvents work quickly with minimal surface damage. For cured epoxy, mechanical grinding with a diamond cup wheel is most effective but requires proper equipment and safety precautions. Small areas may respond to heat guns followed by scraping. For large commercial spaces, professional grinding is often required to remove epoxy efficiently without damaging the concrete substrate.
Yes, you can remove epoxy without grinding using chemical stripping solutions or solvents like acetone or isopropyl alcohol, which work best on uncured or thin coatings. Heat guns can soften cured epoxy enough to scrape away, though this method is labor-intensive and works only on smaller areas. However, grinding is often considered the most reliable method for thick, fully cured epoxy coatings because it removes residue completely and prepares the surface for new applications. Chemical-only removal may leave epoxy residue that interferes with new coatings.
Acetone and isopropyl alcohol are effective solvents for fresh or uncured epoxy. Commercial epoxy strippers formulated for concrete work on both cured and uncured coatings by breaking down the epoxy's chemical bonds. Always check product labels to ensure compatibility with your concrete and follow manufacturer safety instructions, including proper ventilation and protective equipment. For cured epoxy, chemical strippers may require extended dwell time or multiple applications, making mechanical removal more practical for thick coatings.
After epoxy removal, thoroughly clean the concrete surface with a pressure washer or degreaser to eliminate all chemical residue and epoxy flakes. Allow the surface to dry completely, then inspect for cracks, spalling, or damage caused during removal. Repair any damaged areas with concrete patching compound before applying new coatings. Test surface adhesion using a concrete bonding agent to ensure the new coating will adhere properly. Proper preparation prevents premature peeling and extends the life of your new epoxy or overlay system.