how-to
DIY Concrete Crack Repair for Epoxy Floors
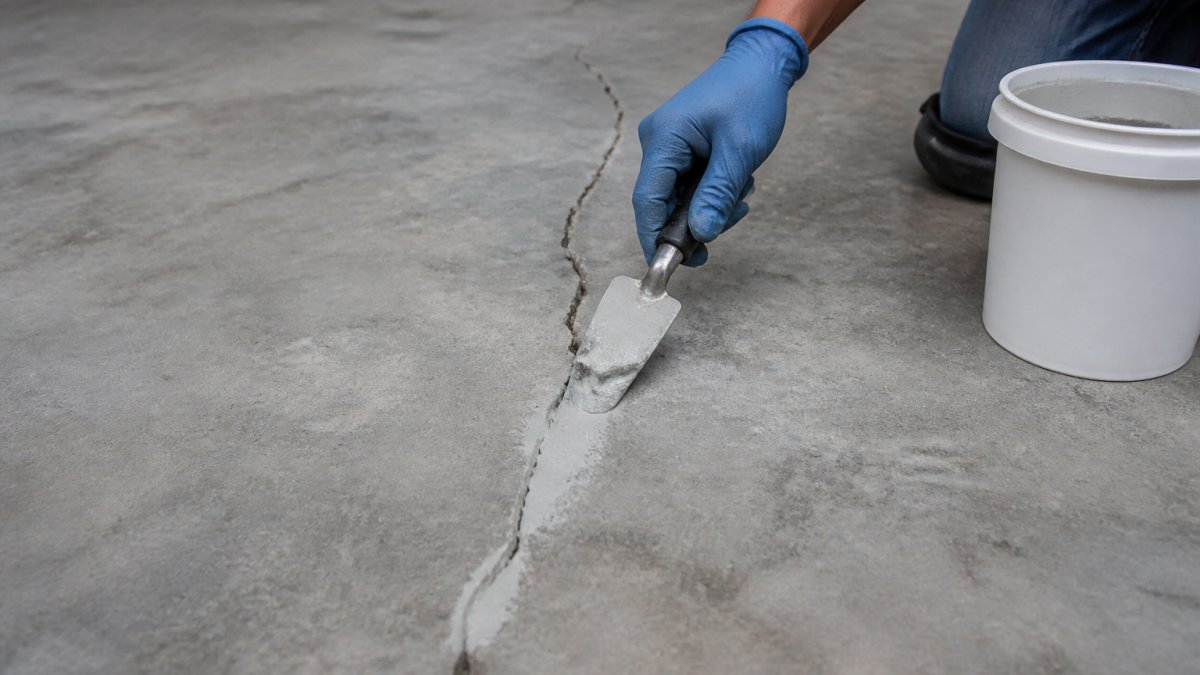
Table of Contents
- Why Concrete Crack Repair Matters Before Epoxy Flooring
- Diagnosing Cracks: Stable vs. Structural and Active Movement
- Tools and Materials for DIY Concrete Crack Repair
- How to Prepare Concrete for Epoxy Coating and Crack Repair
- Step-by-Step: Repair Concrete Cracks Before Epoxy Coating
- Epoxy Injection for Concrete Cracks: When and How to Use It
- Concrete Crack Filler Cure Time and Coating Compatibility
- Common Mistakes and When to Call a Professional
- Frequently Asked Questions
Last Updated: October 8, 2026
Why Concrete Crack Repair Matters Before Epoxy Flooring
Cracked concrete will ruin an epoxy floor coating, no matter how good the coating is, which is why diy concrete crack repair for epoxy deserves attention before you order a kit.
Concrete crack repair is the process of cleaning, filling, and sealing a crack so the slab acts as one solid surface again. Skip it, and the repair fails from below.
How Cracks Undermine an Epoxy Floor Coating
Epoxy is a thin, rigid layer that does not stretch. When the slab moves or a crack opens even slightly, the coating tears along that line, becoming a visible seam within months as water gets in and freeze-thaw cycles widen it.
Diagnosing Cracks: Stable vs. Structural and Active Movement
Not every crack should be filled by a homeowner, some need an engineer. Here is the diagnostic sequence.
Step 1: Measure and Record the Crack
Use a crack comparator card (a few dollars at most hardware stores) or feeler gauges to measure width at the widest point, and photograph the crack with a tape measure for scale. Width is your first filter:
- Under 1/8 inch: Usually a shrinkage crack. Often a DIY candidate.
- 1/8 to 1/4 inch: Investigate before filling. Could be shrinkage, could be movement.
- Over 1/4 inch: Treat as suspect until proven otherwise. Get a second opinion.
Step 2: Monitor for Active Movement
A crack is only "stable" if it has stopped moving, and you cannot know that from a single look. Use a crack monitor: a small plastic gauge with two halves you epoxy across the crack; as it opens or closes, the halves separate or overlap and the scale tells you how much.
Step 3: Look for Structural Red Flags
These signs mean stop and call a licensed structural engineer or foundation specialist:
- Vertical displacement: One side of the crack sits higher than the other. Run a straightedge across it, if you can rock the straightedge, the slab has shifted.
- Horizontal displacement: The two sides no longer line up laterally.
- Branching or stair-stepping: Cracks that fork, spider, or step diagonally across a slab suggest settlement or load movement, not shrinkage.
Any one of these is a professional call. Filling them with epoxy is cosmetic at best and dangerous at worst.
Step 4: Match the Crack to the Repair Method
Once you know the crack is stable, the width and location decide the filler:
| Crack Profile | Likely Cause | Best Repair |
|---|---|---|
| Hairline (<1/8 in), flat slab | Shrinkage | Thin two-part epoxy resin, gravity-fed |
| 1/8-1/4 in, flat slab | Shrinkage or minor movement | Epoxy putty or sand-filled mortar |
| Deep, narrow, stable | Shrinkage or old joint | Low-pressure epoxy injection |
| Wide (>1/4 in), stable | Shrinkage or old repair failure | Sand-filled repair mortar, possibly with primer |
| Any width, active or displaced | Movement, settlement, water | Flexible sealant or professional evaluation, not epoxy |
Checking for Water Intrusion and Moisture
Water is the silent killer of epoxy floors: if moisture pushes up through the slab, no coating will bond.
Tape a square of plastic sheeting to the bare concrete for 24 hours; condensation underneath means the slab is holding moisture and needs to dry out or be treated before you coat.
Look for these signs of water intrusion:
- Dark, damp patches around the crack
- White chalky residue, called efflorescence, near the crack edges
- Rust stains or a musty smell in the area
Tools and Materials for DIY Concrete Crack Repair
You need the right tools and the right filler for the crack size. Gather these before you start:
- Safety gear: nitrile gloves, safety glasses, and a dust mask
- Cleaning tools: wire brush, stiff broom, and a shop vacuum
- Application tools: margin trowel, putty knife, and a mixing cup
A margin trowel is the workhorse: its narrow blade fits tight cracks and lets you press filler in with control.
How to Prepare Concrete for Epoxy Coating and Crack Repair
Preparation is where most DIY jobs fail. A coating bonds to a clean, sound surface, and nothing else.
Widen the crack slightly with a wire brush or grinder so the filler can grip, then clean out every bit of debris.
Cleaning Dust and Loose Concrete from Cracks
Dust is the enemy of adhesion. Epoxy will not bond to a dusty surface, period.
Follow this sequence:
- Scrape out loose concrete and old filler with a wire brush.
- Blow or vacuum out the dust from deep in the crack.
- Wipe the crack edges with a clean, damp cloth.
- Let the area dry completely before filling.
If you are prepping a whole slab, this is also the time to grind the surface and remove any laitance, the weak top layer of concrete.
Step-by-Step: Repair Concrete Cracks Before Epoxy Coating
Follow this core process in order and you will get a repair that holds up under a coating.
Total Time: 2-4 hours for a few cracks, plus cure time Difficulty: Beginner to intermediate
What You'll Need: wire brush, shop vacuum, margin trowel, mixing cup, two-part epoxy or repair mortar, gloves, and safety glasses
Step 1: Clean the Crack [Time: 20 minutes]
Remove all loose concrete and dust. Vacuum the crack until it is completely clear.
Expected Result: A clean, dry crack with visible, sound edges.
Step 2: Mix Your Filler [Time: 5 minutes]
Two-part epoxy comes as a resin and a hardener. Mix them fully, following the ratio on the label. Stir for a full minute after the color turns even.
Call (919) 824-5403 or email craigrfear@gmail.com for a free estimate →
Step 3: Fill the Crack [Time: 15 minutes]
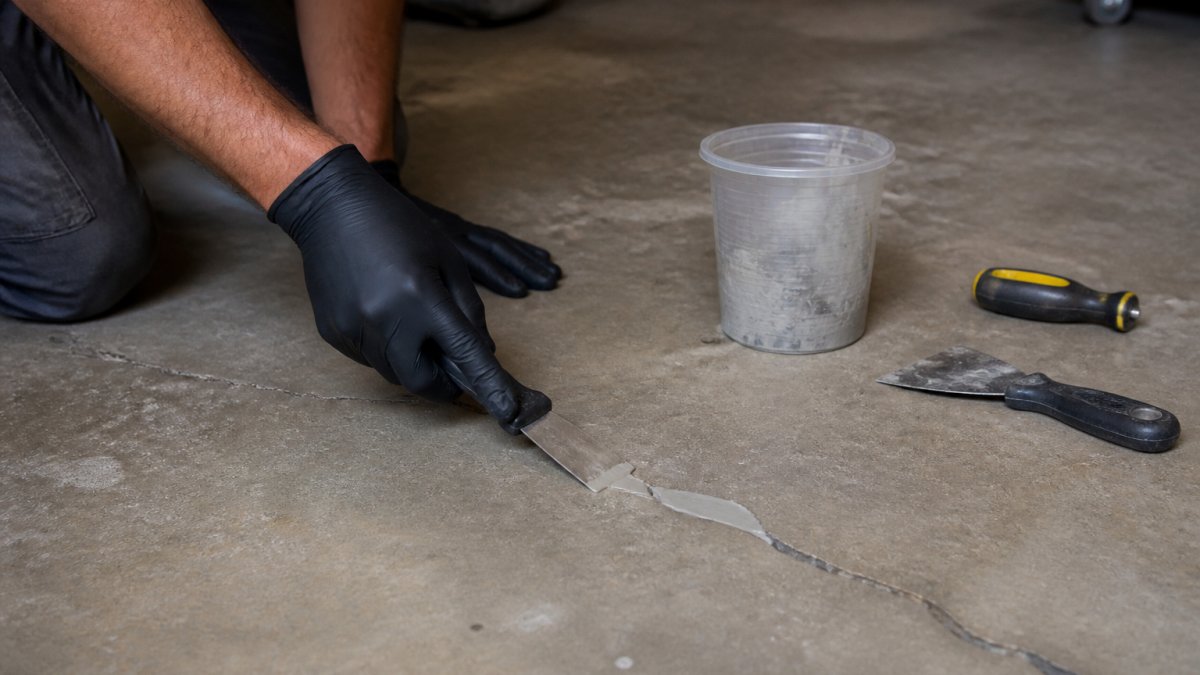
Press the filler into the crack with your margin trowel. Work from one end to the other. Overfill slightly so the filler sits just above the surface.
Step 4: Smooth and Let It Cure [Time: varies]
Scrape the surface level with the trowel. Wipe the edges clean. Then leave it alone until fully cured.
Epoxy Injection for Concrete Cracks: When and How to Use It
Epoxy injection is for deep cracks you cannot reach with a trowel. It pushes resin into the full depth of the crack under low pressure.
Use epoxy injection for concrete cracks when:
- The crack runs deep into the slab
- You cannot reach the bottom with a trowel
- The crack is stable but wide enough to accept an injection port
You drill small holes along the crack and set injection ports, seal the surface, then pump low-pressure epoxy through each port starting at the lowest point, filling the crack from the bottom up.
This takes more skill than surface filling, if your crack is large or your slab is critical, hire a pro.
Concrete Crack Filler Cure Time and Coating Compatibility
This is where DIY epoxy floors fail. The crack repair and the floor coating are two separate chemical systems that must bond to each other; get the cure window, surface profile, or moisture limit wrong and the coating delaminates, often months later, after you have moved the furniture back in.
Cure Time by Filler Type
"Cure" is not one event: two-part epoxies go through gel, set, and full-cure stages, and only the last is safe to coat over.
Typical cure windows at around 70°F:
| Filler Type | Set / Workable | Full Cure Before Coating | Notes |
|---|---|---|---|
| Two-part epoxy resin (injection or gravity) | 30-60 min | 24 hours minimum, often 3-7 days | Cooler temps extend cure; check the product data sheet |
| Epoxy putty | 15-30 min | 24 hours | Fast set, but full strength takes longer |
| Sand-filled epoxy mortar | 1-2 hours | 24-72 hours | Thicker sections cure slower |
| Polyurethane / flexible sealant | 24 hours | 7 days or per label | Some coatings will not bond to flexible sealants at all |
| Cementitious repair mortar | 2-4 hours | 7-28 days | Must be fully dry; moisture in the mortar will push coating off |
Cold slows cure dramatically: at 50°F, a two-part epoxy that cures in 24 hours at 70°F may need two to three times as long.
Amine blush is the hidden trap: many epoxy hardeners leave a waxy film as they cure, and that film blocks adhesion.
Coating Compatibility: The Four Things That Must Match
Before you coat over any crack repair, verify all four:
- Chemical compatibility. The coating manufacturer's data sheet will list approved substrates and primers. Some epoxy floor coatings require a specific primer over cementitious repairs; others bond directly. Never assume.
- Surface profile. Epoxy coatings need a roughened, open surface to mechanically key into, typically a Concrete Surface Profile (CSP) of 2 to 3 per the International Concrete Repair Institute's CSP scale. A troweled-smooth repair is too slick, so grind or scarify it flush and rough it up before coating.
- Moisture content. Most epoxy systems specify a maximum moisture vapor emission rate. If your slab is above that limit, no crack repair will save the coating, you need a moisture mitigation primer or a different floor system.
- Cure state. The filler must be fully cured, not just hard. A filler that is hard to the touch can still be releasing moisture or solvent.
Recoat Windows and the Timing Trap
Epoxy has a recoat window, the period during which a fresh coat chemically bonds to the previous one. Miss it (too early and the surface is still curing; too late and it has hardened and needs abrading) and you lose the chemical bond.
For crack repair followed by a full floor coating, the safe sequence is usually:
- Fill and finish the crack.
- Let the filler reach full cure per the data sheet.
- Grind the repair flush and open the surface profile.
- Clean all dust.
- Verify moisture and temperature are within the coating's limits.
- Apply the coating within its recoat window relative to any primer.
Temperature and Humidity Limits
Most two-part epoxies and epoxy floor coatings want substrate and ambient temperatures between roughly 60°F and 85°F, with relative humidity under about 75% to 80%.
An infrared thermometer on the slab tells you substrate temperature, which can differ from air temperature by 10 degrees or more, especially in a garage or on a slab-on-grade.
A Compatibility Checklist Before You Coat
Run through this before the coating bucket is opened:
- Filler is fully cured per its data sheet, not just hard
- Amine blush wiped off if the epoxy is not blush-free
- Repair ground flush and surface profile opened to the coating's spec
Common Mistakes and When to Call a Professional
Most DIY failures trace back to a few repeat mistakes. Avoid these and your repair will hold.
- Coating over a dirty crack. Dust kills the bond. Clean it out.
- Filling a moving crack. It will reopen and tear the coating.
- Skipping moisture testing. Trapped moisture pushes the coating off from below.
Call a professional when the crack is wide, deep, or structural, when you see water intrusion you cannot stop, or when the slab has shifted.
A cracked slab will defeat even the best epoxy coating if the repair underneath is rushed.
Frequently Asked Questions
Can I repair concrete cracks before epoxy coating?
Yes, and you should. Epoxy floor coating is thin and will not bridge a moving or wide crack on its own. Repair the crack first with an epoxy crack sealer, epoxy putty, or sand-filled repair mortar, let it cure fully, then grind the patch smooth so the coating bonds to a flat, sound surface. Skipping this step often leads to cracks telegraphing through the finished floor.
What is the best two-part epoxy concrete crack filler?
The best choice depends on crack width and location. For hairline to narrow cracks, a low-viscosity two-part epoxy resin that penetrates deeply works well. For wider cracks or divots, an epoxy putty or a repair mortar mixed with silica sand or manufactured sand gives you a fill that stays put. Look for products labeled for concrete crack repair and compatible with your planned epoxy floor coating.
How long should concrete crack filler cure before epoxy is applied?
Cure time depends on the product and conditions. Most two-part epoxy crack fillers reach a recoat-ready state in 4 to 24 hours at typical indoor temperatures, but full cure can take longer in cool or humid conditions. Always follow the manufacturer's data sheet. Test the patch for hardness and dryness before coating; applying epoxy over an uncured filler can cause bonding failure.
When should a concrete crack be repaired by a professional?
Call a professional if the crack is wider than a quarter inch, shows vertical displacement, runs across a structural slab, or reappears after repair. These signs point to active movement, water intrusion, or a foundation issue that a surface patch will not fix. A pro can assess whether epoxy injection, routing, or structural repair is needed before any coating goes down.
Tags: concrete crack repair, diy concrete crack repair for epoxy, repair concrete cracks before epoxy coating, how to prepare concrete for epoxy coating, concrete crack filler cure time
Frequently Asked Questions
Yes, and you should. Epoxy floor coating is thin and will not bridge a moving or wide crack on its own. Repair the crack first with an epoxy crack sealer, epoxy putty, or sand-filled repair mortar, let it cure fully, then grind the patch smooth so the coating bonds to a flat, sound surface. Skipping this step often leads to cracks telegraphing through the finished floor.
The best choice depends on crack width and location. For hairline to narrow cracks, a low-viscosity two-part epoxy resin that penetrates deeply works well. For wider cracks or divots, an epoxy putty or a repair mortar mixed with silica sand or manufactured sand gives you a fill that stays put. Look for products labeled for concrete crack repair and compatible with your planned epoxy floor coating.
Cure time depends on the product and conditions. Most two-part epoxy crack fillers reach a recoat-ready state in 4 to 24 hours at typical indoor temperatures, but full cure can take longer in cool or humid conditions. Always follow the manufacturer's data sheet. Test the patch for hardness and dryness before coating; applying epoxy over an uncured filler can cause bonding failure.
Call a professional if the crack is wider than a quarter inch, shows vertical displacement, runs across a structural slab, or reappears after repair. These signs point to active movement, water intrusion, or a foundation issue that a surface patch will not fix. A pro can assess whether epoxy injection, routing, or structural repair is needed before any coating goes down.