how-to
How to Apply Concrete Crack Filler Correctly
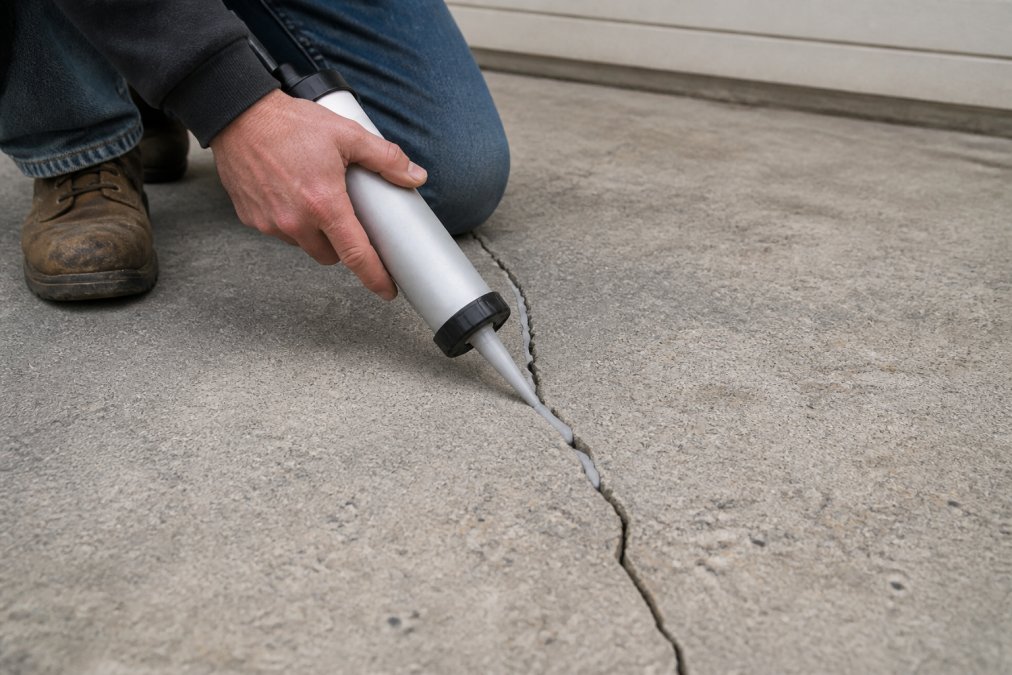
Table of Contents
- Concrete Crack Filler: Why Preparation Matters More Than Application
- Tools Needed for Concrete Crack Repair
- Step 1: Prepare the Crack Surface
- Step 2: Choose Your Concrete Crack Filler
- Step 3: Apply the Filler Correctly
- Repairing Wide Cracks in Concrete: Special Techniques
- How Long Does Concrete Filler Take to Cure?
- Avoid These Common Application Mistakes
- Frequently Asked Questions
Last Updated: September 5, 2026
Concrete Crack Filler: Why Preparation Matters More Than Application
Most homeowners assume the hardest part of concrete repair is squeezing the filler out of the tube. In reality, surface preparation determines whether your repair lasts five years or five weeks.
The single biggest mistake is treating every crack the same. A hairline crack in a garage floor and a wide gap in a driveway foundation require different approaches, materials, and preparation. Before you buy anything, diagnose whether the crack is cosmetic or structural.
Below, we'll walk through the complete process, from choosing the right tools to knowing exactly how long your repair needs to cure.
Tools Needed for Concrete Crack Repair
Stopping mid-job to hunt for a tool while filler begins to set creates a messy, weak repair.
The essential tools needed for concrete crack repair are straightforward and inexpensive:
- Wire brush or stiff nylon brush for debris removal
- Putty knife or margin trowel for applying and smoothing filler
- Vacuum or compressed air to blow out dust
- Caulk gun if using tube-style filler
- Backer rod for wide or deep cracks
- Bonding agent or primer, depending on the filler type
- Safety glasses and work gloves
Step 1: Prepare the Crack Surface
Filler cannot bond to loose debris, dust, or moisture, so your goal is a clean, dry, sound surface.
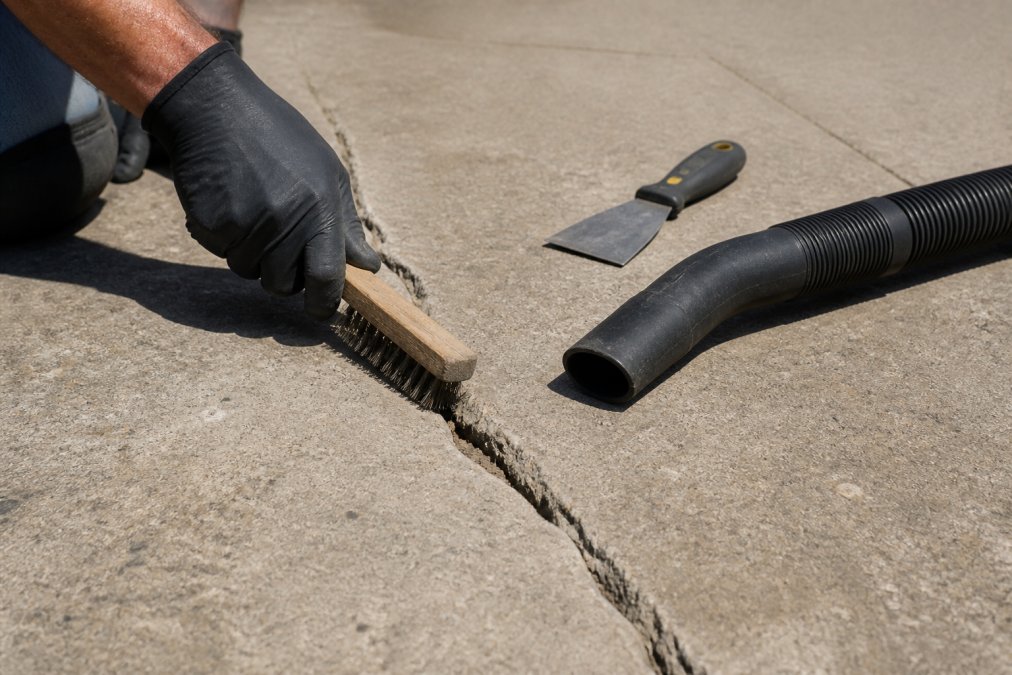
Start by removing all loose concrete and debris with your wire brush, scrubbing aggressively along the full length to expose solid material. Hairline cracks often hide wider voids beneath the surface that need to be opened up before filling.
After brushing, vacuum the crack thoroughly to remove every trace of dust. The surface must be completely dry before applying filler; concrete that looks dry on top can still hold moisture in deeper pores, compromising adhesion and extending curing time.
Step 2: Choose Your Concrete Crack Filler
The chemistry determines how a filler bonds, flexes, and holds up over time. Matching the product to the crack's width, location, and movement is the difference between a repair that lasts a season and one that lasts a decade.
Understanding the Three Main Filler Chemistries
Latex-based fillers are the most common DIY option. They are water-based, easy to clean up, and paintable, working well for hairline to moderate cracks in low-traffic areas. Their main weakness is poor resistance to prolonged water immersion and limited flexibility in extreme temperature swings.
Polyurethane fillers are the workhorse for exterior cracks. They cure by reacting with moisture in the air, forming a rubber-like seal that expands and contracts with the concrete. They are more expensive than latex and require a solvent for cleanup, but their durability justifies the cost.
Epoxy fillers are the strongest option, designed for structural repairs and heavy loads. They are two-part systems that cure into a rigid, high-strength plastic and are the only type that can restore some structural integrity. However, they do not flex, so they are a poor choice for moving cracks or exterior slabs subject to thermal expansion.
Matching the Filler to the Crack Profile
- Hairline cracks (under 1/8 inch): Use a liquid-grade, self-leveling polyurethane or a thin latex filler. These products have a watery viscosity that flows deep into the gap. A caulk-tube filler is too thick to penetrate and will only coat the surface, leaving a void below that will fail.
- Moderate cracks (1/8 to 1/4 inch): A standard polyurethane or latex filler in a caulk tube is appropriate. These products are thick enough to stay in place but flexible enough to handle minor movement. For interior floors, a latex filler is fine; for exterior slabs, choose polyurethane.
- Wide cracks (over 1/4 inch): Do not fill these with a caulk-tube product alone. The material will shrink as it cures and pull away from the walls. Instead, use a backer rod to fill the void, then cap it with a polyurethane filler or a trowel-grade epoxy patching compound. For cracks wider than 1/2 inch, a vinyl-reinforced concrete patching compound is often a better choice than a crack filler.
Location-Specific Considerations
- Driveways and exterior slabs: These surfaces face freeze-thaw cycles, UV exposure, and deicing salts. Choose a polyurethane filler rated for exterior use. Deicing salts can degrade latex fillers over time, so read the label for chemical resistance. If the driveway is subject to vehicle traffic, wait the full cure time before driving over the repair.
- Garage floors: These need a filler that can handle point loads from car jacks and temperature swings from the slab being heated in winter. Epoxy is the best choice here because it bonds strongly and resists oil and chemical spills. A polyurethane filler is an acceptable second choice, but it will not be as hard.
- Pool decks and wet areas: Constant moisture and chlorine or salt exposure will break down many fillers. Look for a product specifically rated for submerged or wet conditions, typically a polyurethane or epoxy formulation. Avoid latex entirely in these areas.
- Basement walls and floors: These are often damp, which complicates adhesion. Many fillers require a dry surface. If you cannot get the crack dry, look for a moisture-tolerant epoxy or a hydraulic cement product designed for wet conditions.
The Viscosity Trap
A frequent mistake is using a thin, self-leveling filler on a wide crack. These products sink into the void, shrink, and leave a concave depression that collects water. Conversely, a thick, trowel-grade compound cannot penetrate a hairline crack and will peel off within months.
A Note on Bonding Agents
Some fillers, particularly epoxies and high-performance polyurethanes, require a bonding agent or primer. This is not optional: the primer penetrates the concrete pores and creates a chemical bridge between the old surface and the new filler. Skipping it is a leading cause of delamination.
Step 3: Apply the Filler Correctly
With the surface clean and the right material selected, proper technique prevents air pockets, shrinkage, and weak adhesion.
Load the filler into your caulk gun and cut the nozzle at a 45-degree angle. The opening should be slightly narrower than the crack width so the material is forced down into the gap. Insert the nozzle deep into the crack and squeeze the trigger as you pull the gun steadily along the crack path, overfilling slightly.
For wide cracks, use a putty knife to press the filler firmly into the gap, working from the bottom up to eliminate voids. Once full, strike off the excess with the putty knife held at a slight angle to create a smooth, slightly recessed surface. A tapered edge helps the repair blend in and reduces chipping.
Repairing Wide Cracks in Concrete: Special Techniques
Repairing wide cracks in concrete, anything over a quarter inch, requires additional steps. Simply troweling filler into a wide gap leads to shrinkage and failure because the material cannot cure evenly at depth.
For wide or deep cracks, install a backer rod, a closed-cell foam rope pressed into the crack to create a solid backing and control filler depth. This prevents the filler from running down into the void and reduces the amount of expensive filler needed. The rod should sit about a quarter inch below the surface.
After installing the backer rod, apply a bonding agent to the crack walls if your filler requires it; skipping this step is a leading cause of delamination.
For very wide cracks with significant structural concerns, consider whether a simple filler is appropriate at all. Cracks wider than half an inch, or cracks that show vertical displacement between the two edges, may require a professional assessment (concrete.org). In these cases, the concrete itself may need to be cut out and replaced rather than patched.
Call (919) 824-5403 or email craigrfear@gmail.com for a free estimate →
How Long Does Concrete Filler Take to Cure?
Curing time is the most underestimated part of any concrete repair. Many people walk on a freshly filled crack after a few hours, only to find the filler has deformed or failed. The answer depends on the product, temperature, and humidity. installing backer rod.
Most latex-based fillers dry to the touch within two to four hours and can handle light foot traffic within 24 hours (quikrete.com). However, full cure, the point at which the material reaches its maximum strength, typically takes seven days. Epoxy-based fillers cure faster in terms of handling, often within 12 to 24 hours, but they also benefit from a full week before heavy use.
Environmental conditions dramatically affect curing time. Filler cures slower in cold, damp weather and faster in warm, dry conditions. The ideal application temperature for most concrete fillers is between 50 and 80 degrees Fahrenheit (sika.com). Below 40 degrees, many products will not cure at all. High humidity also slows the process and can leave the surface tacky for days.
| Filler Type | Dry to Touch | Foot Traffic | Vehicle Traffic | Full Cure |
|---|---|---|---|---|
| Latex-based | 2-4 hours | 24 hours | 3-7 days | 7 days |
| Polyurethane | 4-8 hours | 24-48 hours | 3-5 days | 5-7 days |
| Epoxy | 4-12 hours | 12-24 hours | 24-48 hours | 7 days |
| Self-leveling liquid | 3-6 hours | 24 hours | 5-7 days | 7 days |
Avoid These Common Application Mistakes
Even experienced DIYers make predictable errors when applying concrete crack filler. Beyond the basics of cleaning and overfilling, two areas are consistently overlooked: the impact of environmental conditions during the cure and the need for post-repair sealing.
The Most Common Errors
The most common mistake is applying filler to a damp or dirty crack. Concrete absorbs moisture from the ground and the air, and that moisture prevents the filler from bonding. Test the crack by pressing a piece of plastic wrap over it and sealing the edges. If condensation forms on the plastic within a few hours, the concrete is too wet to repair.
Another frequent error is overfilling the crack and leaving excess material proud of the surface. This excess gets sheared off by foot traffic or vehicle tires, creating a rough edge that collects debris and water. Always strike off the filler level with the surrounding concrete, or slightly below, using a putty knife.
Skipping the backer rod in wide cracks is a third common mistake. Filler applied at depth cures unevenly, shrinks, and pulls away from the crack walls. The result is a repair that looks fine for a month, then develops a new crack down the center.
The Environmental Trap: Temperature and Humidity Swings
Most guides tell you to check the weather before applying filler, but few explain why conditions during the entire curing period matter more than at the moment of application. If conditions change dramatically during the cure, the repair can fail even if the application was perfect.
Temperature: Most polyurethane and latex fillers cure best between 50°F and 80°F. Below 50°F, the reaction slows dramatically, and a freeze can expand water in latex products and crack the repair. Above 90°F, the surface sets before the material below releases solvents, creating blisters. Apply filler when the forecast shows stable temperatures within the ideal range for the next 48 to 72 hours.
Humidity: High humidity slows evaporation. A repair that feels dry after four hours in dry air may remain tacky for 24 hours or more above 80% relative humidity. If you must apply filler during humid conditions, extend the drying time before walking on the repair.
Direct sunlight: UV exposure during the cure can cause the surface of the filler to cure faster than the interior, leading to a wrinkled or cracked skin. If the crack is in direct sun, consider applying filler in the late afternoon so the initial cure happens overnight, or shade the repair with a board for the first 24 hours.
The Missed Step: Post-Repair Sealing
Once the filler has cured, the repair is not finished. The concrete around the crack is still porous and vulnerable to water penetration. In freeze-thaw climates, water seeps into the pores, freezes, expands, and pushes the filler out. This is why many repairs fail at the edges.
To prevent this, apply a penetrating concrete sealer over the entire repaired area after the filler has fully cured. It soaks into the pores, forming a hydrophobic barrier that protects the edges and prevents moisture from undermining the bond.
Choose a silane or siloxane-based penetrating sealer for exterior slabs. These products are breathable, meaning they allow moisture vapor to escape from the concrete while blocking liquid water from entering. Film-forming sealers, such as acrylics, can trap moisture and cause the concrete to spall in freeze-thaw conditions.
Apply the sealer with a pump sprayer or roller, covering the crack and about six inches of concrete on either side. Most penetrating sealers require two coats, applied 15 to 30 minutes apart. The sealer will not change the color of the concrete significantly, but it will provide a critical layer of protection.
Maintenance After the Repair
A properly filled and sealed crack still requires periodic attention. Inspect the repair twice a year for edge lifting, new parallel cracks, or water pooling. If you see any, clean the area, reapply filler if necessary, and refresh the sealer. Most penetrating sealers need reapplication every two to three years.
After your repair cures and is sealed, maintain it by keeping the crack clean and free of debris. Reapply filler and sealer every few years as part of routine maintenance. For larger repair projects, or when cracks indicate deeper structural issues, professional assessment is worth the cost. Concrete-Enhancements provides professional concrete repair and resurfacing across the Raleigh-Durham Triangle, NC Triad, and Coastal SC, backed by over 20 years of experience as a CTi Certified Dealer. If your concrete has more than surface-level damage, call (919) 824-5403 or email craigrfear@gmail.com for a free estimate.
Frequently Asked Questions
Do concrete crack fillers really work?
Yes, when you apply concrete crack filler correctly. The key is proper surface preparation and choosing the right product for the crack type. For hairline cracks, a liquid filler or caulk works well. For larger gaps, a sand-loaded filler or patching compound is necessary. The filler must be pressed firmly into the crack to fill the entire void and bond with the concrete substrate. If you skip cleaning or use the wrong product, the repair will fail regardless of the filler's quality.
What are the common mistakes to avoid when repairing concrete cracks?
The most common mistakes are skipping surface preparation, applying filler to a damp or dirty crack, and using the wrong type of filler. Many DIYers also fail to underfill deep cracks before applying the top layer, which can lead to shrinkage and cracking. Another frequent error is not tooling the joint to create a slight depression, which prevents the repair from sitting proud of the surface. Finally, walking on or painting the repair before the full curing time has elapsed ruins the bond.
How do you prepare a concrete crack before filling?
Proper preparation is critical. First, remove all loose debris, dirt, and vegetation from the crack using a wire brush or a high-pressure air compressor. If the crack is oily or contaminated, clean it with a concrete degreaser and rinse thoroughly. The crack must be completely dry before you apply the concrete crack filler. For wide or deep cracks, you may need to underfill the void with sand or install a backer rod to create a solid base for the filler and prevent it from sagging.
What is the best filler for repairing wide cracks in concrete?
For repairing wide cracks in concrete, you need a sand-loaded, pourable filler or a vinyl-reinforced patching compound. These products are formulated to handle the movement and load that wider cracks experience. Before applying the filler to a wide crack, install a backer rod to fill the void and reduce the amount of material needed. This also helps prevent the filler from sinking or cracking during the curing process. Always check the product label to confirm it is rated for the width of your crack.
This article was written using GrandRanker
Frequently Asked Questions
Yes, when you apply concrete crack filler correctly. The key is proper surface preparation and choosing the right product for the crack type. For hairline cracks, a liquid filler or caulk works well. For larger gaps, a sand-loaded filler or patching compound is necessary. The filler must be pressed firmly into the crack to fill the entire void and bond with the concrete substrate. If you skip cleaning or use the wrong product, the repair will fail regardless of the filler's quality.
The most common mistakes are skipping surface preparation, applying filler to a damp or dirty crack, and using the wrong type of filler. Many DIYers also fail to underfill deep cracks before applying the top layer, which can lead to shrinkage and cracking. Another frequent error is not tooling the joint to create a slight depression, which prevents the repair from sitting proud of the surface. Finally, walking on or painting the repair before the full curing time has elapsed ruins the bond.
Proper preparation is critical. First, remove all loose debris, dirt, and vegetation from the crack using a wire brush or a high-pressure air compressor. If the crack is oily or contaminated, clean it with a concrete degreaser and rinse thoroughly. The crack must be completely dry before you apply the concrete crack filler. For wide or deep cracks, you may need to underfill the void with sand or install a backer rod to create a solid base for the filler and prevent it from sagging.
For repairing wide cracks in concrete, you need a sand-loaded, pourable filler or a vinyl-reinforced patching compound. These products are formulated to handle the movement and load that wider cracks experience. Before applying the filler to a wide crack, install a backer rod to fill the void and reduce the amount of material needed. This also helps prevent the filler from sinking or cracking during the curing process. Always check the product label to confirm it is rated for the width of your crack.