ultimate-guide
Epoxy Floor Moisture Barrier Solutions: Complete Guide
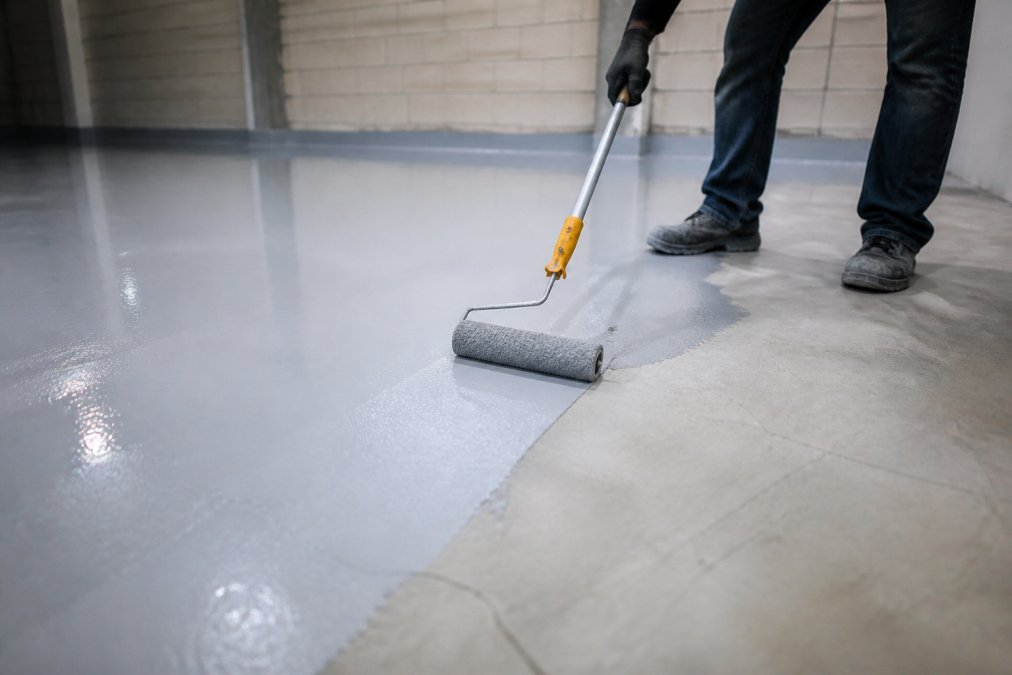
Table of Contents
- What Is a Moisture Barrier for Epoxy Floors?
- Why Moisture Mitigation Is Critical for Epoxy Success
- Concrete Moisture Testing Methods Before Application
- Epoxy Primer vs. Moisture Barrier: What's the Difference?
- Epoxy Floor Bubbling Causes and How to Prevent Them
- Step-by-Step Application Process for Moisture Barriers
- Long-Term Maintenance and Durability of Moisture-Protected Floors
- Frequently Asked Questions
Last Updated: September 26, 2026
What Is a Moisture Barrier for Epoxy Floors?
A moisture barrier for epoxy floors is a specialized coating system designed to block moisture vapor transmission through concrete slabs before applying decorative epoxy topcoats. It acts as a protective seal between the concrete substrate and the final floor finish, preventing water vapor from rising through the slab and compromising the integrity of the epoxy system above it.
Concrete is porous by nature. Even when it appears dry to the touch, moisture continuously migrates upward through capillary action and vapor transmission. This moisture movement is measured in pounds per 1,000 square feet per 24 hours, a metric called the moisture vapor emission rate. When this vapor reaches an epoxy coating that hasn't been properly sealed at the substrate level, it creates pressure that literally pushes the coating away from the concrete. The result: bubbling, peeling, and complete failure within months.
The moisture barrier serves three critical functions: it blocks vapor transmission, it improves adhesion between the concrete and topcoat, and it prevents osmotic blistering, the phenomenon where water pressure builds up beneath the coating and literally blisters the surface. Without this step, even premium topcoats will fail on moisture-prone slabs.
Why Moisture Mitigation Is Critical for Epoxy Success
Moisture is the single largest cause of epoxy floor failure in residential and commercial applications. This isn't a minor concern, it's the difference between a floor that lasts 10 years and one that fails within 12 months.
The problem escalates in certain environments. Basements, ground-floor commercial spaces, areas with poor drainage, and regions with high humidity create conditions where concrete wicks moisture continuously. Hydrostatic pressure, the force exerted by water pushing upward through the slab, compounds the issue. In these scenarios, a moisture barrier isn't optional; it's mandatory.
According to American Concrete Institute guidance on concrete moisture, concrete can retain significant moisture content even after appearing dry. Standard concrete cures over 28 days, but moisture can remain trapped within the matrix for months or years. When epoxy is applied without addressing this moisture first, the coating becomes a moisture trap. Vapor pressure builds beneath the surface, and the coating delaminates, separates from the concrete.
The consequences extend beyond aesthetics. A failed epoxy coating leaves concrete vulnerable to staining, dusting, and accelerated deterioration. In commercial spaces, this creates liability and safety issues. In homes, it's a frustrating waste of money and effort.
Concrete Moisture Testing Methods Before Application
Testing concrete moisture levels before application is non-negotiable. This determines whether a simple moisture barrier will suffice or whether the slab requires additional mitigation strategies.
The calcium chloride test is the most widely used method for measuring moisture vapor emission rates. A small dish of calcium chloride is placed on the concrete surface under a sealed dome for 24 hours. The chloride absorbs moisture from the concrete, and the weight gain is measured and converted to an MVTR (moisture vapor emission rate). Results above 3 pounds per 1,000 square feet per 24 hours indicate high moisture conditions requiring a strong moisture barrier system.
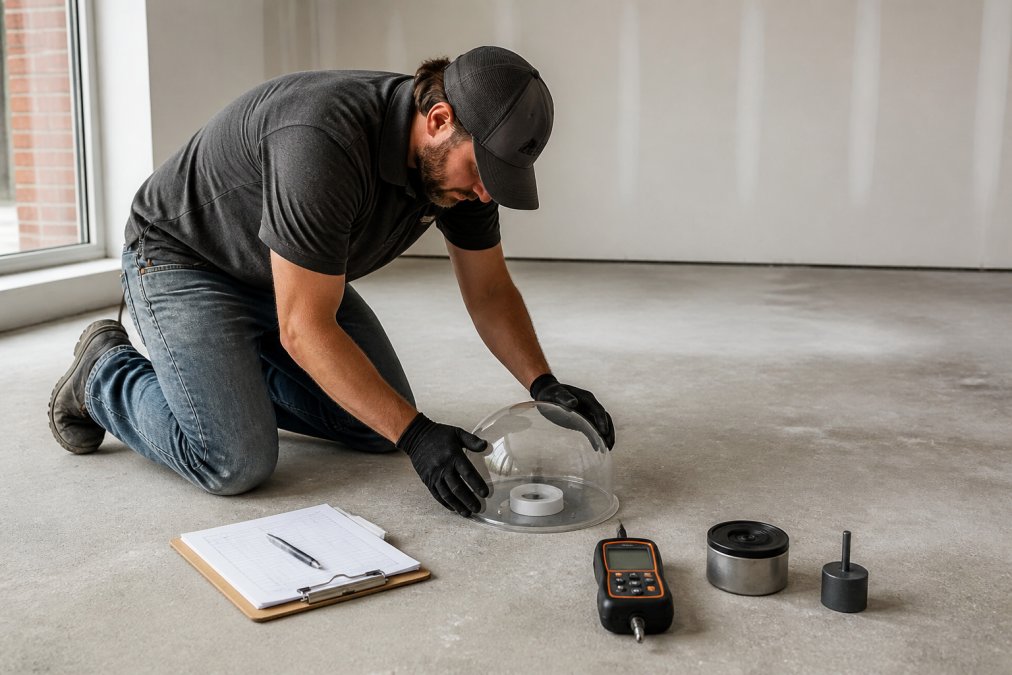
Relative humidity testing using in-situ probes offers another approach. A probe is inserted into the concrete to a specific depth, and the relative humidity at that depth is measured. Readings above 75% relative humidity at the epoxy application depth signal moisture concerns. This method is more expensive than calcium chloride testing but provides real-time data.
A third method, the plastic sheet test, is simple but less precise. A clear plastic sheet is taped flat to the concrete surface for 24 hours. If condensation forms on the underside of the sheet, moisture is present. This qualitative test indicates a problem exists but doesn't quantify severity.
The calcium chloride test remains the industry standard because it directly measures what matters: the rate at which moisture vapor will pass through the slab after epoxy is applied. If results exceed 3 pounds per 1,000 square feet per 24 hours, a 100% solids epoxy moisture barrier is essential.
Epoxy Primer vs. Moisture Barrier: What's the Difference?
These terms are often used interchangeably, but they describe different functions, though high-performance products combine both.
A standard epoxy primer improves adhesion between the concrete and topcoat. It seals minor surface porosity and creates a uniform base for the decorative coat. However, a basic primer may not be formulated to handle significant moisture vapor transmission. It's designed for aesthetics and adhesion, not vapor blocking.
Call (919) 824-5403 or email craigrfear@gmail.com for a free estimate →
A dedicated moisture barrier, by contrast, is engineered specifically to stop moisture vapor transmission. It uses 100% solids formulation, meaning no water or solvents are present in the product, to create maximum density and impermeability. Products are rated to block 25 pounds or more of moisture vapor per 1,000 square feet per 24 hours. This is a two-component system that requires precise mixing and application.
The best approach combines both functions: use a 100% solids epoxy moisture barrier as the base layer, then apply a decorative topcoat over it. This layered system addresses both the moisture problem and the aesthetic goal. For slabs with extreme moisture issues or high hydrostatic pressure, this is the only reliable solution.
Epoxy Floor Bubbling Causes and How to Prevent Them
Bubbling in epoxy floors is almost always a moisture-related failure. Understanding the mechanics helps explain why prevention matters so much.
Bubbles form when moisture vapor trapped beneath the epoxy coating builds pressure and forces the coating away from the concrete. This is called osmotic blistering. The coating hasn't failed chemically, it's been physically pushed off by vapor pressure. If you puncture a bubble, moisture escapes, and the bubble collapses. This confirms the underlying cause.
Delamination follows bubbling. Once the coating separates from the substrate, moisture continues to migrate beneath it. The affected area expands, and the entire coating system eventually fails. By the time bubbling becomes visible, the damage is already extensive.
Other causes of bubbling are far less common but worth noting. Improper surface preparation, failing to remove dust, oil, or contamination, can trap pockets of air that expand during curing. Applying epoxy in high humidity or moisture conditions can introduce moisture directly into the coating during application. Over-application of primer or topcoat can create thick areas that cure unevenly and trap air pockets.
Prevention requires addressing moisture first. Test the slab. If MVTR is elevated, apply a moisture barrier before the topcoat. Prepare the surface properly: grind or shot-blast to remove all contaminants and create a profile that promotes adhesion. Apply epoxy under appropriate conditions: temperature between 50-85°F, relative humidity below 85%, and avoid application during rain or high-moisture periods.
Step-by-Step Application Process for Moisture Barriers
Proper application of an epoxy floor moisture barrier requires precision and attention to detail. Skipping steps or rushing the process undermines the entire system.
Step 1: Surface Preparation (Time: 4-8 hours) Remove all coatings, sealers, and contaminants from the concrete. Grind the surface to expose fresh concrete and create a profile that promotes adhesion. A concrete grinder with 80-120 grit abrasive removes old coatings and roughens the surface. Vacuum thoroughly to remove all dust. Any remaining dust will create a barrier between the concrete and the moisture barrier coating.
Step 2: Moisture Testing (Time: 24 hours) Perform calcium chloride testing to establish baseline moisture levels.
| Step | Duration | Key Point |
|---|---|---|
| Surface Preparation | 4-8 hours | Remove all contaminants and create profile |
| Moisture Testing | 24 hours | Establish baseline MVTR levels |
| Concrete Repair | 2-24 hours | Fill defects and allow full cure |
| Final Cleaning | 2-4 hours | Remove dust; allow concrete to dry |
| Mixing | 10-15 minutes | Follow precise mixing ratios and duration |
| Application | 2-4 hours | Maintain uniform thickness and wet edge |
| Curing | 24-72 hours | Allow full cure before topcoat |
Long-Term Maintenance and Durability of Moisture-Protected Floors
Systems that received proper moisture testing, barrier application, and ongoing maintenance remain intact and functional. The failures seen are almost always traceable to skipped or inadequate moisture mitigation during installation.
Frequently Asked Questions
Do you need a moisture barrier for epoxy floors?
Yes, a moisture barrier is essential if your concrete slab shows moisture levels above 3 pounds per 1,000 square feet per 24 hours (measured via calcium chloride test). Without one, moisture vapor will cause bubbling, peeling, and delamination within months. Even slabs that feel dry on the surface can have hidden moisture from groundwater or hydrostatic pressure. A 100% solids epoxy moisture barrier seals the substrate and prevents coating failure.
What happens if moisture gets under an epoxy floor?
Moisture trapped beneath an epoxy floor causes osmotic blistering, where water vapor pushes up against the coating and creates bubbles. This leads to peeling, loss of adhesion, and complete system failure. The topcoat separates from the substrate, allowing more moisture to penetrate. Once delamination starts, the entire floor may need removal and reapplication. This is why testing concrete for moisture before application is non-negotiable.
What is the best moisture barrier for epoxy floors?
The best moisture barrier depends on your concrete's moisture level and environment. 100% solids epoxy primers (rated to block up to 25 lbs. of moisture vapor) are industry-standard for high-moisture slabs. Professional-grade options offer superior sealing for bare concrete in high-moisture environments. Concrete-Enhancements can assess your slab and recommend the right solution for your specific conditions.
How often does a moisture-protected epoxy floor need maintenance?
A properly installed moisture barrier system requires minimal maintenance: regular sweeping, occasional damp mopping with pH-neutral cleaner, and avoiding harsh chemicals or excessive water exposure. Inspect annually for signs of wear, especially in high-traffic areas. If you notice any peeling or discoloration, contact a professional immediately. Long-term durability depends on substrate preparation quality and using the correct barrier product for your moisture conditions.
Tags: epoxy floor moisture barrier, epoxy floor moisture barrier solutions, concrete moisture testing methods, epoxy floor bubbling causes, epoxy primer vs moisture barrier
Frequently Asked Questions
Yes, a moisture barrier is essential if your concrete slab shows moisture levels above 3 pounds per 1,000 square feet per 24 hours (measured via calcium chloride test). Without one, moisture vapor will cause bubbling, peeling, and delamination within months. Even slabs that feel dry on the surface can have hidden moisture from groundwater or hydrostatic pressure. A 100% solids epoxy moisture barrier seals the substrate and prevents coating failure.
Moisture trapped beneath an epoxy floor causes osmotic blistering, where water vapor pushes up against the coating and creates bubbles. This leads to peeling, loss of adhesion, and complete system failure. The topcoat separates from the substrate, allowing more moisture to penetrate. Once delamination starts, the entire floor may need removal and reapplication. This is why testing concrete for moisture before application is non-negotiable.
The best moisture barrier depends on your concrete's moisture level and environment. 100% solids epoxy primers (rated to block up to 25 lbs. of moisture vapor) are industry-standard for high-moisture slabs. Professional-grade options offer superior sealing for bare concrete in high-moisture environments. Concrete-Enhancements can assess your slab and recommend the right solution for your specific conditions.
A properly installed moisture barrier system requires minimal maintenance: regular sweeping, occasional damp mopping with pH-neutral cleaner, and avoiding harsh chemicals or excessive water exposure. Inspect annually for signs of wear, especially in high-traffic areas. If you notice any peeling or discoloration, contact a professional immediately. Long-term durability depends on substrate preparation quality and using the correct barrier product for your moisture conditions.