how-to
How to Protect Outdoor Furniture With Epoxy Resin
Last Updated: October 30, 2026
Quick Summary
Epoxy resin can protect outdoor furniture, but only in covered or semi-protected spots like porches, pergolas, or under awnings. Full sun exposure causes yellowing, so a UV-stable topcoat is usually needed. Choose a product with a clear UV rating and temperature range.
- Standard epoxy resin is not built for constant sun and rain exposure.
- Sunlight causes epoxy resin to yellow and dull over time.
- A UV-stable urethane or varnish topcoat helps prevent yellowing.
- Check moisture with a pin-type meter before mixing and applying.
- Keep furniture out of use until the epoxy resin is fully hard.
Table of Contents
- Is Epoxy Resin Suitable for Outdoor Furniture?
- Choosing the Best Epoxy Resin for Outdoor Use
- UV-Resistant Epoxy Resin and Preventing Yellowing
- Preparing and Applying Epoxy to Outdoor Furniture
- Epoxy Resin Curing Time and Temperature Limits
- Epoxy Versus Spar Urethane for Outdoor Furniture
- Scheduling Your Outdoor Furniture Coating Project
- Frequently Asked Questions
Is Epoxy Resin Suitable for Outdoor Furniture?
Epoxy resin can protect outdoor furniture, but only in the right conditions. Most standard epoxies are not built for constant sun and rain.
The main concern is sunlight. Epoxy that sits in direct UV light can yellow and dull over time. Epoxy may not have enough UV protection on its own, so a second finish may still be needed.
Here is a quick way to decide:
- Covered or shaded spots: Epoxy can work well with a good topcoat.
- Full sun all day: Use a UV-stable product or plan a protective topcoat.
- Rain and humidity: Epoxy resists water well once fully cured.
- Freezing or very hot climates: Check the product's temperature limits first.
Choosing the Best Epoxy Resin for Outdoor Use
The best epoxy resin for outdoor use is one that states its UV and weather ratings clearly.
Look for these details on the product page:
- A stated UV resistance or "UV-stable" formula
- A clear temperature range for application and use
- Manufacturer instructions for outdoor use
- Mixing ratio and cure time that fit your project
Be careful with some outdoor-marketed products, and check the manufacturer's stated temperature limits. Never assume "outdoor" on a label means it handles any climate.
If you are unsure which product fits your furniture, call us or email for a free estimate. You can also browse professional-grade CTi coating systems and epoxy finishes.
UV-Resistant Epoxy Resin and Preventing Yellowing
Yellowing is the most common complaint with epoxy outdoors. Sunlight breaks down the resin over time, and the surface turns amber or cloudy.
The usual fix is a UV-stable topcoat. Applying a UV-stable urethane or varnish over cured epoxy is a common way to help prevent yellowing.
For more detail on how UV damage happens and how to prevent it, read Preventing Epoxy Floor Yellowing Outdoors.
Preparing and Applying Epoxy to Outdoor Furniture
Surface preparation is a key factor in coating performance, so work through the steps below in order. A furniture-specific sequence matters because chairs, tables, and benches have edges, joints, and end grain that behave differently from a flat floor or a craft blank. Work through the steps below in order, and do not skip the moisture and temperature checks.
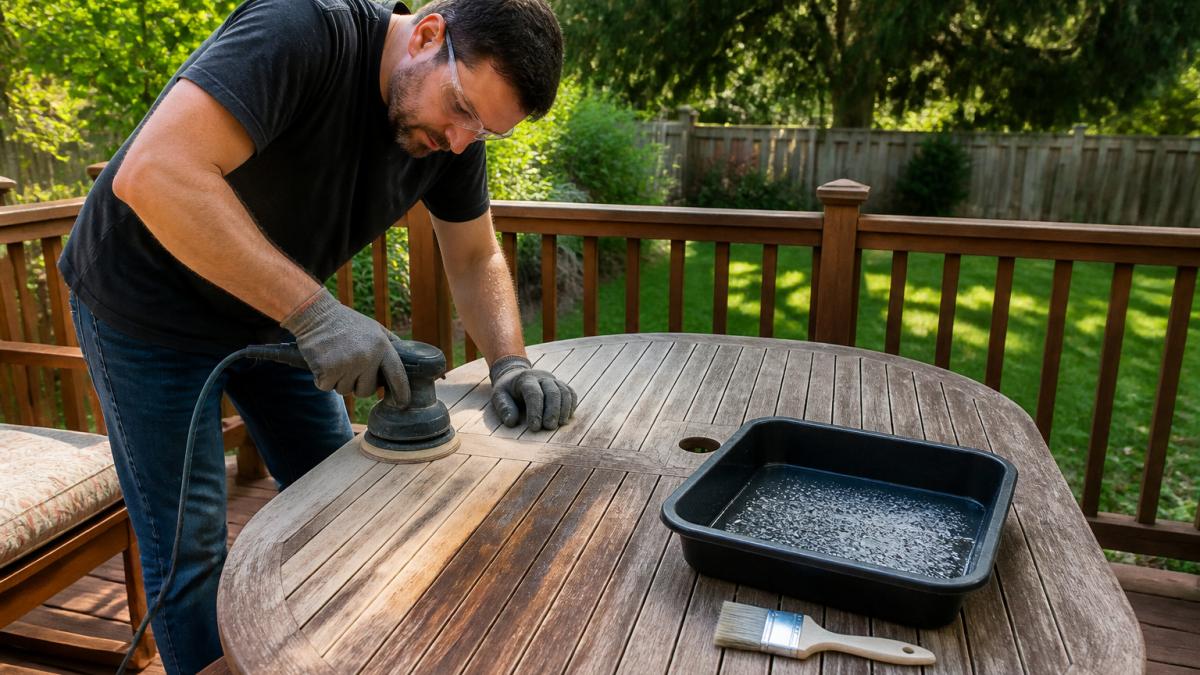
1. Clean and strip the surface
Remove dirt, pollen, oil, and old finish before you sand. A degreaser or a mix of mild dish soap and warm water works for most furniture; rinse and let it dry. If the piece has an old film finish (varnish, polyurethane, paint), strip or sand it back to bare wood where the epoxy will bond.
2. Sand for grip, not for gloss
Sand bare wood to a uniform 120-150 grit. Rougher scratches give the epoxy a mechanical key; polished wood gives it nothing to hold. Sand end grain and edges carefully, these are the spots that dry out fastest and drink the most resin. Vacuum and tack-cloth the surface so dust does not get trapped under the coating.
3. Check moisture before you mix
Wet wood traps water under the resin and causes bubbles, cloudiness, and lifting. A pin-type moisture meter is the reliable check; furniture wood is commonly checked for moisture content before coating, with a pin-type moisture meter as the reliable check. If the wood feels damp or has been rained on, move it under cover and wait.
4. Seal and stabilize absorbent areas
End grain, knots, and repaired joints can soak up resin unevenly and leave dry spots or bubbles. A thin seal coat, sometimes called a sizing coat, on these areas helps even out absorption before the main coats go on. Follow the product's recoat window so the seal coat and the next coat bond chemically rather than just sitting on top of each other.
5. Mix by ratio, not by eye
Measure resin and hardener by volume or weight exactly as the label states. Guessing the ratio is the most common cause of sticky, soft, or cloudy spots. Mix slowly and scrape the sides and bottom of the container; unmixed resin on the walls will not cure. Pour the mixed batch into a second clean container and mix again, a common two-cup method that catches unmixed material.
6. Apply thin, even coats
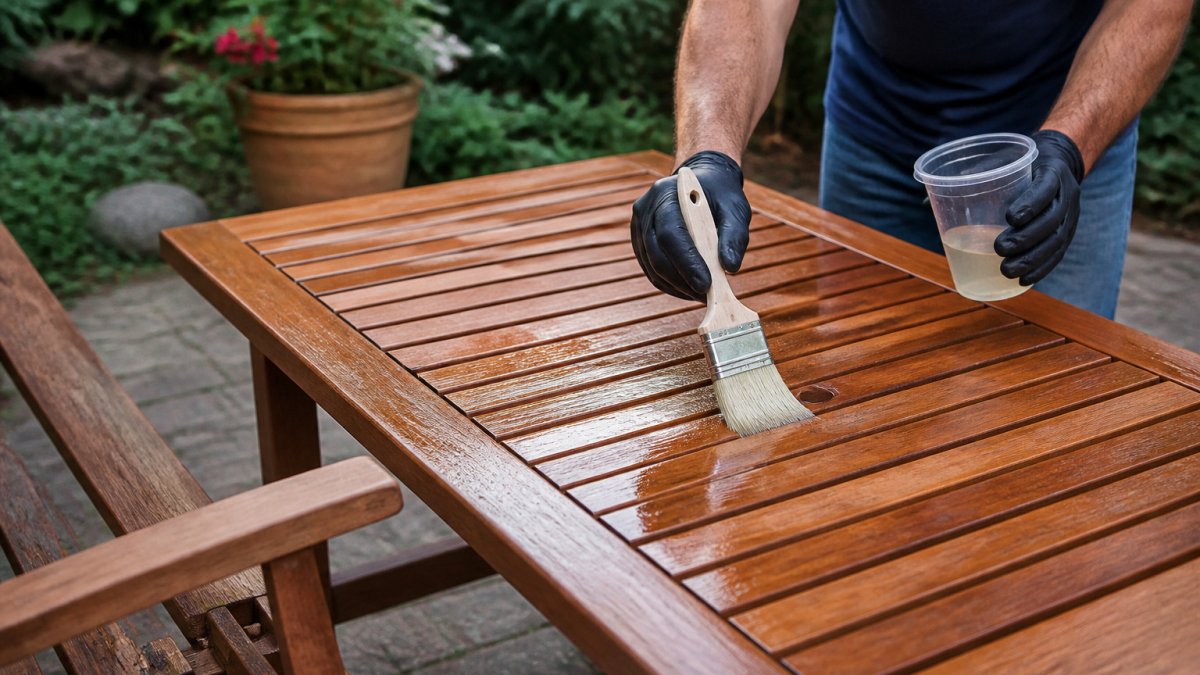
Brush or pour in thin coats rather than one heavy flood. Thick pours overheat, trap air, and cure unevenly, especially on vertical surfaces like chair legs and table aprons. Work with the piece level where possible, and watch for drips on the underside and at joints. Build the finish in layers, respecting the manufacturer's recoat window between coats.
Call (919) 824-5403 or email craigrfear@gmail.com for a free estimate →
7. Topcoat for UV protection
Epoxy alone is not a UV finish. You can see how a polyurethane topcoat over epoxy adds UV stability and scratch resistance. Once the epoxy is cured to the manufacturer's specification, a UV-stable topcoat can help slow yellowing.
8. Inspect edges and joints after curing
Edges, joints, and any spot where the coating is thin are where water gets in first.
If you are unsure whether your piece is a good candidate, call us. We can help you match the resin and topcoat to your exposure, budget, and finish goals.
The steps below summarise the application sequence, with the key action and timing for each stage.
| Step | What to do | Time or frequency |
|---|---|---|
| Clean and strip | Remove dirt, oil and old finish to bare wood | Before sanding |
| Sand | Sand bare wood to 120-150 grit | Uniform grit across the piece |
| Check moisture | Use a pin-type moisture meter | Before mixing |
| Seal absorbent areas | Apply a thin seal coat to end grain and knots | Within the recoat window |
| Mix by ratio | Measure resin and hardener exactly as labelled | Per the product label |
| Apply thin coats | Brush or pour thin, even layers | Respect the recoat window |
| Topcoat for UV | Apply a UV-stable topcoat over cured epoxy | After cure to spec |
| Inspect edges | Check edges and joints for thin spots or pinholes | After final cure |
Epoxy Resin Curing Time and Temperature Limits
Epoxy needs time, the right temperature, and dry air to cure. Rushing this step causes soft surfaces, cloudiness, weak adhesion, and amine blush, a waxy film that can keep a topcoat from bonding. The guidance below is a practical framework; always defer to the product's own technical data sheet, because formulations differ.
Temperature: the working window
Epoxy products are typically formulated for a moderate application range, so always check the product's data sheet for its stated temperature window. Below that range, cure slows dramatically and may never reach full hardness; above it, pot life shortens and the resin can bubble or cure too fast to level. Check both the air temperature and the surface temperature of the furniture, a piece in direct sun can be much hotter than the air.
Humidity and dew point
High humidity slows cure and can leave a blush on the surface. Condensation on a cool surface can contaminate the bond, so avoid applying epoxy when moisture is condensing on the surface. If the furniture feels clammy or has visible condensation, wait. Indoor or covered work areas with moving air cure more predictably than a humid backyard.
Rain-free curing window
Epoxy needs to be protected from rain until the label's stated cure time has passed, since rain on a tacky coat can cause surface defects. If the forecast is uncertain, move the piece under cover or into a garage for the initial cure.
Pot life versus cure time
Pot life is how long the mixed resin stays workable; cure time is how long it takes to reach full hardness. They are not the same number. Warm conditions shorten pot life, so mix smaller batches when it is hot. Cold conditions lengthen both, so do not assume a batch that is still tacky after the stated cure time is defective, check the temperature first.
Full cure and return to service
Keep furniture out of use until the epoxy is fully hard, not just dry to the touch. A fingernail test in an inconspicuous spot is a reasonable field check, but the label's full-cure time is the real benchmark. Using a piece too early can leave marks, dents, and imprints that are hard to fix.
Climate-specific notes
- Hot, sunny climates: Work early in the day in shade, mix small batches, and watch for bubbling on dark surfaces that absorb heat.
- Cool, damp climates: Extend cure time, use a covered work area, and check dew point before coating.
- Coastal and marine exposure: Salt air and humidity raise the bar; a marine-grade epoxy and a UV-stable topcoat are the safer combination.
- Seasonal swings: Wood moves with humidity. Coat during a stable stretch rather than in the middle of a wet-to-dry transition, and inspect joints after the first seasonal change.
If you are unsure whether your conditions are within range, call us. We can help you plan the application window and choose a product that fits your climate. Our [pricing depends on quantity, dates, and delivery; contact us for a current quote] approach means you get a real estimate for your job, not a guess.
Epoxy Versus Spar Urethane for Outdoor Furniture
Epoxy is not the only option for outdoor wood. Spar urethane, a marine-grade varnish, is a common alternative, and many woodworkers prefer it for outdoor furniture.
Epoxy builds a thick, glass-like surface and resists water well. It can yellow in sunlight unless topcoated.
Penetrating oils are a third choice. They soak into the wood and are easy to refresh, but they offer less surface protection.
Scheduling Your Outdoor Furniture Coating Project
Plan your project around weather and your time, choosing a dry stretch with mild temperatures when possible. Allow enough time for each coat and the final cure.
If you would rather hand the work to a professional, call (919) 824-5403 or email craigrfear@gmail.com for a free estimate.
Frequently Asked Questions
Is epoxy resin OK for outdoor furniture?
Epoxy resin can be used on outdoor furniture, but it is not a complete outdoor finish on its own. Outdoor epoxy guidance stresses evaluating weather and UV resistance, and recommends topcoating cured epoxy with a UV-stable urethane or varnish to help prevent yellowing. Product guidance also notes that epoxy performs best in covered or semi-protected areas. Some outdoor-rated products list temperature limits, so always check the manufacturer's stated conditions before committing to a project.
Will epoxy resin hold up in direct sunlight?
Direct sunlight is the main challenge for epoxy. Ultraviolet exposure can cause yellowing and discoloration over time, and standard epoxy is not designed to resist UV on its own. Choosing a UV-stable product and applying a UV-stable topcoat helps reduce this risk. A forum commenter cautioned that epoxy alone may not provide adequate UV protection outdoors, which is consistent with the general guidance to add a protective finish. Furniture in full sun will still need more maintenance than pieces under a roof.
How long does epoxy resin take to cure before outdoor use?
Cure time varies by product, mixing ratio, and temperature, so follow the manufacturer's data sheet for the exact schedule. Many epoxies reach handling strength within hours but need days or longer to fully cure. Temperature changes can slow or stop curing, so avoid applying in cold, damp, or extremely hot conditions. Protect freshly coated furniture from rain, dew, and dust until the surface is fully hardened.
Is epoxy better than spar urethane for outdoor furniture?
Epoxy and spar urethane serve different roles. Epoxy forms a hard, glossy, waterproof film, but it is less flexible and can yellow in sunlight unless it is topcoated with a UV-stable finish. Spar urethane is designed for exterior wood and flexes with wood movement, which makes it a common choice for outdoor furniture exposed to weather. For pieces that need a durable clear finish in full sun, many owners pair the two or choose spar urethane alone.

Tags: epoxy resin, epoxy resin for outdoor furniture protection, best epoxy resin for outdoor use, uv-resistant epoxy resin, epoxy resin curing time, epoxy versus spar urethane for outdoor furniture
Frequently Asked Questions
Epoxy resin can be used on outdoor furniture, but it is not a complete outdoor finish on its own. Outdoor epoxy guidance stresses evaluating weather and UV resistance, and recommends topcoating cured epoxy with a UV-stable urethane or varnish to help prevent yellowing. Product guidance also notes that epoxy performs best in covered or semi-protected areas. Some outdoor-rated products list temperature limits, so always check the manufacturer's stated conditions before committing to a project.
Direct sunlight is the main challenge for epoxy. Ultraviolet exposure can cause yellowing and discoloration over time, and standard epoxy is not designed to resist UV on its own. Choosing a UV-stable product and applying a UV-stable topcoat helps reduce this risk. A forum commenter cautioned that epoxy alone may not provide adequate UV protection outdoors, which is consistent with the general guidance to add a protective finish. Furniture in full sun will still need more maintenance than pieces under a roof.
Cure time varies by product, mixing ratio, and temperature, so follow the manufacturer's data sheet for the exact schedule. Many epoxies reach handling strength within hours but need days or longer to fully cure. Temperature changes can slow or stop curing, so avoid applying in cold, damp, or extremely hot conditions. Protect freshly coated furniture from rain, dew, and dust until the surface is fully hardened.
Epoxy and spar urethane serve different roles. Epoxy forms a hard, glossy, waterproof film, but it is less flexible and can yellow in sunlight unless it is topcoated with a UV-stable finish. Spar urethane is designed for exterior wood and flexes with wood movement, which makes it a common choice for outdoor furniture exposed to weather. For pieces that need a durable clear finish in full sun, many owners pair the two or choose spar urethane alone.