how-to
How to Prevent Concrete Cracks in Garage Floor: 7 Steps
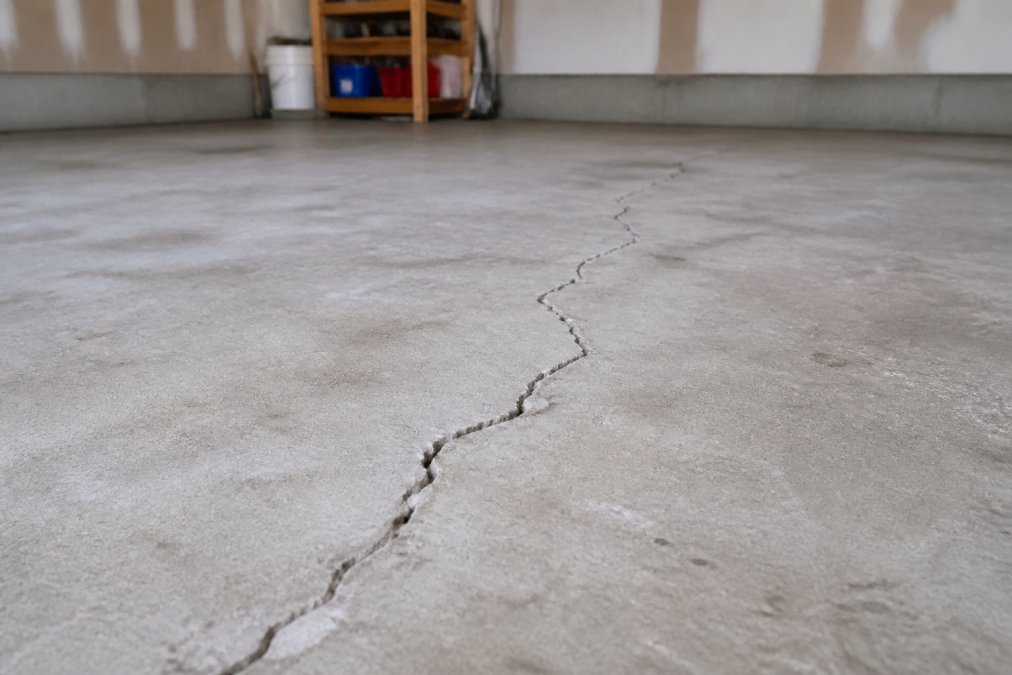
Table of Contents
- Step 1: Start with a Solid Sub-Base and Sub-Grade
- Step 2: Proper Concrete Mix Design and Reinforcement
- Step 3: Concrete Control Joints Spacing and Placement
- Step 4: Curing Concrete Garage Floor the Right Way
- Step 5: Best Concrete Sealer for Garage Floors
- Long-Term Maintenance and When to Call a Pro
- Frequently Asked Questions
Why Garage Floors Crack: Shrinkage vs. Structural Issues
Most garage floor cracks are not a sign of foundation failure; they appear within the first few weeks after pouring because the concrete was not given the right conditions to harden properly. Understanding the difference between cosmetic shrinkage cracks and serious structural movement is the first step in learning how to prevent concrete cracks in garage floor step by step.
Shrinkage cracks are thin, hairline fractures that appear as the concrete loses moisture and contracts during curing. They are typically surface-level and rarely threaten structural integrity. Structural cracks, by contrast, are wider, often feature one side raised above the other, and result from soil settlement, tree roots, or heavy loads exceeding the slab's design capacity.
A common mistake is treating every crack the same. If concrete cracks garage floor wider than a quarter of an inch or shows vertical displacement between the two edges, you may have a sub-base problem that no sealant will fix. The Portland Cement Association's guide on concrete cracking notes that most cracking stems from preventable issues during placement and curing rather than from the concrete material itself.
Step 1: Start with a Solid Sub-Base and Sub-Grade
The ground beneath your garage floor determines whether it will crack. Concrete is only as strong as what it sits on, and many homeowners skip this step because it is invisible once the slab is poured.
Proper sub-base preparation begins with removing all organic topsoil, which compresses and decays over time. The exposed sub-grade should be compacted with a plate compactor, then topped with 4 to 6 inches of compacted gravel or crushed stone. This granular layer allows water to drain away from the slab instead of pooling beneath it, reducing the risk of frost heave and settling.
Many contractors recommend a soil test before pouring. Clay-heavy soils expand when wet and shrink during dry spells, exerting tremendous pressure on a slab. If you are building on expansive soil, the sub-base depth and compaction effort must increase accordingly. Skipping this step means your concrete cracks garage floor within the first year, and no surface repair will correct the underlying movement.
Step 2: Proper Concrete Mix Design and Reinforcement
The concrete mix plays a major role in crack resistance. For a garage floor, use a mix with a compressive strength of at least 4,000 psi (cement.org). The water-to-cement ratio matters more than most realize: too much water makes concrete easier to place but dramatically increases shrinkage as it dries.
Reinforcement controls where cracks form, not whether they form. Wire mesh and rebar both work but must be positioned correctly. Wire mesh should sit in the upper third of the slab, supported on chairs. Rebar is better for slabs carrying heavy loads and should be tied at intersections to create a continuous grid.
Reinforcement does not make concrete crack-proof. It holds the concrete together when shrinkage or minor movement occurs, turning a wide gap into a series of hairline cracks that stay tight and harmless.
Step 3: Concrete Control Joints Spacing and Placement
Control joints are the single most effective tool for preventing random cracking. A control joint is a deliberate, weakened line that tells the concrete where to crack. Without them, the slab will find its own crack location, and it will not be straight or clean.
Concrete control joints spacing follows a simple rule: the slab thickness in inches multiplied by 24 to 36 gives the maximum joint spacing in inches (cement.org). A 4-inch slab, for example, needs joints every 8 to 12 feet. Joints should also divide the slab into roughly square sections rather than long rectangles, since long narrow sections tend to crack diagonally.
The timing of the joint cut matters as much as the placement. Joints must be cut within 6 to 12 hours after finishing, before shrinkage stress builds. Waiting a day or two means the concrete has already started cracking on its own. A crack chaser or early-entry saw creates the groove, cut to a depth of at least one-quarter of the slab thickness.
Step 4: Curing Concrete Garage Floor the Right Way
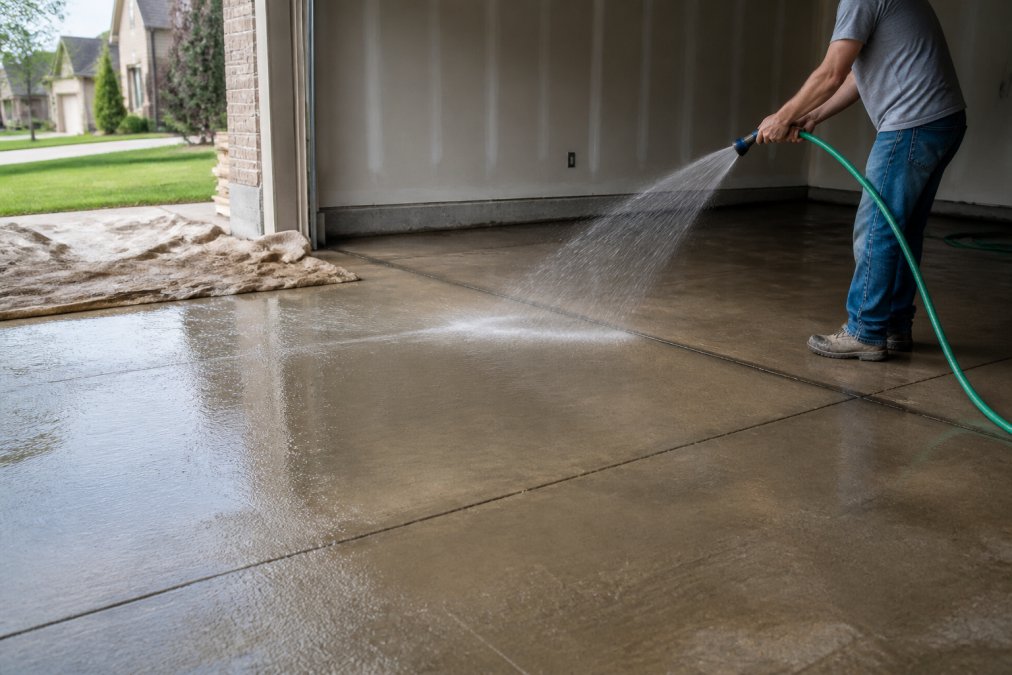
Curing is the process of keeping concrete moist and at a stable temperature while it gains strength, and it is the most neglected step in residential concrete work. Concrete reaches its design strength only if it retains enough moisture for the chemical reaction called hydration to continue over several days.
The first 7 days after pouring are critical. The slab should be kept continuously moist using wet burlap, a soaker hose, or a liquid curing compound. The goal is to slow evaporation so the surface does not dry faster than the interior, which creates tensile stress and surface cracking.
A concrete garage floor that cures properly for 7 days will be significantly harder and more resistant to cracking than one left to dry on its own. Many contractors finish the surface and walk away, assuming the concrete will be fine. It will not. The difference between a floor that lasts 30 years and one that cracks within 3 is often just the curing process.
Step 5: Best Concrete Sealer for Garage Floors
Selecting the best concrete sealer for garage floors is not about picking the most expensive product. It is about matching the chemistry to your climate, your exposure to deicing salts, and whether you plan to park on it immediately. Most top-ranking guides stop at 'apply a sealer,' but the real depth is in understanding how different sealers behave under freeze-thaw cycles and UV exposure.
Penetrating sealers are the workhorses of garage floor protection. These silicon-based compounds (silanes, siloxanes, or siliconates) penetrate the concrete matrix and chemically react to form a hydrophobic lining inside the pores. They do not change the surface appearance, making them the default choice if you intend to apply an epoxy or polyaspartic coating later. Their primary job is to block moisture vapor transmission and prevent water from entering the slab, the root cause of freeze-thaw damage in colder regions. They will not protect against oil stains or chemical spills, but they significantly reduce the risk of spalling when water freezes inside the concrete.
Film-forming sealers (acrylics, urethanes, and epoxies) sit on the surface and provide a physical barrier. Acrylics are the most common DIY option because they are inexpensive and easy to apply, but they are soft and wear quickly under vehicle traffic. A high-solids acrylic lasts 1 to 2 years in a garage with daily parking; a solvent-based acrylic is more durable but emits strong VOCs. Urethanes are harder and more chemical-resistant than acrylics, making them better for garages where deicing salts are tracked in during winter. The trade-off is that urethanes are more expensive and require a perfectly clean, dry surface to bond. prevent driveway cracks.
Call (919) 824-5403 or email craigrfear@gmail.com for a free estimate →
Polyaspartic coatings are the premium choice for a reason. These two-part aliphatic polyureas cure rapidly, often allowing you to park on the floor within 12 to 24 hours. Unlike many epoxies, they do not yellow under UV light, which matters if your garage door is left open. They also handle the freeze-thaw cycle better because they maintain flexibility at low temperatures. Their key differentiator is chemical resistance: they stand up to gasoline, brake fluid, and road salt far better than acrylics or standard epoxies. The downside is cost and application skill. Polyaspartics have a short pot life, beginning to cure within minutes of mixing, so they are not a beginner-friendly DIY project.
Climate-specific prevention is the angle most guides miss. In northern states with freeze-thaw cycles, the sealer's primary job is to keep water out of the slab. A penetrating sealer applied every 3 to 5 years is often sufficient. In southern climates with high heat and intense UV, the bigger risk is thermal expansion and surface degradation. A film-forming sealer with UV stabilizers is more appropriate there, because it reflects heat and protects the surface from oxidation. In coastal areas, salt air accelerates corrosion of embedded reinforcement, so a penetrating sealer that blocks chloride intrusion is critical.
Application matters as much as product choice. The slab must be clean, dry, and free of any curing compounds or old coatings. Most manufacturers require the concrete to be at least 28 days old before sealing. For penetrating sealers, the surface should be dry to allow proper penetration; for film-forming sealers, the surface should be dry to prevent blistering. Temperature ranges are printed on every label and are not suggestions. Applying a film-forming sealer when the slab temperature is above 90°F or below 50°F will cause it to fail prematurely.
If you are unsure which chemistry fits your garage, test a small area first. Apply the sealer to a 2-foot square patch, let it cure fully, and then pour water and oil on it. If the water beads and the oil does not soak in within 15 minutes, the sealer is doing its job. If either liquid penetrates, you need a different product or a second coat.
Long-Term Maintenance and When to Call a Pro
Prevention does not end when the concrete cures. A garage floor responds to seasonal changes, chemical exposure, and mechanical stress. The most effective way to keep it crack-free is to follow a structured maintenance schedule that catches small issues before they become structural problems. Most guides offer vague advice like 'inspect regularly.' This section gives you a concrete calendar and a clear decision framework for when DIY maintenance is no longer enough.
The Garage Floor Health Calendar is a four-season approach that aligns maintenance tasks with the conditions that actually stress your slab.
Spring (after the last freeze): Inspect control joints for debris and old sealer that has peeled or worn away. Clean the joints with a wire brush or shop vacuum to remove grit that prevents the joint from opening and closing freely. If you used a film-forming sealer, check for wear patterns near the garage door where tires and foot traffic are heaviest. Reapply sealer to those high-wear zones if the surface no longer beads water. Also check for any new hairline cracks that appeared during the winter freeze-thaw cycle.
Summer (high heat and UV exposure): Sweep the floor weekly to remove abrasive grit that acts like sandpaper under tires. If your garage door faces west or south, check for surface discoloration or chalking, which indicates UV degradation of a film-forming sealer. Clean up oil or coolant spills immediately, because summer heat thins these fluids and allows them to penetrate deeper into the concrete. If you park a vehicle with a slow leak, place a drip pan under it rather than relying on the sealer.
Fall (before the first freeze): This is the most critical maintenance window. Clean the floor thoroughly with a degreaser and rinse it completely. Inspect the control joints for any cracks that have widened beyond 1/8 inch, which suggests the joint filler has failed. Reapply a penetrating sealer if it has been more than 3 years since the last application. If you live in a climate where deicing salts are used, consider applying a sacrificial coating of a cheap acrylic sealer near the garage door. This layer will take the brunt of salt damage and can be stripped and reapplied each year without harming the underlying concrete.
Winter (freeze-thaw stress): Do not park a warm vehicle on a frozen slab and expect no consequences. The temperature differential causes the concrete to expand and contract unevenly. If you must park inside, let the vehicle idle outside for a minute to let the tires warm up before driving in. Knock snow and ice off your tires before entering the garage. Salt that falls off your car will melt and refreeze in the concrete pores, causing spalling over time. Sweep up any salt residue weekly.
When to call a professional: The decision framework is simpler than most homeowners think. You can handle any crack that is hairline (less than 1/8 inch wide), does not change width over time, and does not allow water to pass through. These are shrinkage cracks and can be filled with a polyurea or epoxy crack filler. Call a professional if any of the following are true: the crack is wider than 1/4 inch, one edge is raised above the other by more than 1/8 inch, the crack is actively growing (measure it monthly and compare), water seeps through the crack during rain, or you see multiple parallel cracks suggesting soil settlement. These signs point to sub-base failure or structural movement, and no surface repair will hold.
For most garage floors, the best time to prevent cracks is before the concrete is poured. Proper sub-base compaction, correct mix design, well-placed control joints, and disciplined curing will keep your floor solid for decades. If you are planning a new garage floor or need to repair an existing one that has already cracked, Concrete-Enhancements brings over 20 years of experience to residential and commercial concrete work across the Raleigh-Durham Triangle, NC Triad, and Coastal SC. As a CTi Certified Dealer, we handle professional concrete repair and durable epoxy and polyaspartic coatings.
Frequently Asked Questions
Is it normal for a concrete garage floor to crack?
Some cracking is normal, but not inevitable. Hairline shrinkage cracks often appear within the first few months as excess water evaporates. The key is distinguishing these from structural cracks caused by sub-base failure or missing control joints. Proper curing and correct concrete control joints spacing dramatically reduce the risk. If you see cracks wider than 1/4 inch or with vertical displacement, call a professional to assess structural integrity.
How do control joints help prevent garage floor cracking?
Control joints create weak planes that direct where concrete cracks as it shrinks during curing. Without them, tensile stress finds its own path, often resulting in random, unsightly cracks. For a standard 4-inch garage slab, concrete control joints spacing should be 8 to 12 feet apart. Joints should be cut to a depth of one-quarter of the slab thickness within 24 hours after finishing.
What is the best concrete sealer for garage floors?
For garage floors, a penetrating sealer or a high-build polyaspartic coating works best. Penetrating sealers protect against moisture vapor transmission and deicing salts without creating a film that can peel. Polyaspartic coatings offer superior durability and UV stability. Avoid basic acrylic sealers in garages since they wear quickly under vehicle traffic. Apply sealer only after the concrete has fully cured, typically 28 days.
Does curing time affect the likelihood of garage floor cracks?
Yes, curing time is one of the most critical factors. Properly curing concrete garage floor surfaces keeps moisture in the slab during the first 7 days, allowing hydration to continue and compressive strength to develop. Skip curing and the surface dries too fast, creating shrinkage cracks. Maintain moisture with wet burlap, curing compound, or plastic sheeting for at least 7 days after pouring.
Tags: concrete cracks garage floor, how to prevent concrete cracks in garage floor step by step, concrete control joints spacing, best concrete sealer for garage floors, curing concrete garage floor
Frequently Asked Questions
Some cracking is normal, but not inevitable. Hairline shrinkage cracks often appear within the first few months as excess water evaporates. The key is distinguishing these from structural cracks caused by sub-base failure or missing control joints. Proper curing and correct concrete control joints spacing dramatically reduce the risk. If you see cracks wider than 1/4 inch or with vertical displacement, call a professional to assess structural integrity.
Control joints create weak planes that direct where concrete cracks as it shrinks during curing. Without them, tensile stress finds its own path, often resulting in random, unsightly cracks. For a standard 4-inch garage slab, concrete control joints spacing should be 8 to 12 feet apart. Joints should be cut to a depth of one-quarter of the slab thickness within 24 hours after finishing.
For garage floors, a penetrating sealer or a high-build polyaspartic coating works best. Penetrating sealers protect against moisture vapor transmission and deicing salts without creating a film that can peel. Polyaspartic coatings offer superior durability and UV stability. Avoid basic acrylic sealers in garages since they wear quickly under vehicle traffic. Apply sealer only after the concrete has fully cured, typically 28 days.
Yes, curing time is one of the most critical factors. Properly curing concrete garage floor surfaces keeps moisture in the slab during the first 7 days, allowing hydration to continue and compressive strength to develop. Skip curing and the surface dries too fast, creating shrinkage cracks. Maintain moisture with wet burlap, curing compound, or plastic sheeting for at least 7 days after pouring.