how-to
Concrete Polishing Techniques Explained for 2026
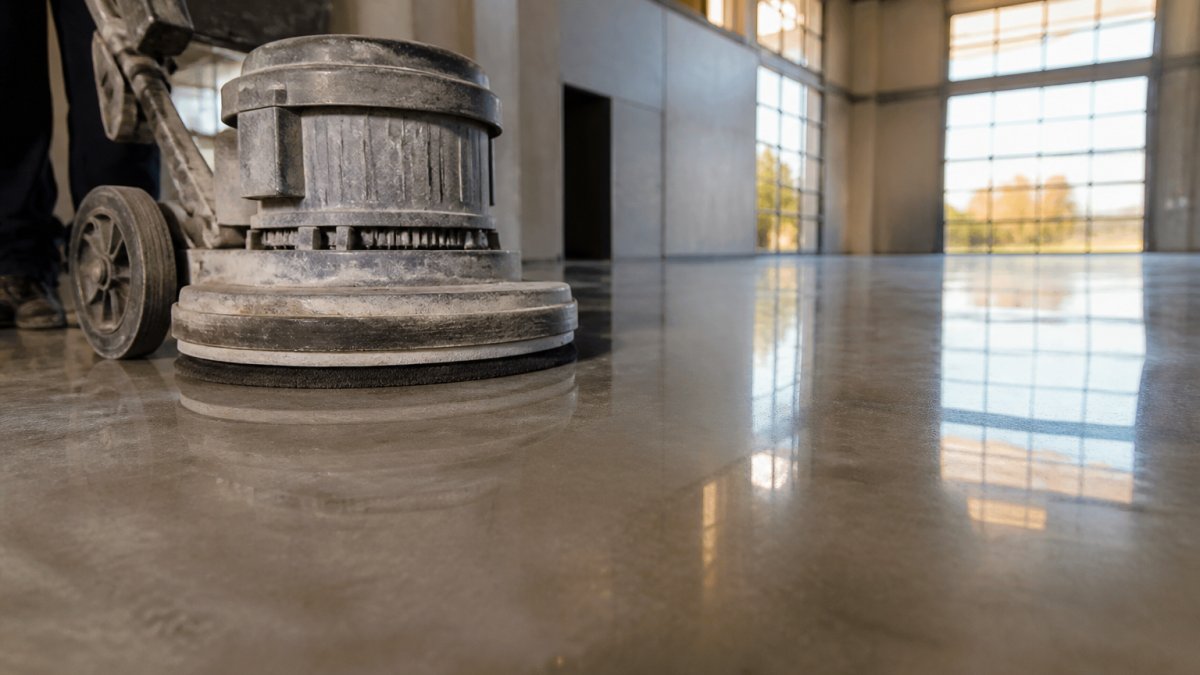
Table of Contents
- Concrete Polishing Techniques Explained: What You Need to Know First
- The Concrete Polishing Steps: A Sequenced Workflow
- Polished Concrete Grit Sequence: Matching Abrasives to Your Finish
- Why a Concrete Densifier Matters for Hardness and Durability
- Polished Concrete vs Epoxy Coating: Which Fits Your Space?
- Troubleshooting Common Polishing Defects and When to Call a Pro
- Frequently Asked Questions
Last Updated: October 4, 2026
Concrete Polishing Techniques Explained: What You Need to Know First
Concrete polishing techniques explained in plain terms come down to one idea: you grind a concrete floor with progressively finer diamond abrasives until the surface turns smooth and reflective. This guide from Concrete-Enhancements walks through surface preparation, the grit sequence, densifiers, and how to choose between polished concrete and an epoxy coating.
Here is the part most guides skip: polishing is not a coating. You are not covering the slab. You are refining it. That changes everything about how you prep, how long the job takes, and what can go wrong.
The American Concrete Institute's guidance on concrete surface preparation treats surface prep as the single biggest factor in finish quality. Skip it and no amount of fine grinding will save the floor.
Below, we break down each stage of the process, the abrasive sequence, and the fixes for common defects. We also cover when polishing is the wrong call entirely.
Surface Preparation and Removal of Imperfections
Surface preparation is where the job is won or lost. Before any polishing begins, the slab has to be clean, sound, and free of anything that will show through later.
Start by assessing the concrete. Look for cracks, spalling, old coatings, and construction marks. These need repair before grinding, not after.
- Remove existing coatings, glue, and paint
- Fill cracks and patch spalled areas
- Grind off high spots and level uneven sections
- Check for moisture issues before you commit
A common mistake is grinding over a slab with a failing sealer still on it. The abrasive loads up, the finish turns blotchy, and you end up stripping and starting over.
How Mechanical Grinding and Polishing Work
Mechanical grinding and polishing use a floor grinding machine fitted with diamond tooling. The machine spins diamond abrasives against the slab, shaving the surface down in tiny increments.
Two tooling types do the work:
- Metal-bond segments handle the coarse grinding and leveling
- Resin-bond abrasives handle the fine grinding and surface refinement
Think of it as sanding wood, but with diamonds and a much bigger machine. Each pass removes the scratches left by the previous one.
A diamond grinder with a dust shroud connects to a vacuum. That dust control matters. Silica dust is a real health hazard, and the OSHA standards on respirable crystalline silica require proper containment and protection on concrete grinding jobs.
The Concrete Polishing Steps: A Sequenced Workflow
The concrete polishing steps follow a fixed order. Skip a stage and the finish suffers. Here is a typical sequence.
- Assess the slab condition and moisture
- Repair cracks, patches, and surface imperfections
- Coarse grinding with metal-bond segments
- Apply densifier and let it cure
- Fine grinding through the resin-bond grits
- Polish to the target sheen
- Apply a guard or sealer for stain protection
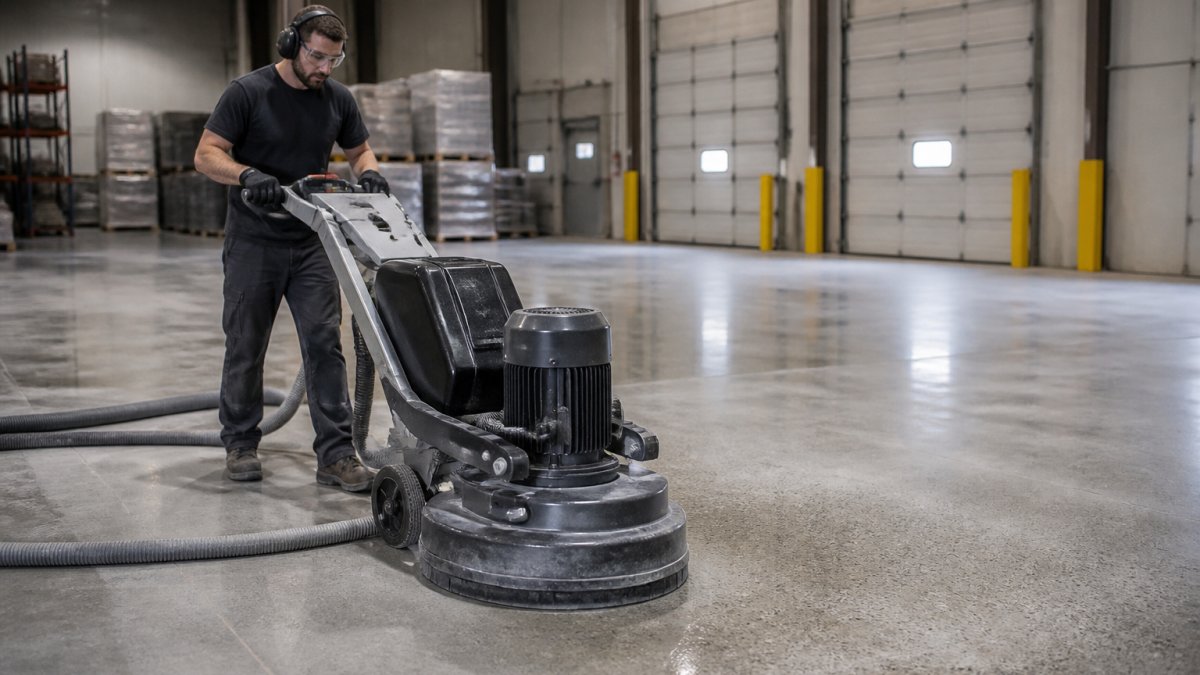
Each step builds on the last. The coarse pass sets the flatness. The densifier hardens the surface. The fine grits create the sheen.
Polished Concrete Grit Sequence: Matching Abrasives to Your Finish
The polished concrete grit sequence decides your final look, and it is the single most misunderstood part of the process. Lower grit numbers cut deeper and expose more aggregate. Higher grits refine the surface toward a gloss.
Diamond abrasives are graded by the size of the diamond particles embedded in the bond. A 30-grit metal-bond segment has coarse diamonds that cut aggressively and leave deep scratches. A 3000-grit resin-bond pad has microscopic diamonds that leave almost no scratch at all.
Here is how the stages map to a finish:
| Stage | Typical Grit Range | Bond Type | What It Does |
|---|---|---|---|
| Coarse grind | 16-70 | Metal | Cuts through coatings, levels high spots, opens the slab |
| Aggregate exposure | 30-120 | Metal | Determines cream, salt-and-pepper, or full stone look |
| Honing | 100-400 | Metal or resin | Removes coarse scratches, starts the refinement |
| Densifier window | 100-200 | , | Applied after the first honing pass, before fine grits |
| Fine grinding | 400-800 | Resin | Builds the matte base, closes the surface |
| Polishing | 800-1500 | Resin | Satin sheen, light reflection |
| Burnishing | 1500-3000 | Resin | High gloss, mirror-like reflection |
A few practical rules that separate a clean floor from a scratched one:
- Do not skip more than one grit step at a time. Going from 50 to 100 is fine. Going from 50 to 400 is not.
- Cross-hatch every pass. Run the machine north-south, then east-west, at each grit. This removes the directional scratch pattern before you move up.
- Match the bond to the job. Metal-bond for cutting, resin-bond for refining. Using resin too early loads the pad and wastes money.
- Watch the slurry. The color and consistency of the slurry tells you how much material you are removing. Thin, watery slurry means the grit is done.
Finish selection is not just about gloss. It is about how much aggregate you expose and how much of the slab's natural variation you are willing to show.
One more thing most guides skip: the grit sequence is not fixed. A hard, dense slab may need an extra pass at 100 and 200 to get the same cut that a softer slab gets in one pass. A soft, chalky slab may need a densifier earlier and a lighter touch at the coarse grits to avoid over-exposing aggregate. Read the slab, not just the chart.
Why a Concrete Densifier Matters for Hardness and Durability
A concrete densifier hardens the slab from the inside, and it is the step most DIY polishers either skip or apply wrong. Understanding the chemistry makes the timing obvious.
Call (919) 824-5403 or email craigrfear@gmail.com for a free estimate →
Most densifiers are silicate-based, either sodium silicate, potassium silicate, or lithium silicate.
The three silicate types behave differently, and the choice matters:
- Sodium silicate is the least expensive and reacts fast, but it can leave a white residue if it pools or dries on the surface. It also tends to push the pH higher, which can affect some sealers.
- Potassium silicate is a middle option, moderate cost, moderate residue risk, good penetration.
- Lithium silicate is the most expensive and the most forgiving. The lithium ion is small, so it penetrates deeper before reacting, and it is far less likely to leave a haze. Most polishing contractors who care about a clean high-gloss finish default to lithium.
Application timing is where jobs go wrong.
Once the densifier has cured, usually overnight, sometimes longer in cool, humid conditions, you resume the fine grinding sequence.
Most polished floors also get a guard or topical sealer after the final polish. This adds stain protection and chemical resistance without changing the look.
A densifier is not a coating and it is not a shortcut. It is a chemical reaction that changes the slab itself. Get the chemistry, the timing, and the dust control right, and the rest of the polish holds up. Get them wrong, and no amount of fine grit will save the finish.
Polished Concrete vs Epoxy Coating: Which Fits Your Space?
Polished concrete vs epoxy coating comes down to what your space needs. Polished concrete is the slab itself, refined and sealed. Epoxy is a resin coating applied on top.
Choose polished concrete when you want:
- A natural, low-maintenance flooring look
- High wear resistance for heavy traffic
- A floor that will not peel or delaminate
Choose epoxy when you want:
- A specific color or decorative design
- A seamless, uniform surface over a worn slab
- Chemical resistance for a shop or lab floor
A common mistake is treating them as competitors. They solve different problems. Polished concrete suits a warehouse that tracks dust. Epoxy suits a showroom that wants a bold color and a smooth finish.
The National Ready Mixed Concrete Association's resources on concrete durability is a solid reference if you want to understand how slab condition affects either choice.
Troubleshooting Common Polishing Defects and When to Call a Pro
Most polishing defects trace back to prep or the grit sequence. Here is how to read the problem and fix it.
- Swirl marks: you skipped a grit. Back up one step and re-grind.
- Blotchy sheen: uneven densifier. Re-apply and re-polish.
- Visible scratches: contaminated tooling or too big a grit jump.
- Dull finish: soft slab or missed fine grits.
- Patchy aggregate: inconsistent slab hardness across the pour.
When should you call a pro? If the slab has structural cracks, major moisture problems, or heavy spalling, DIY grinding will make it worse. Those need assessment and repair before polishing even starts.
At Concrete-Enhancements, we have spent over 20 years resurfacing and restoring concrete across the Raleigh-Durham Triangle, NC Triad, and Coastal SC. We are a CTi Certified Dealer, and we handle everything from decorative overlays to epoxy coatings and full repair.
Frequently Asked Questions
What are the main steps in polishing a concrete floor?
The process starts with surface preparation to remove coatings and imperfections, then moves through a concrete polishing grit sequence using progressively finer diamond abrasives. After the initial coarse grinding, a concrete densifier is applied to harden the slab. Polishing continues through finer resin-bond stages until the desired sheen is reached, followed by a sealer if needed. Skipping or rushing any step affects the final finish and durability.
Which grit sequence should you use to polish concrete?
A standard concrete polishing grit sequence begins with 30 or 40 grit metal-bond diamonds for coarse grinding, then moves to 80, 120, and 200 grit for surface refinement. Resin-bond abrasives at 400, 800, and 1500 grit follow for polishing stages. For a high-gloss finish, continue to 3000 grit. The exact sequence depends on concrete hardness and the finish you want. A matte finish may stop at 400 grit, while a reflective finish requires the full progression.
What is the difference between mechanically polished concrete and a topical coating?
Mechanically polished concrete uses diamond tooling to grind and refine the slab itself, creating a permanent finish that will not peel or flake. A topical coating, such as epoxy, sits on top of the concrete surface. Polished concrete relies on densifiers and sometimes sealers for stain protection, while epoxy forms a separate layer. Polished concrete typically needs less long-term maintenance, but epoxy offers more color and design options.
Can every concrete floor be polished?
Not every slab is a good candidate. Concrete that is severely cracked, has moisture issues, or lacks sufficient hardness may not polish well. A professional assessment checks slab condition, aggregate exposure potential, and existing coatings. In some cases, repairs or a overlay may be needed before polishing. If the concrete is too soft or damaged, a concrete sealer or epoxy coating might be a better choice.
Polishing a floor is only as good as the slab underneath it. If your concrete is cracked, dusty, or worn, the right fix might be repair or resurfacing instead of grinding. Concrete-Enhancements brings over 20 years of experience, CTi Certified Dealer status, and a full range of decorative overlays, epoxy coatings, and professional repair. Call (919) 824-5403 or email craigrfear@gmail.com for a free estimate and get a floor built to last.
Tags: concrete polishing, concrete polishing techniques explained, concrete polishing steps, polished concrete grit sequence, concrete densifier, polished concrete vs epoxy coating
Frequently Asked Questions
The process starts with surface preparation to remove coatings and imperfections, then moves through a concrete polishing grit sequence using progressively finer diamond abrasives. After the initial coarse grinding, a concrete densifier is applied to harden the slab. Polishing continues through finer resin-bond stages until the desired sheen is reached, followed by a sealer if needed. Skipping or rushing any step affects the final finish and durability.
A standard concrete polishing grit sequence begins with 30 or 40 grit metal-bond diamonds for coarse grinding, then moves to 80, 120, and 200 grit for surface refinement. Resin-bond abrasives at 400, 800, and 1500 grit follow for polishing stages. For a high-gloss finish, continue to 3000 grit. The exact sequence depends on concrete hardness and the finish you want. A matte finish may stop at 400 grit, while a reflective finish requires the full progression.
Mechanically polished concrete uses diamond tooling to grind and refine the slab itself, creating a permanent finish that will not peel or flake. A topical coating, such as epoxy, sits on top of the concrete surface. Polished concrete relies on densifiers and sometimes sealers for stain protection, while epoxy forms a separate layer. Polished concrete typically needs less long-term maintenance, but epoxy offers more color and design options.
Not every slab is a good candidate. Concrete that is severely cracked, has moisture issues, or lacks sufficient hardness may not polish well. A professional assessment checks slab condition, aggregate exposure potential, and existing coatings. In some cases, repairs or a overlay may be needed before polishing. If the concrete is too soft or damaged, a concrete sealer or epoxy coating might be a better choice.