ultimate-guide
Concrete Resurfacing Before Epoxy: A Step-by-Step Guide
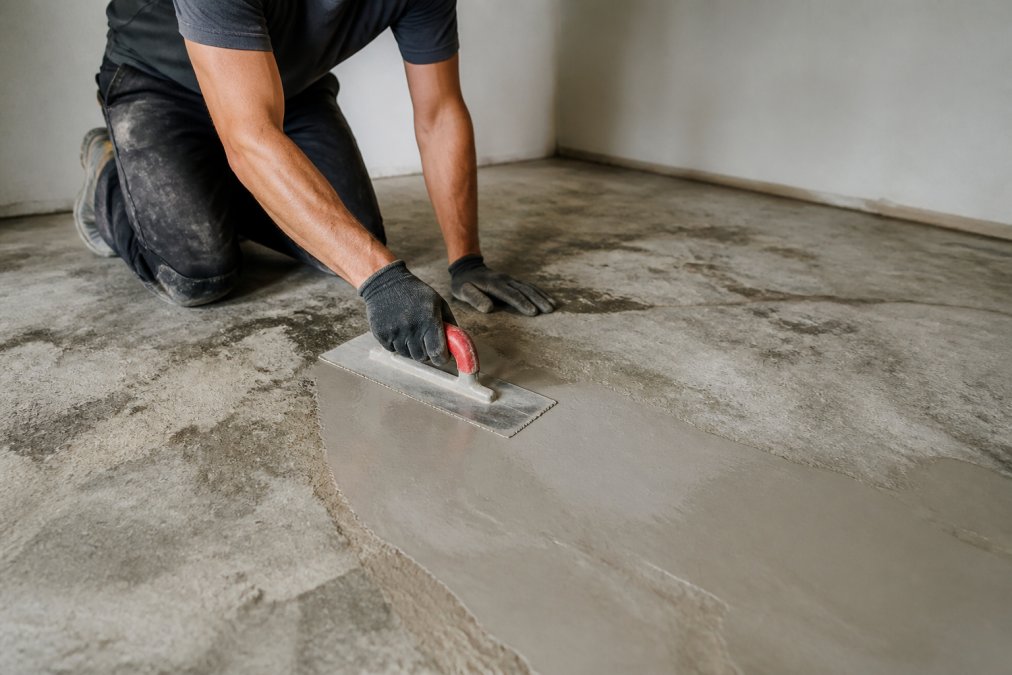
Table of Contents
- Why Concrete Resurfacing Before Epoxy Application Matters
- Assessing Your Concrete Substrate Condition
- Concrete Crack Repair Before Epoxy Coating
- Cleaning and Degreasing for Proper Epoxy Adhesion
- How to Grind Concrete for Epoxy Preparation
- Moisture Testing and Curing Time for Concrete Resurfacer
- Final Surface Preparation and Application Readiness
- Conclusion
- Frequently Asked Questions
Last Updated: September 21, 2026
Why Concrete Resurfacing Before Epoxy Application Matters
Concrete resurfacing epoxy application is the foundation of any successful epoxy floor project. Skip this step, and your coating will fail within months. The epoxy won't bond properly, it'll peel, bubble, and crack. You'll have wasted money and time.
Epoxy bonds only to clean, sound substrate. Dust, oil, cracks, and damage prevent adhesion. At Concrete-Enhancements, we've seen countless DIY attempts fail because homeowners and contractors skip or rush the resurfacing phase.
The concrete substrate must be mechanically sound and chemically clean before any epoxy touches it. This means assessing damage, repairing cracks, grinding the surface to the right profile, removing contaminants, and testing moisture levels. Each step matters. Each one directly impacts how long your coating lasts.
Assessing Your Concrete Substrate Condition
Walk the entire floor and identify problem areas: active moisture, cracks, spalling, delamination, and surface contaminants.
Spalling (flaking concrete) and delamination (top layer separation) require repair before epoxy application, or the coating will fail as the concrete continues to deteriorate.
Check for moisture by pressing your hand against the floor for a few minutes. Damp or cold surfaces indicate moisture that will push epoxy away from the substrate.
Assess surface texture: porous, chalky concrete absorbs epoxy unevenly; dense concrete bonds better. Grinding improves mechanical bonding regardless of porosity.
Concrete Crack Repair Before Epoxy Coating
Crack repair is non-negotiable, and patching compound choice directly affects epoxy adhesion. Incompatible materials fail within months.
Crack Width and Repair Method
Hairline cracks (less than 1/16 inch) can be sealed with epoxy primer alone. Cracks wider than 1/8 inch should be routed with a V-groove bit to create mechanical lock, then cleaned with a shop vacuum.
Material Compatibility: The Hidden Failure Point
Not all patching compounds work with all epoxy types. Chemical adhesion at the interface determines success or failure.
Cement-based patches (pH 12-13) don't chemically bond with water-based epoxy. The result is mechanical adhesion only. When epoxy shrinks or concrete expands/contracts, the interface fails and epoxy peels away.
Epoxy-based crack fillers are chemically compatible with epoxy coatings, creating a monolithic bonded layer. This is the gold standard for crack repair.
Urethane-based patches may or may not bond with epoxy. Check your epoxy's technical data sheet for compatibility.
How to Verify Compatibility
Test compatibility on a scrap piece or hidden corner: apply patch, cure fully, apply epoxy primer and topcoat, wait 7 days, then attempt to peel. If it resists peeling, materials are compatible. This prevents costly failure across your entire floor.
Filling the Crack
Fill cracks with a patching compound compatible with your epoxy type (epoxy-based patch for water-based epoxy, etc.). Apply slightly overfilled, then grind flush after curing.
Curing Time and Environmental Factors
Allow patches to cure fully (typically 24-48 hours for epoxy-based, longer for cement-based). Temperature and humidity affect curing speed. Check the product's technical data sheet and don't apply epoxy until fully cured.
Partially cured patches have weak internal structure and will fail under thermal stress or moisture exposure.
Movement Cracks and Active Water
For movement cracks, use flexible epoxy-based fillers to prevent telegraphing. For active water seepage, address the water source before patching, as water pressure will push the patch away.
Cleaning and Degreasing for Proper Epoxy Adhesion
Surface contaminants, oil, grease, dust, mold, mineral deposits, prevent adhesion and cause epoxy failure.
Call (919) 824-5403 or email craigrfear@gmail.com for a free estimate →
Use a degreaser rated for concrete (general-purpose for light contamination, industrial for heavy grease). Apply per instructions, scrub with a stiff brush, rinse thoroughly. Pay special attention to vehicle parking areas and equipment spots where oils accumulate.
Allow concrete to dry completely after degreasing (24-48 hours in dry conditions, longer in humid conditions). Use a moisture meter to verify dryness before proceeding.
Acid etching can improve bonding but is unnecessary if you're grinding the concrete. Mechanical grinding is cleaner and more controllable.
How to Grind Concrete for Epoxy Preparation
Grinding creates the surface profile for epoxy mechanical bonding. The rougher the surface, the more area epoxy has to grip.
Use a diamond grinding machine with dust extraction. Start with 40-grit diamonds, step up to 60-80-grit for finishing. Target a surface profile of 60-90 mils (CSP 2-3) for good adhesion.
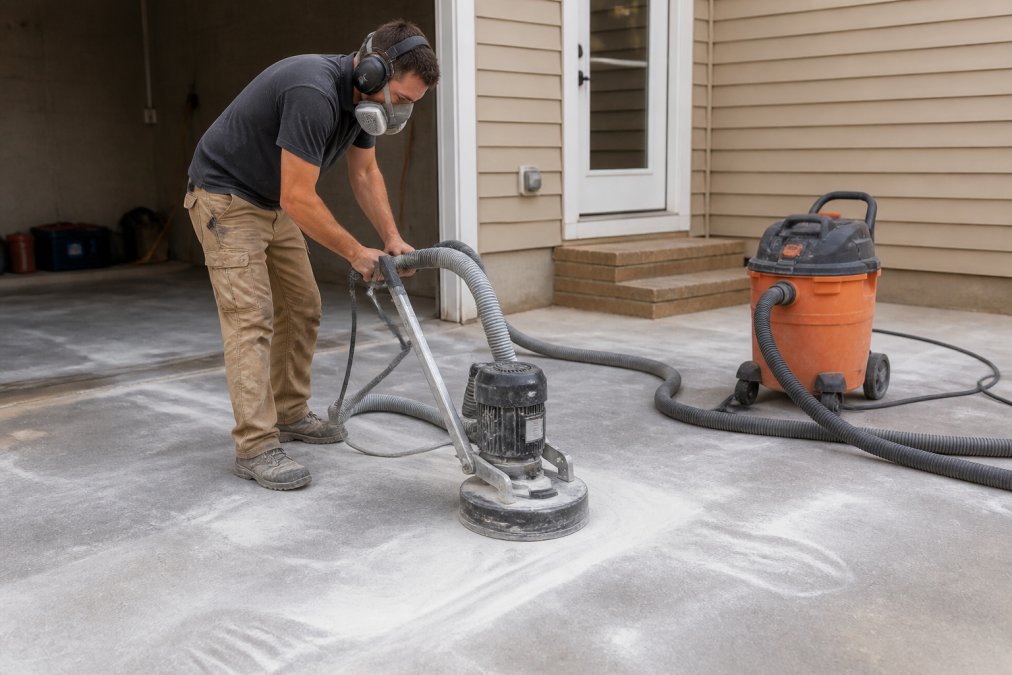
Grind in overlapping passes with uniform coverage. Inconsistent grinding leads to thin or over-applied epoxy, both causing failure.
Wear a NIOSH-rated P100 respirator, eye protection, and hearing protection during grinding. Concrete dust is silica and damages lungs.
Vacuum all dust with a HEPA-filter shop vacuum. Compressed air alone redistributes dust. Dust left on the surface traps air bubbles and creates voids that weaken the coating.
Moisture Testing and Curing Time for Concrete Resurfacer
Moisture testing is critical after applying concrete resurfacer. Fresh resurfacer introduces moisture that must dissipate before epoxy application. This is where most failures occur.
Why Moisture Matters for Epoxy Adhesion
Concrete can feel dry but contain subsurface moisture. Water vapor migrates up and pushes epoxy away from the substrate, causing delamination, bubbling, and peeling.
Concrete resurfacer adds water that must evaporate before epoxy application. Time required depends on resurfacer type, temperature, humidity, and thickness.
Measuring Moisture: Calcium Chloride vs. Moisture Meters
There are two primary methods for measuring concrete moisture: the calcium chloride test (ASTM F1869) and electronic moisture meters (ASTM F2170).
The calcium chloride test (ASTM F1869) measures moisture vapor transmission (MVT) rate. A sealed dish absorbs moisture vapor for 24 hours.
Curing Time for Concrete Resurfacer: Temperature and Humidity Effects
Moisture Content Thresholds for Epoxy Application
Moisture Content Thresholds for Epoxy Application:
- Calcium chloride test: MVT rate must be below manufacturer's specification (typically 3-5 pounds per 1,000 square feet per 24 hours). If 6 pounds or higher, wait 3-7 days and retest.
- Moisture meter: Readings should be stable and below 75% relative humidity at 1 inch depth. Wait until readings stabilize if still dropping.
- Dew point test: Concrete surface temperature must be at least 5°F above dew point to prevent condensation.
What to Do If Moisture Levels Are Too High
Final Surface Preparation and Application Readiness
Perform a final inspection: walk the floor, look for dust and unground areas, run your hand across the surface (should feel consistently rough like medium-grit sandpaper). Wipe with a tack cloth or damp microfiber cloth to remove remaining dust, then let dry completely.
Conclusion
Concrete resurfacing epoxy is the entire project. Every step directly impacts coating performance and longevity.
| Preparation Phase | Key Task | Why It Matters |
|---|---|---|
| Assessment | Evaluate cracks, moisture, contaminants | Identifies repair needs before epoxy |
| Crack Repair | Fill cracks wider than 1/8 inch | Prevents epoxy from following cracks |
| Cleaning | Remove oils, grease, dust | Ensures epoxy adhesion to substrate |
| Grinding | Create proper surface profile (CSP 2-3) | Provides mechanical bonding for epoxy |
| Moisture Testing | Verify concrete moisture levels | Prevents coating failure from water vapor |
| Final Inspection | Confirm all steps complete | Readies substrate for epoxy application |
Frequently Asked Questions
Do I need to resurface my concrete floor before applying epoxy?
Yes. Concrete resurfacing before epoxy application is essential for long-term adhesion and durability. Epoxy bonds only as well as the substrate beneath it. If your concrete has spalling, delamination, or significant cracks, the epoxy will eventually fail. Proper resurfacing removes weak surface layers, fills damage, and creates the mechanical profile epoxy needs to grip. Skipping this step is why many DIY epoxy jobs peel within a year.
How long does concrete need to cure before applying epoxy?
Concrete resurfacer typically requires 24 to 48 hours of curing time before epoxy application, depending on the product and environmental conditions. However, moisture content matters more than time alone. Concrete must reach a moisture vapor transmission rate below 3 pounds per 1,000 square feet per 24 hours before epoxy can be applied. Use a moisture meter to verify readiness rather than relying on time estimates. High humidity or cool temperatures can extend curing significantly.
What tools are required to prepare concrete for an epoxy finish?
Essential tools include a concrete grinder or shot blasting equipment for surface profiling, a moisture meter to test substrate readiness, a degreaser and pressure washer for cleaning, crack filler or patching compound for repairs, and PPE including respirator, safety glasses, and gloves. For crack repair, you'll need a concrete crack filler or urethane cement. Dust extraction equipment is critical when grinding to protect your lungs and keep the work area safe.
Can you apply epoxy over a concrete overlay or resurfacer?
Yes, but only if the overlay or resurfacer is fully cured and properly bonded to the substrate below. The overlay must be compatible with epoxy adhesion requirements and reach the correct concrete surface profile (CSP 2-3 is typical). If the overlay is delaminating or not mechanically bonded, epoxy will fail. Always verify moisture content and test bond strength before application. Some patching compounds and self-leveling underlayments work better with specific epoxy types, so confirm compatibility with your epoxy product.
Tags: concrete resurfacing epoxy, resurfacing concrete before epoxy application, concrete crack repair before epoxy, how to grind concrete for epoxy, curing time for concrete resurfacer
Frequently Asked Questions
Yes. Concrete resurfacing before epoxy application is essential for long-term adhesion and durability. Epoxy bonds only as well as the substrate beneath it. If your concrete has spalling, delamination, or significant cracks, the epoxy will eventually fail. Proper resurfacing removes weak surface layers, fills damage, and creates the mechanical profile epoxy needs to grip. Skipping this step is why many DIY epoxy jobs peel within a year.
Concrete resurfacer typically requires 24 to 48 hours of curing time before epoxy application, depending on the product and environmental conditions. However, moisture content matters more than time alone. Concrete must reach a moisture vapor transmission rate below 3 pounds per 1,000 square feet per 24 hours before epoxy can be applied. Use a moisture meter to verify readiness rather than relying on time estimates. High humidity or cool temperatures can extend curing significantly.
Essential tools include a concrete grinder or shot blasting equipment for surface profiling, a moisture meter to test substrate readiness, a degreaser and pressure washer for cleaning, crack filler or patching compound for repairs, and PPE including respirator, safety glasses, and gloves. For crack repair, you'll need a concrete crack filler or urethane cement. Dust extraction equipment is critical when grinding to protect your lungs and keep the work area safe.
Yes, but only if the overlay or resurfacer is fully cured and properly bonded to the substrate below. The overlay must be compatible with epoxy adhesion requirements and reach the correct concrete surface profile (CSP 2-3 is typical). If the overlay is delaminating or not mechanically bonded, epoxy will fail. Always verify moisture content and test bond strength before application. Some patching compounds and self-leveling underlayments work better with specific epoxy types, so confirm compatibility with your epoxy product.