ultimate-guide
Cost of Professional Epoxy Floor Installation
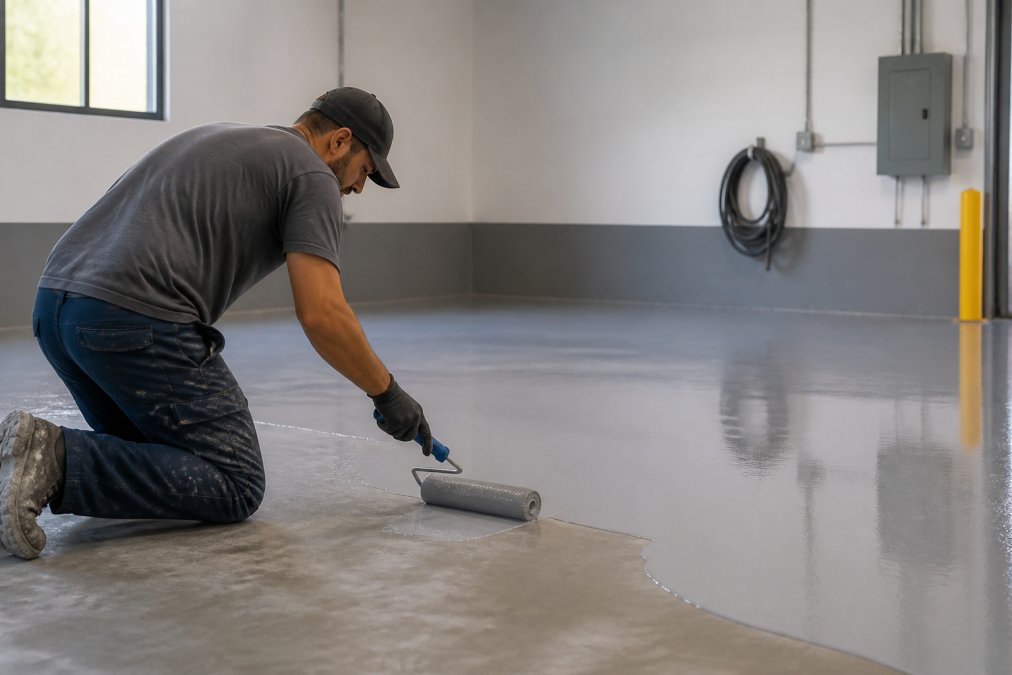
Table of Contents
- What Determines the Cost of Professional Epoxy Floor Installation
- Factors Affecting Epoxy Flooring Price
- DIY vs Professional Epoxy Installation
- Epoxy Floor Installation Timeline and Project Phases
- Cost Breakdown by Garage Size and Application Type
- Getting an Accurate Epoxy Floor Quote
- Longevity, Maintenance, and Warranty Considerations
- Frequently Asked Questions
Last Updated: September 22, 2026
What Determines the Cost of Professional Epoxy Floor Installation
The cost of professional epoxy floor installation varies dramatically based on several interconnected factors. Understanding what drives pricing helps you evaluate contractor quotes and avoid sticker shock. Homeowners and facility managers often underestimate how much surface preparation and material selection impact the final bill.
Square Footage and Project Scale
Project size is the most straightforward cost driver. A small residential garage requires different labor and material volumes than a sprawling warehouse. Smaller projects typically cost more per square foot because fixed overhead gets spread across fewer square feet. A 300-square-foot garage floor demands the same equipment setup and crew mobilization as a 1,000-square-foot space, but the labor efficiency differs significantly.
Two-car garage floors generally fall between 400 and 600 square feet, which represents the sweet spot for residential epoxy installation. Larger commercial spaces benefit from economies of scale, though their complexity often offsets that advantage. The relationship between square footage and total cost isn't linear, doubling the area doesn't double the cost, but it doesn't stay flat either.
Concrete Surface Preparation and Moisture Testing
This is where most quotes diverge. Surface preparation typically accounts for 30-40% of the total project cost, yet it's the phase homeowners most often try to cut corners on. Your existing concrete's condition determines everything downstream.
Moisture vapor barrier installation requires concrete moisture testing beforehand. If your slab sits above grade or shows any history of dampness, you'll need moisture mitigation. Concrete that fails moisture testing can't receive epoxy directly, the coating will peel within months. Testing itself costs money, but skipping it guarantees failure.
Diamond grinding removes the top layer of concrete to create proper adhesion for epoxy resin. Shot blasting and acid etching are alternative preparation methods, each with different cost and outcome profiles. Acid etching is cheaper but less thorough. Diamond grinding costs more but delivers superior adhesion and longevity. The choice depends on your concrete's existing condition and the epoxy system you select.
Material Selection and Coating System
Epoxy resin systems come in different formulations, and the choice directly impacts durability and price. A basic two-part epoxy costs less than a polyaspartic topcoat system, but polyaspartic offers faster curing time and superior UV stability. If your garage gets direct sunlight, polyaspartic prevents the yellowing and fading that standard epoxy experiences.
Decorative flakes and custom color selections add material costs. A solid-color epoxy floor costs less than one with decorative elements. However, flakes serve a practical purpose, they hide minor imperfections and dust better than solid finishes. High-traffic areas and commercial spaces often benefit from this trade-off.
The primer coat, base coat, and topcoat system you choose determines thickness and protection level. Thicker floor systems with multiple coats last longer but cost more upfront. A single-coat application might seem attractive until it wears through in high-traffic zones within a few years.
Factors Affecting Epoxy Flooring Price
Beyond the basic components, several site-specific variables shift costs unpredictably.
Labor Costs and Installation Complexity
Labor represents 50-60% of the total project cost for professional installation. Installation complexity depends on floor layout, existing damage, and access constraints. A straightforward residential garage with no obstacles requires less labor than a warehouse with equipment to work around or a floor with significant cracks needing repair.
Curing time affects labor scheduling. Standard epoxy requires 24-48 hours between coats and several days before the floor handles traffic. Polyaspartic systems cure in hours, allowing faster project completion. Faster curing means lower labor costs, though the material itself costs more. This creates a genuine trade-off between material and labor expenses.
Subfloor Repair and Site Conditions
Cracked or damaged concrete requires repair before epoxy application. Small hairline cracks might need simple filling. Significant structural damage demands concrete patching or resurfacing. Some contractors include minor repairs in their base quote; others charge separately. Always clarify what's included.
Site conditions like temperature and humidity during installation affect labor and curing. Cold weather slows epoxy curing and complicates application. Hot, humid conditions can trap moisture in the coating. If your project falls during challenging weather seasons, expect either schedule delays or premium pricing for climate control measures.
Decorative Elements and Design Customization
Custom logos, multi-color designs, and specialty finishes command higher prices. A simple solid-color floor costs significantly less than one with decorative flakes scattered throughout or metallic accents. Slip-resistant additives, which are essential for pool decks and high-traffic commercial spaces, add to material costs.
The complexity of your design vision directly correlates to installation time. A custom pattern requiring tape work and precise application takes longer than a straightforward single-color coat. Simple designs finish faster and cost less.
DIY vs Professional Epoxy Installation
The appeal of DIY epoxy kits is understandable, the material cost alone looks reasonable compared to contractor quotes. The reality of DIY application reveals why professional expertise commands its price.
Why DIY Coatings Fail Prematurely
Most DIY epoxy failures trace to inadequate surface preparation. Homeowners typically skip or rush the grinding and cleaning phases because they're physically demanding and time-consuming. Epoxy applied to insufficiently prepared concrete peels within months or years. The coating doesn't fail because the material is defective, it fails because adhesion was compromised from the start.
Moisture issues often go undetected in DIY projects. Without professional moisture testing, you might apply epoxy over concrete that's absorbing water from below. The moisture vapor pressure eventually breaks the epoxy's bond, creating bubbling and peeling. By the time you notice the failure, the damage is done.
Application technique matters more than most DIYers realize. Uneven roller pressure, incorrect mixing ratios, and improper curing conditions all produce substandard results. The coating might look fine initially but deteriorate quickly under actual use. High-traffic areas show wear patterns that reveal poor application technique.
The Value of Professional Expertise and Warranty
Professional installers bring equipment, experience, and accountability. They perform proper moisture testing before starting work. They use industrial-grade grinders and blasting equipment that achieve better surface preparation than consumer tools. Their application technique ensures even coating thickness and proper cure conditions.
Warranty coverage is the practical difference. A professional installation typically includes a warranty covering material and workmanship for 3-10 years, depending on the system and contractor. DIY installations come with only the product manufacturer's warranty, which often excludes labor and application errors. If something goes wrong, you're responsible for correcting it.
Professional contractors also handle site cleanup, debris removal, and traffic management during the project. These services are included in their pricing but would fall on you if you tackled the project yourself.
Epoxy Floor Installation Timeline and Project Phases
Understanding the timeline helps you evaluate quotes that seem to include excessive labor costs. A typical residential epoxy floor installation can span several days from start to finish, with the floor not fully cured for a period after application.
Surface preparation, cleaning, grinding or blasting, and moisture testing are labor-intensive and cannot be rushed. This is followed by primer application and any necessary repairs. The base coat application, decorative elements, and topcoat are then applied.
| Project Phase | Timeline | Key Activities |
|---|---|---|
| Surface Prep | 1-2 days | Cleaning, grinding, moisture testing |
| Primer & Repairs | 1 day | Primer application, concrete patching |
| Base Coat | 1 day | First epoxy layer application |
| Decorative & Topcoat | 1 day | Flakes, color, final protective layer |
| Curing | 7 days | No traffic, full cure time |
Cost Breakdown by Garage Size and Application Type
Real-world pricing varies by region and contractor, but understanding the structure helps you evaluate quotes intelligently.

Residential Garage Floors
A typical two-car garage (500 square feet) involves material costs for primer, epoxy resin, decorative elements, and topcoat. Labor for surface preparation dominates the budget. A basic single-color epoxy floor without decorative elements costs less than one with flakes or metallic finishes.
Commercial and High-Traffic Spaces
Commercial applications demand more durable epoxy systems. Warehouses, retail spaces, and manufacturing facilities need coatings that resist heavy foot traffic, forklift traffic, and chemical exposure. These requirements push toward thicker epoxy systems with reinforced topcoats and slip-resistant additives.
Getting an Accurate Epoxy Floor Quote
Evaluating contractor quotes requires understanding what's included and what varies between estimates.
What to Ask and What to Compare
Ask whether the quote includes moisture testing. If it doesn't, request a separate line item price. This tells you whether the contractor plans to test or assume your concrete is suitable. A contractor skipping moisture testing is cutting corners on a critical step.
Longevity, Maintenance, and Warranty Considerations
The initial installation cost matters less than the cost of ownership over time. A premium epoxy system that lasts ten years costs less per year than a budget system requiring reapplication every four years.
Frequently Asked Questions
How much does a typical two-car garage epoxy floor cost?
The cost of professional epoxy floor installation for a two-car garage depends on concrete condition, surface preparation requirements, and material selection. Pricing varies based on moisture vapor barriers needed, primer and topcoat systems chosen, and whether subfloor repair is required. Contact us for a free estimate to get an accurate quote based on your specific project scope and site conditions.
What is the lifespan of a professionally installed epoxy floor?
The lifespan of a professionally installed epoxy floor depends on the epoxy resin system used, traffic levels, chemical resistance requirements, and maintenance frequency. Professional installation and quality materials can significantly extend floor longevity compared to DIY applications.
Why is epoxy floor installation more expensive than DIY kits?
Professional installation accounts for labor costs, concrete surface preparation (diamond grinding, acid etching, or shot blasting), moisture testing, and primer/base coat/topcoat application expertise. DIY kits often fail because they skip critical surface preparation and moisture vapor barrier steps. Professional contractors ensure proper curing time, slip resistance, and chemical resistance, factors that prevent premature peeling and failure that commonly occurs with DIY attempts.
Does professional epoxy installation include concrete repair?
Professional epoxy installation typically includes inspection and assessment of concrete condition. Subfloor repair costs are separate and depend on damage severity. Surface preparation, including cleaning, grinding, and moisture testing, is included in standard installation. Additional repairs like patching cracks or addressing moisture issues are quoted separately based on site conditions discovered during the initial assessment.
Tags: cost of professional epoxy floor installation, epoxy floor installation timeline, factors affecting epoxy flooring price, diy vs professional epoxy installation
Frequently Asked Questions
The cost of professional epoxy floor installation for a two-car garage depends on concrete condition, surface preparation requirements, and material selection. Pricing varies based on moisture vapor barriers needed, primer and topcoat systems chosen, and whether subfloor repair is required. Contact us for a free estimate to get an accurate quote based on your specific project scope and site conditions.
The lifespan of a professionally installed epoxy floor depends on the epoxy resin system used, traffic levels, chemical resistance requirements, and maintenance frequency. Professional installation and quality materials can significantly extend floor longevity compared to DIY applications.
Professional installation accounts for labor costs, concrete surface preparation (diamond grinding, acid etching, or shot blasting), moisture testing, and primer/base coat/topcoat application expertise. DIY kits often fail because they skip critical surface preparation and moisture vapor barrier steps. Professional contractors ensure proper curing time, slip resistance, and chemical resistance—factors that prevent premature peeling and failure that commonly occurs with DIY attempts.
Professional epoxy installation typically includes inspection and assessment of concrete condition. Subfloor repair costs are separate and depend on damage severity. Surface preparation—including cleaning, grinding, and moisture testing—is included in standard installation. Additional repairs like patching cracks or addressing moisture issues are quoted separately based on site conditions discovered during the initial assessment.