listicle
DIY Garage Floor Epoxy Kit Reviews: 2026 Buyer's Guide
Table of Contents
- DIY Garage Floor Epoxy Kit Reviews: Quick Comparison
- How We Evaluated These Epoxy Kits
- Top DIY Garage Floor Epoxy Kits for 2026
- Garage Floor Epoxy Preparation Steps That Determine Success
- How Long Does Garage Epoxy Take to Cure?
- DIY Garage Floor Epoxy Mistakes to Avoid
- When to Call a Professional Epoxy Installer
- Frequently Asked Questions
Last Updated: September 16, 2026
DIY Garage Floor Epoxy Kit Reviews: Quick Comparison
Choosing a DIY garage floor epoxy kit comes down to three variables: cure speed, solids content, and prep support. This guide covers five popular kits for 2026, plus the prep, cure timelines, and mistakes that decide whether your floor lasts five years or fifteen.
Here's the short version before the detail:
| Kit | Best For | Cure Speed | Key Strength |
|---|---|---|---|
| Rust-Oleum RockSolid Polycuramine | Fast turnaround | Walkable in 8-10 hrs | Polycuramine durability |
| ArmorClad Epoxy Kit | Complete first-timers | Standard epoxy cure | All prep tools included |
| ArmorGarage DIY Epoxy Kit | Long-term protection | Standard epoxy cure | 10-15+ year lifespan |
| Rust-Oleum EpoxyShield | Light-duty budgets | Standard water-based cure | Low cost, easy cleanup |
| Spartan Epoxies High Solids | Heavy-duty use | Extended pot life | Commercial-grade film build |
How We Evaluated These Epoxy Kits
We scored each kit on five criteria: solids content, cure and recoat windows, chemical and abrasion resistance, package completeness, and first-timer forgiveness. Solids content matters most: a 100% solids epoxy cures to a thicker film with no water to evaporate, so high-solids systems resist hot tire pickup and chemical spills better than water-based formulas.
Top DIY Garage Floor Epoxy Kits for 2026
Each kit below targets a different buyer. Match the product to your slab condition and traffic level, not just the price.
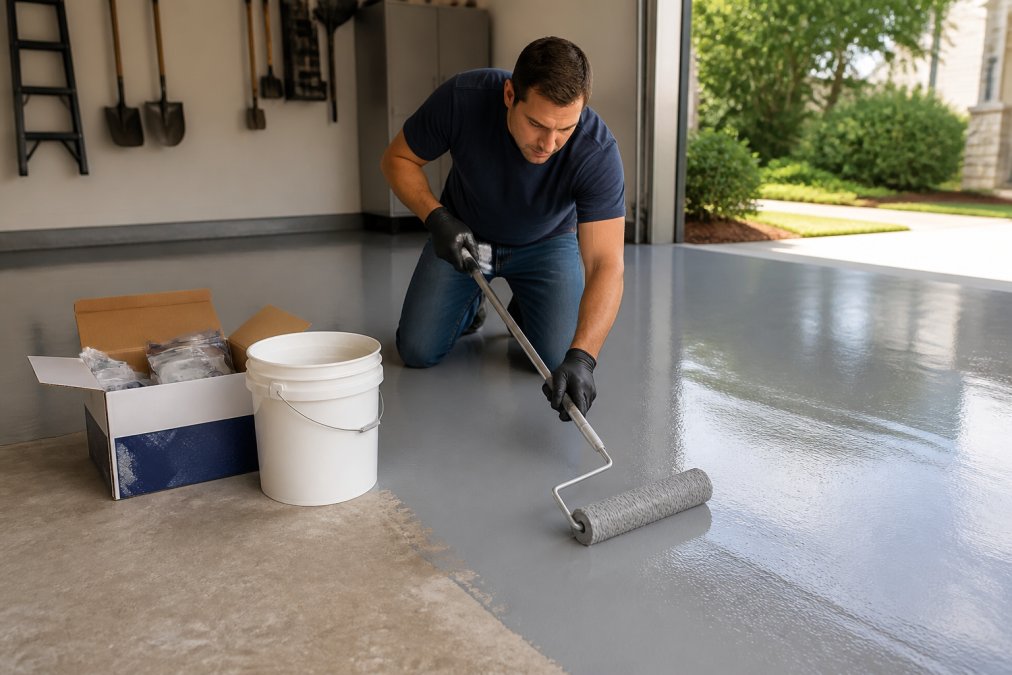
Rust-Oleum RockSolid Polycuramine: Fastest Cure
RockSolid Polycuramine is the pick when you need the car back by tomorrow: it walks in 8-10 hours and drives in 24, and the self-leveling high-gloss finish resists salt and chemicals. The tradeoff is a short pot life, so mix only what you can roll within the window. Plan roughly $200-$280 per kit.
ArmorClad Epoxy Kit: Most Complete Package
ArmorClad ships as a full system: industrial-grade epoxy, cleaner, and a non-slip additive in one box. The high-solids formula resists hot tire pickup and chemical spills, and the included prep tools remove a common excuse for skipping prep.
ArmorGarage DIY Epoxy Kit: Longest Lifespan
ArmorGarage targets longevity with a military-grade system rated for a 10-15+ year lifespan. Primer and topcoat are included, and the high-solids formulation handles hot tires and chemicals. Pricing runs about $2.50-$4.00 per square foot, higher than big-box kits but well below professional installation.
Rust-Oleum EpoxyShield: Budget-Friendly Option
EpoxyShield is a water-based, two-part coating with decorative color chips included. It cleans up easily and suits light-duty interior floors, but long-term durability reviews are mixed compared to high-solids systems, treat it as an entry-level choice for low-traffic garages, not a permanent solution.
Spartan Epoxies High Solids System: Commercial-Grade Performance
Spartan's high-solids system builds a thick, durable film and covers roughly 600 sq. ft. per kit, suiting garages, warehouses, and offices. It delivers professional-grade chemical resistance but demands professional-level technique. For that performance without the application risk, a CTi Certified Dealer like Concrete-Enhancements earns its keep.
Garage Floor Epoxy Preparation Steps That Determine Success
Preparation decides the outcome more than any product choice. A coating bonds to the surface profile it's applied over, and a smooth, contaminated slab gives epoxy nothing to grip.
- Clear the garage and degrease oil spots with a dedicated degreaser.
- Test for moisture vapor transmission before anything else.
- Create surface profile by diamond grinding or acid etching.
- Repair cracks and spalls, then let patches cure fully.
- Vacuum and wipe the slab until it's dust-free.
- Apply the base coat within the recoat window.
- Broadcast decorative flakes while the base is wet.
- Roll the clear topcoat once the base is tack-free.
How Long Does Garage Epoxy Take to Cure?
The four cure stages you actually care about:
Call (919) 824-5403 or email craigrfear@gmail.com for a free estimate →
- Pot life (working time). The minutes between mixing Part A and Part B and the point where the blend turns stringy and unrollable. Fast polycuramine systems like RockSolid can gel in 20-30 minutes in a warm garage; standard high-solids epoxies give you 45-60 minutes. Once it gels, it's trash, never add thinner.
- Tack-free / recoat window. The window when the base coat is cured enough to walk on but still chemically active enough for the next coat to cross-link to it. Miss the upper end and the topcoat sits on a fully cured, glossy film with nothing to bond to, the most common cause of topcoat delamination on DIY jobs.
- Walkable cure. Typically 8-10 hours for polycuramine, 16-24 hours for standard high-solids epoxy, and 24-48 hours for water-based formulas like EpoxyShield. Walkable does not mean loadable.
- Full chemical cure. The point where the film reaches its rated hardness, chemical resistance, and adhesion strength, usually 5-7 days for standard epoxy, stretching to 10-14 days in cool, humid conditions. Hot tire pickup risk is highest here: park too early and a warm tire can pull the coating off the slab.
Temperature and humidity shift every number above.
| Condition | Effect on Cure |
|---|---|
| Slab below 60°F | Cure time roughly doubles; some epoxies stop reacting entirely below 55°F |
| Slab 75-85°F, low humidity | Fastest cure, shortest pot life, mix smaller batches |
| Relative humidity above 75% | Amine blush can form on the surface, blocking intercoat adhesion |
| Slab within 5°F of dew point | Condensation forms under the film; adhesion fails from below |
Why a missed recoat window is not a small problem. Epoxy bonds chemically (fresh coats cross-link at the molecular level) or mechanically (a cured coat must be scuffed to 80-120 grit). A chemical bond is roughly an order of magnitude stronger. Blow past the recoat window and you must sand or grind the entire floor before the topcoat, a step most DIYers skip, and the reason so many two-coat kits fail at the interface between coats rather than at the concrete.
- Day 1 morning: grind, patch, vacuum, moisture test review
- Day 1 afternoon: base coat, broadcast flakes while wet
- Day 2 morning: scrape excess flake, apply clear topcoat
- Day 3-7: keep the garage empty; no vehicle traffic
- Day 7-14: full chemical cure; light foot traffic only until then
DIY Garage Floor Epoxy Mistakes to Avoid
Most DIY epoxy guides list the same four mistakes: don't skip prep, don't apply on a damp slab, don't mix partial batches, don't roll too thin. That advice is correct and useless, it doesn't explain why each mistake destroys the floor or how the failure presents three years later. Here's the mechanism behind each, plus the long-term failure modes almost no kit review covers.
The four classic mistakes, with the mechanism
1. Skipping surface prep. Epoxy doesn't glue to concrete, it mechanically locks into the microscopic profile of an abraded surface. A smooth, sealed, or contaminated slab gives the resin nothing to grip. Acid etching opens the surface chemically but leaves salts behind that can interfere with adhesion; diamond grinding creates a far more consistent profile. The International Concrete Repair Institute's surface profile guidelines describe the concrete surface profile (CSP) scale, most epoxy kits want CSP 2-3, which is a light-to-medium grind, not a quick acid wash.
The long-term failures nobody warns you about
These are the failures that show up at year three, not year one, and they're the reason a DIY floor that looked perfect on install day starts peeling while a professionally installed floor doesn't.
What separates a five-year floor from a fifteen-year floor
It isn't the brand on the box. It's whether the slab was tested for moisture, the surface profile created correctly, the recoat window respected, and the film applied at the specified thickness, all decided before the first roller touches concrete.
When to Call a Professional Epoxy Installer
Some slabs shouldn't get a DIY kit at all. If moisture testing shows high vapor transmission, if the concrete is spalling or heavily cracked, or if you need a commercial-grade floor for a warehouse or showroom, professional installation is the cheaper path over time. The Occupational Safety and Health Administration's guidance on walking-working surfaces also matters for commercial spaces, where slip resistance and floor condition affect workplace safety compliance.
Frequently Asked Questions
How much does it cost to epoxy a 1000 sq ft garage?
DIY epoxy kit pricing varies widely by product and coverage. Rust-Oleum RockSolid Polycuramine kits start around $200-$280, while ArmorGarage DIY kits run $2.50-$4.00 per square foot. A 1,000 sq ft garage could require multiple kits depending on coverage rates. Professional installation costs more but includes surface preparation and warranty. Request a free estimate from Concrete-Enhancements for your specific garage size and condition.
How long does a DIY epoxy floor last compared to professional installation?
DIY epoxy longevity depends heavily on surface preparation and product quality. ArmorGarage kits claim a 10-15+ year lifespan when applied correctly. Water-based kits like Rust-Oleum EpoxyShield may show wear sooner. Professional installations from CTi Certified dealers like Concrete-Enhancements typically last longer because they include diamond grinding, moisture testing, and proper substrate repair before coating.
Is it worth doing a DIY epoxy floor or should I hire a professional?
DIY epoxy works for homeowners with time, patience, and a sound concrete slab. It saves money upfront but risks application mistakes that cause peeling or hot tire pickup. Hiring a professional makes sense when your garage floor has moisture issues, existing coating failures, or extensive cracking. Concrete-Enhancements offers free estimates to assess whether your slab is a good candidate for DIY or needs professional preparation.
What are the biggest DIY garage floor epoxy mistakes to avoid?
The most common DIY garage floor epoxy mistakes include skipping surface preparation, applying epoxy over a damp slab, ignoring the recoat window, and mixing batches incorrectly. Acid etching alone often leaves a surface profile too smooth for proper adhesion. Diamond grinding or thorough mechanical abrasion gives epoxy something to grip. Always test for moisture vapor transmission before coating, and never apply epoxy below the dew point.
Tags: garage floor epoxy, diy garage floor epoxy kit reviews, garage floor epoxy preparation steps, how long does garage epoxy take to cure, diy garage floor epoxy mistakes to avoid
Frequently Asked Questions
DIY epoxy kit pricing varies widely by product and coverage. Rust-Oleum RockSolid Polycuramine kits start around $200-$280, while ArmorGarage DIY kits run $2.50-$4.00 per square foot. A 1,000 sq ft garage could require multiple kits depending on coverage rates. Professional installation costs more but includes surface preparation and warranty. Request a free estimate from Concrete-Enhancements for your specific garage size and condition.
DIY epoxy longevity depends heavily on surface preparation and product quality. ArmorGarage kits claim a 10-15+ year lifespan when applied correctly. Water-based kits like Rust-Oleum EpoxyShield may show wear sooner. Professional installations from CTi Certified dealers like Concrete-Enhancements typically last longer because they include diamond grinding, moisture testing, and proper substrate repair before coating.
DIY epoxy works for homeowners with time, patience, and a sound concrete slab. It saves money upfront but risks application mistakes that cause peeling or hot tire pickup. Hiring a professional makes sense when your garage floor has moisture issues, existing coating failures, or extensive cracking. Concrete-Enhancements offers free estimates to assess whether your slab is a good candidate for DIY or needs professional preparation.
The most common DIY garage floor epoxy mistakes include skipping surface preparation, applying epoxy over a damp slab, ignoring the recoat window, and mixing batches incorrectly. Acid etching alone often leaves a surface profile too smooth for proper adhesion. Diamond grinding or thorough mechanical abrasion gives epoxy something to grip. Always test for moisture vapor transmission before coating, and never apply epoxy below the dew point.