how-to
How to Fix Spalling Concrete Driveway: Step-by-Step
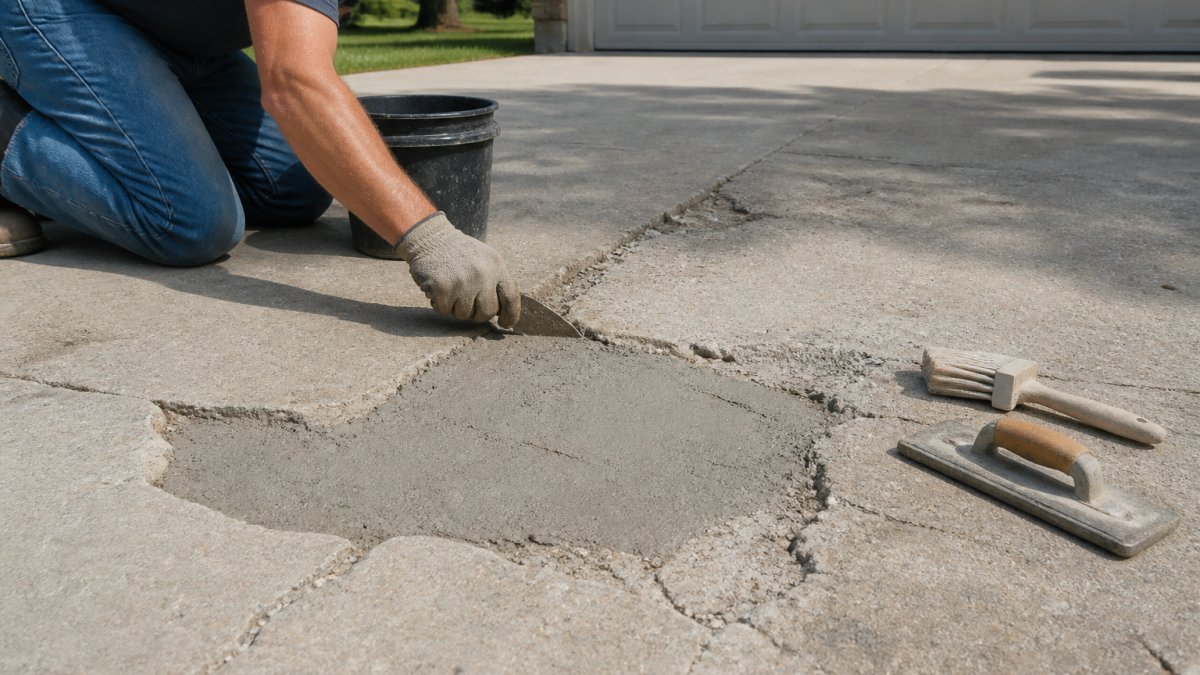
Table of Contents
- What Is Spalling Concrete and How to Recognize It
- Common Causes of Concrete Driveway Spalling
- Assessing Damage Severity and Repair Depth
- Step-by-Step Repair Process for Spalling Concrete
- Selecting the Right Concrete Patching Compound for Driveway Repair
- Concrete Driveway Resurfacing vs. Patching: When to Choose Each
- Concrete Driveway Repair Cost and Budget Planning
- Preventing Future Spalling and Extending Driveway Life
- Frequently Asked Questions
Last Updated: October 15, 2026
What Is Spalling Concrete and How to Recognize It
Spalling concrete is the flaking or chipping away of the concrete surface, leaving pits, rough patches, or exposed aggregate, and understanding how to fix spalling concrete driveway damage is essential for homeowners. It's one of the most common forms of concrete driveway damage.
Spalling looks different depending on severity. Early spalling shows as minor surface pitting, tiny holes or divots scattered across the driveway. As it progresses, larger chunks flake away, exposing the concrete underneath.
The key to managing spalling is catching it early. Surface-level spalling is straightforward to repair. Deep spalling that reaches the reinforcing steel or extends more than half an inch down requires professional intervention or full resurfacing.
Common Causes of Concrete Driveway Spalling
Understanding what causes spalling helps you prevent it after repair. Most driveway spalling stems from moisture damage, chemical exposure, or poor initial concrete installation. The good news: many causes are preventable with proper maintenance and protective measures.
Freeze-Thaw Damage and Winter Weather
Water is concrete's enemy in cold climates. When moisture seeps into concrete, then freezes, it expands. That expansion puts pressure on the concrete from the inside. When it thaws, small gaps form.
This cycle accelerates in areas with frequent temperature swings. A driveway in a region that sees freezing nights and warming days repeatedly throughout winter experiences more spalling than one in consistently cold areas. The constant expansion and contraction weakens the surface layer.
Snow and ice sitting on your driveway also trap moisture against the concrete. That standing water works its way into tiny cracks and pores, setting up the next freeze-thaw cycle. Removing snow promptly and allowing the surface to dry reduces this risk significantly.
De-Icing Salt and Chemical Exposure
De-icing salt is effective at melting ice, and damaging concrete. Salt draws moisture into the concrete and accelerates the freeze-thaw process. It also reacts chemically with the concrete binder, weakening the matrix that holds the surface together.
Repeated salt exposure compounds the damage. Each winter application makes the concrete more porous and brittle. After several seasons, the surface becomes vulnerable to spalling even without extreme cold.
Other chemicals cause similar damage: fertilizers, pool chemicals, and acidic substances from vehicle leaks all degrade concrete over time. If your driveway borders a lawn that receives heavy fertilizer, or if you park vehicles that drip fluids, chemical exposure may be accelerating spalling.
Assessing Damage Severity and Repair Depth
Before you start repairs, determine how deep the damage goes. This decides whether you patch or resurface your entire concrete driveway repair.
Light spalling appears as surface pitting less than 1/4 inch deep. These repairs are simple, clean, prepare, and apply a concrete patching compound.
Moderate spalling extends 1/4 to 1/2 inch deep. You can see the damage clearly, and chunks may be loose. These areas need removal of all deteriorated material before patching.
Deep spalling goes beyond 1/2 inch and may expose reinforcing steel or the concrete base layer. Large sections are missing or unstable.
Run your hand over the damaged area. If loose concrete crumbles or flakes away easily, you have unstable material that must be removed.
Step-by-Step Repair Process for Spalling Concrete
The process to fix spalling concrete driveway issues follows a logical sequence. Each step prepares the surface for the next. Skipping or rushing any step reduces the durability of your repair.
Step 1: Clean and Prepare the Damaged Surface
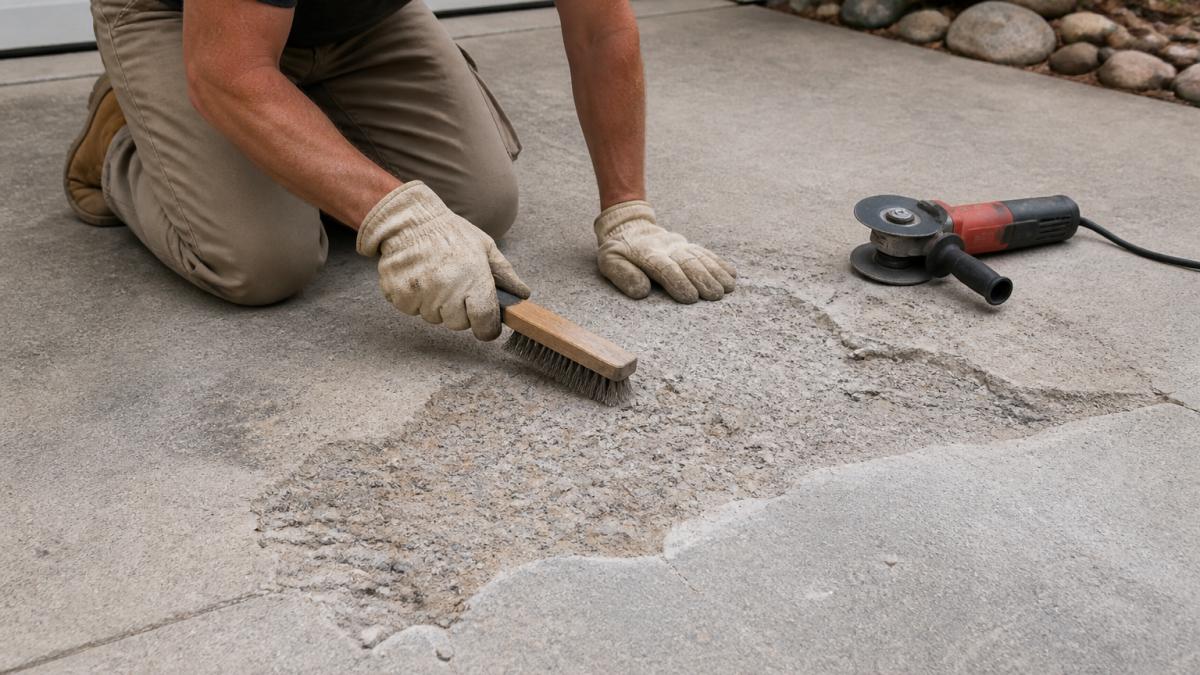
Start by removing all dirt, debris, and loose material from the damaged area. Use a stiff wire brush or broom to sweep away dust and loose concrete particles. A clean surface is essential, dirt prevents the repair material from bonding properly.
Rinse the area thoroughly with water. Use a pressure washer if available, set to medium pressure to avoid further damage. Allow the surface to dry completely before moving forward. Damp concrete won't bond well with repair material.
Pay special attention to the edges of the damage. These areas often have loose or partially detached concrete that needs removal.
Step 2: Remove Loose or Deteriorated Concrete
Use a cold chisel and hammer to remove any concrete that's cracked, crumbling, or unstable around the damaged area. The goal is to create clean, solid edges where the repair material will bond.
For larger areas, a concrete grinder works faster. Start at the edge of the damage and work inward, removing material until you reach solid concrete that won't crumble under light pressure. Create a slightly undercut edge, angling the sides slightly inward, so the repair material locks in place mechanically.
Remove all loose material. A repair that bonds only to weak concrete will fail. The time spent here determines how long your fix lasts.
Step 3: Roughen the Surface for Adhesion
A smooth concrete surface doesn't bond well with repair material. Roughening creates texture that the patching compound can grip. Use a wire brush, grinder, or concrete scarifier to create a rough texture across the entire repair area and slightly beyond.
The surface should feel noticeably rough to your hand, almost like sandpaper texture. This roughness dramatically improves bond strength and reduces the chance of the patch failing or peeling away.
Step 4: Apply Bonding Agent and Repair Material
Apply a concrete bonding agent to the prepared surface according to the product instructions. This liquid primer improves adhesion between the old concrete and the new repair material. Most bonding agents dry quickly, typically 15-30 minutes, but check your specific product.
While the bonding agent is still tacky, apply your concrete patching compound or concrete resurfacer. Use a putty knife, trowel, or float to spread the material evenly. Overfill the repair area slightly, the material will shrink as it cures.
Smooth the surface level with the surrounding concrete. Feather the edges so there's no sharp transition between the repair and the original surface. This improves appearance and prevents the edge from becoming a trip hazard.
Call (919) 824-5403 or email craigrfear@gmail.com for a free estimate →
Step 5: Cure and Finish the Repair
Curing time is critical. Most concrete patching compounds require 24-48 hours before foot traffic, and 7 days before vehicle traffic. Don't rush this step. Premature loading causes the repair to crack and fail.
Keep the repair area dry during curing. If rain is forecast, cover it with plastic sheeting. If the weather is hot and dry, mist the repair lightly with water a few times during the first 24 hours to prevent rapid drying, which causes cracking.
Once fully cured, the repair should be solid and level with the surrounding driveway. If the repair material shrank noticeably or cracked during curing, it may need a second application to achieve a smooth, durable finish.
Selecting the Right Concrete Patching Compound for Driveway Repair
Not all concrete repair products are equal. The right choice depends on repair depth, weather conditions, and your timeline.
Standard concrete patching compounds work well for shallow spalling (less than 1/4 inch). They're affordable and easy to apply.
High-strength repair mixes contain additives that improve bonding and durability.
Self-leveling concrete resurfacers spread easily and create a smooth finish. They work well for shallow, widespread damage. They're less suitable for deep, localized repairs because they spread too much.
Epoxy-based repair systems provide the strongest bond and best durability. They're more expensive and require careful mixing and application. Use epoxy for high-traffic areas or where previous repairs have failed.
Concrete Driveway Resurfacing vs. Patching: When to Choose Each
Sometimes patching isn't the right answer. If your driveway has extensive spalling across multiple areas, resurfacing may be more cost-effective and durable than multiple patches.
Patching works best when:
- Spalling is limited to a few small areas
- Damage is shallow (less than 1/2 inch deep)
- The rest of the driveway is in good condition
- You want a quick, affordable fix
Resurfacing makes sense when:
- Spalling covers more than 20% of the driveway surface
- Multiple patches would be needed
- The driveway shows other signs of age or deterioration
- You want a uniform appearance and long-term durability
A concrete overlay or resurfacing system covers the entire driveway with a new wear layer. This eliminates existing spalling and provides protection against future damage. It's a larger investment upfront but often costs less per square foot than multiple repairs over time.
At Concrete-Enhancements, we evaluate each driveway individually. Sometimes a single patch is the right call. Other times, resurfacing delivers better value and appearance. We'll recommend the approach that makes the most sense for your specific situation.
Concrete Driveway Repair Cost and Budget Planning
Repair costs depend on damage extent, material choice, and whether you DIY or hire professionals. Understanding these factors helps you budget realistically.
DIY patching for small areas costs between $50-$200 in materials. You provide the labor. This works for minor spalling if you're comfortable with basic concrete work.
Professional patch repairs typically range from $300-$800 per damaged area, depending on size and complexity. Professionals ensure proper surface prep, correct material selection, and correct application technique. The repair lasts significantly longer than most DIY attempts.
Concrete driveway resurfacing costs more per square foot but covers the entire surface. Budget depends on driveway size and the resurfacing system chosen. Get quotes from local professionals for accurate pricing in your area.
Preventing Future Spalling and Extending Driveway Life
Once you've fixed spalling, prevent it from returning. Proper maintenance adds years to your driveway's life.
Seal your concrete regularly. A quality concrete sealer creates a protective barrier against moisture and chemicals.
Remove snow and ice promptly. Don't let snow sit on your driveway. Clear it soon after storms.
Address cracks immediately. Small cracks are entry points for water.
Maintain proper drainage. Ensure water runs off your driveway rather than pooling. Standing water accelerates deterioration.
Avoid harsh chemicals. Don't park vehicles that leak fluids on your driveway. Minimize fertilizer runoff from adjacent lawns.
We assess your specific situation, recommend the most cost-effective solution, and execute repairs that last.
Frequently Asked Questions
What is the difference between spalling and regular concrete cracks?
Spalling is surface deterioration where concrete flakes, pits, or chunks break away from the top layer, often exposing aggregate. Cracks are linear breaks that run through the concrete. Spalling typically results from freeze-thaw cycles, de-icing salt, or water penetration, while cracks stem from settling, shrinkage, or structural stress. Both require repair, but spalling demands surface preparation and bonding agents, whereas crack repair focuses on filling the linear void.
Can you use a concrete patching compound for driveway spalling on deep damage?
Concrete patching compounds work best for shallow spalling (less than 1/4 inch deep). For deeper damage exceeding 1/2 inch, use a high-strength repair mortar or concrete resurfacer designed for thicker applications. Patching compounds have thickness limits; exceeding them compromises bond strength and durability. Always check the product specifications for maximum application thickness to ensure the repair lasts.
How long does it take for a spalling concrete driveway repair to cure?
Most concrete patching compounds cure in 24 to 48 hours before light use. Full curing typically takes 7 days, during which you should avoid heavy traffic or pressure washing. Weather affects curing time: cold temperatures and high humidity slow the process, while heat accelerates it. Follow the manufacturer's curing instructions on your specific repair material, and avoid de-icing salt or water exposure during the curing period to prevent failure.
Is concrete driveway resurfacing better than patching for widespread spalling?
Patching works for isolated spalling spots; resurfacing is better for widespread damage across the driveway. Resurfacing applies a new concrete overlay 1/4 to 1/2 inch thick over the entire surface, providing uniform appearance and protection. Patching individual areas leaves visible repairs and does not address underlying causes affecting the rest of the driveway. For damage covering more than 20% of the surface, resurfacing offers superior durability and aesthetic results.
Tags: fix spalling concrete driveway, how to fix spalling concrete driveway, causes of concrete driveway spalling, concrete patching compound for driveway, concrete driveway resurfacing
Frequently Asked Questions
Spalling is surface deterioration where concrete flakes, pits, or chunks break away from the top layer, often exposing aggregate. Cracks are linear breaks that run through the concrete. Spalling typically results from freeze-thaw cycles, de-icing salt, or water penetration, while cracks stem from settling, shrinkage, or structural stress. Both require repair, but spalling demands surface preparation and bonding agents, whereas crack repair focuses on filling the linear void.
Concrete patching compounds work best for shallow spalling (less than 1/4 inch deep). For deeper damage exceeding 1/2 inch, use a high-strength repair mortar or concrete resurfacer designed for thicker applications. Patching compounds have thickness limits; exceeding them compromises bond strength and durability. Always check the product specifications for maximum application thickness to ensure the repair lasts.
Most concrete patching compounds cure in 24 to 48 hours before light use. Full curing typically takes 7 days, during which you should avoid heavy traffic or pressure washing. Weather affects curing time: cold temperatures and high humidity slow the process, while heat accelerates it. Follow the manufacturer's curing instructions on your specific repair material, and avoid de-icing salt or water exposure during the curing period to prevent failure.
Patching works for isolated spalling spots; resurfacing is better for widespread damage across the driveway. Resurfacing applies a new concrete overlay 1/4 to 1/2 inch thick over the entire surface, providing uniform appearance and protection. Patching individual areas leaves visible repairs and does not address underlying causes affecting the rest of the driveway. For damage covering more than 20% of the surface, resurfacing offers superior durability and aesthetic results.