how-to
How to Resurface a Sloped Asphalt Driveway
Last Updated: November 1, 2026
Quick Summary
Resurfacing a sloped asphalt driveway means laying a new asphalt layer over a cleaned, repaired base while preserving the existing pitch so water still drains away. Apply the overlay in lifts of no more than about 1 to 1.5 inches compacted, work from the bottom up, and compact each lift while it is still hot.
- A drop of about 1 inch per foot gives roughly a 2% grade, a common minimum for drainage.
- Alligator cracking, spongy spots and deep ruts signal base failure that resurfacing will not fix.
- A missed or thin tack coat is the most common cause of slippage and delamination on a grade.
- Overlap each compaction pass by about half the plate width and work from the low side uphill.
- Most residential overlays need 24 to 48 hours before foot traffic and 3 to 7 days before vehicles.
Table of Contents
- Why Slope Changes Everything in Asphalt Driveway Resurfacing
- Assessing Pavement Condition and Grade Before You Commit
- Asphalt Driveway Resurfacing Steps for a Sloped Surface
- Repairing Depressions in an Asphalt Driveway on a Grade
- Sloped Driveway Drainage Solutions That Keep Water Moving
- Asphalt Driveway Resurfacing Cure Time and Traffic Control
- When Resurfacing Will Not Fix a Sloped Driveway
- Getting a Professional Assessment for Your Sloped Driveway
- Frequently Asked Questions
Why Slope Changes Everything in Asphalt Driveway Resurfacing
Resurfacing a sloped asphalt driveway is not the same job as resurfacing a flat one.
Cost data shows why homeowners hesitate. According to Angi's driveway resurfacing cost guide, professional driveway resurfacing runs about $3,000, with most homeowners paying between $600 and $6,000. A second estimate from Thumbtack's asphalt resurfacing cost data puts national asphalt resurfacing at roughly $1,277 to $4,001.
Here is the core problem most guides skip: a sloped asphalt driveway sheds water by design. Any new surface layer must preserve that pitch.
Asphalt resurfacing is the process of laying a new asphalt layer over existing pavement after cleaning, repairing, and preparing the base.
Assessing Pavement Condition and Grade Before You Commit
Before any resurfacing work starts, check two things: the condition of the existing pavement and the actual grade of the driveway. Skip this and you may resurface a surface that was never sound, or cover a grading problem that will reappear within a season.
Diagnose the pavement: surface wear versus base failure
Walk the driveway and note:
- Cracks wider than a quarter inch
- Potholes and crumbling edges
- Low spots where water pools after rain
Then separate the findings into two buckets:
- Surface problems: oxidation, hairline cracks, minor raveling, shallow depressions that hold only a film of water. These are candidates for resurfacing.
- Structural problems: alligator cracking, spongy spots, deep ruts, potholes that return after patching, and depressions that hold standing water. These point to a weak base or subgrade and usually require repair or reconstruction before any overlay.
Measure the grade accurately
A 4-foot level and a tape measure give a usable first reading: place the level on the surface, lift one end until the bubble centers, and measure the gap. A drop of about 1 inch per foot gives roughly a 2% grade, which is a common minimum for drainage. Anything flatter invites puddling.
For a more reliable number, use a 10-foot straightedge or a string line stretched between two points and measure the drop over that full run. A 10-foot run that drops 2 to 3 inches is roughly a 2% to 2.5% grade. Repeat the measurement in three places: along each wheel path and down the center.
Trace where the water actually goes
Watch the driveway during a heavy rain and note:
- Where water sheets fastest (usually the steepest section)
- Where it pools or stalls (a low spot or a counter-slope)
- Where it exits, onto the street, into landscaping, or against the garage door and foundation
If water pools against the garage door, the problem is usually a negative or flat pitch near the apron, not the overall grade. If water stalls mid-driveway, look for a depression or a change in slope where two grades meet. These are the conditions that resurfacing alone will not fix.
Check the edges and the apron
On a sloped driveway, the edges carry more runoff pressure than on a flat one. Look for crumbling edges, undermined shoulders, and separation where the driveway meets the garage apron or the street. An edge that has lost support will not hold an overlay, the new asphalt will crack along the same line.
Confirm permits and local rules
Rules vary by jurisdiction, so check what applies before you commit. Our guide to driveway resurfacing permits and regulations covers what to confirm.
Asphalt Driveway Resurfacing Steps for a Sloped Surface
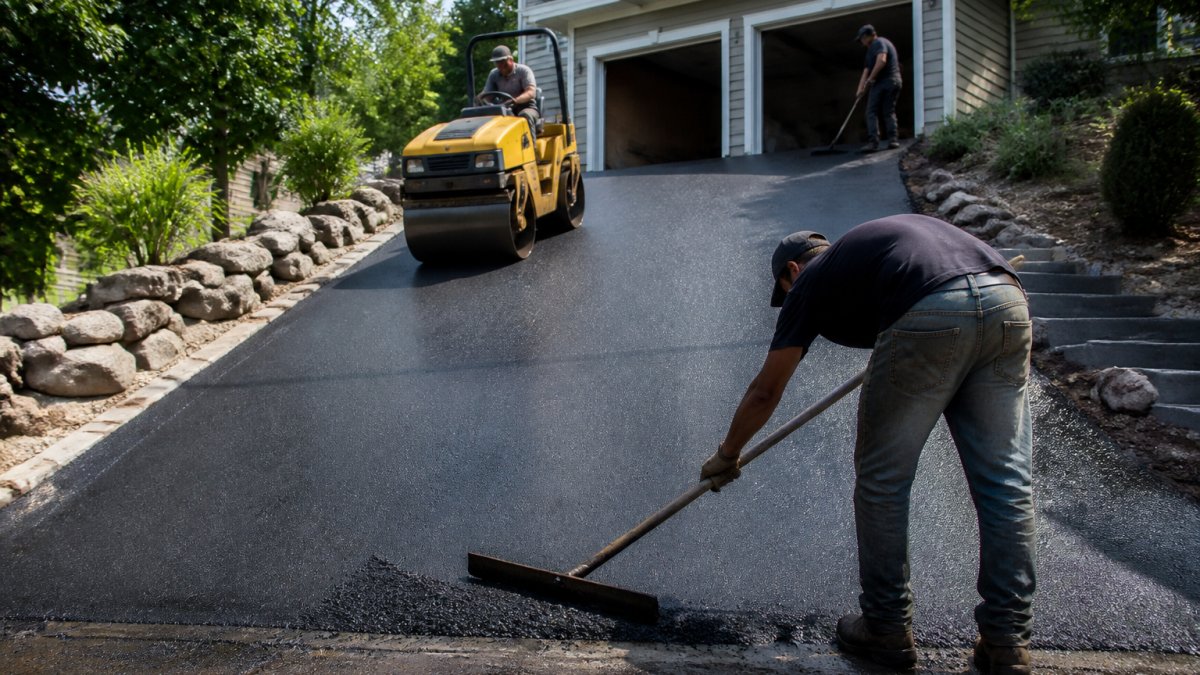
The sequence for resurfacing a sloped asphalt driveway follows four stages: prepare, repair, apply, and compact. Each stage protects the next, and on a grade each stage has a slope-specific twist that flat-driveway guides skip.
Step 1: Clean and Prepare the Surface
Surface preparation decides whether the new asphalt coat sticks. Clear all dirt, oil, moss, and loose gravel. Power washing followed by a full dry is standard. Any debris left behind becomes a bond breaker, and the overlay lifts within a season.
On a grade, work from the top down so runoff carries loosened material away from the work zone. Pay extra attention to the transition at the top of the slope, where water enters, and at the bottom, where it exits, those are the two zones where debris and water concentrate.
Step 2: Repair Cracks, Potholes, and Edge Damage
Fill cracks with crack filler and patch potholes before the overlay goes down. For deeper holes, cold mix asphalt works as a temporary fill until the full repair.
A 2025 analysis in Materials journal on cold-mix asphalt repair found that material placement and compaction are the most significant phases in the repair process. That holds true on grades, where poor compaction shows up first.
Step 3: Apply the New Asphalt Layer
On a slope, the mix and the lift thickness matter more than they do on flat ground:
- Mix selection: a stiffer mix with a slightly larger aggregate grade resists downhill creep better than a soft, fine mix. Ask the supplier for a mix designed for the local climate and for placement on a grade.
- Lift thickness: place the overlay in lifts of no more than about 1 to 1.5 inches compacted. Thick single lifts on a slope tend to shove and migrate downhill before they cool.
- Placement direction: apply from the bottom up so the material is pushed uphill rather than allowed to run down. Crews typically use a lute to spread and feather the mix against the existing surface.
Step 4: Compact in Lifts and Control the Texture
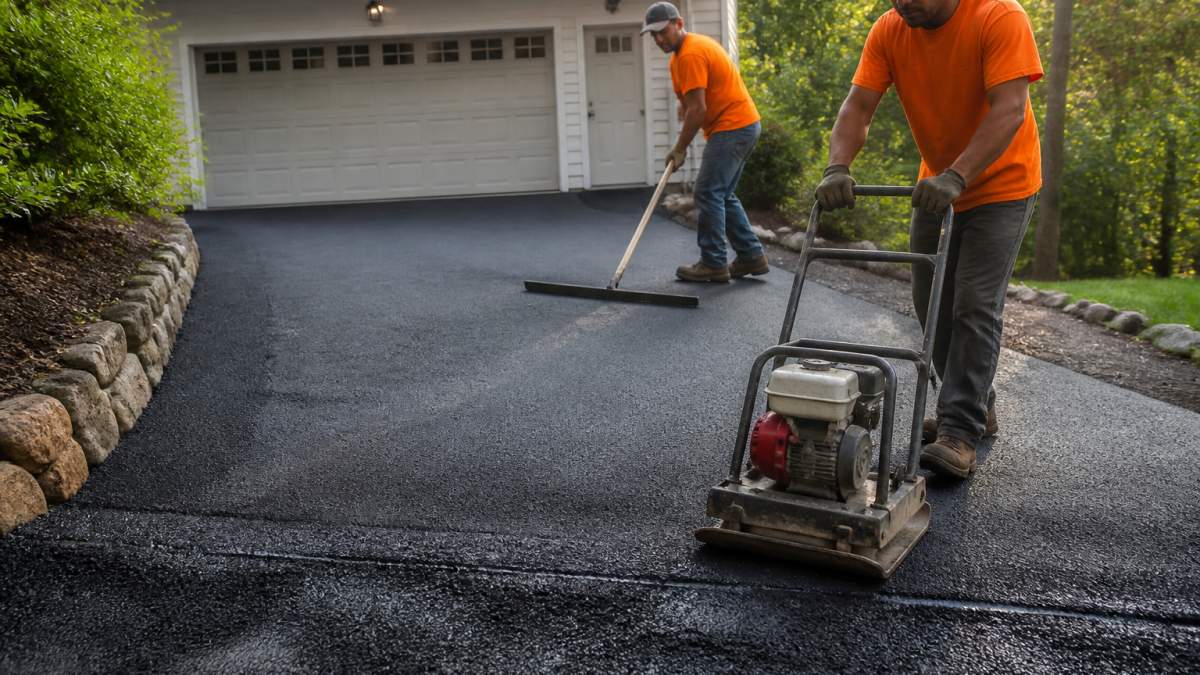
Compaction is where sloped work differs most: the plate compactor fights gravity, so passes take longer and coverage must overlap. Compact each lift while the mix is still hot, timing matters more on a grade because a cooling mix stiffens and resists compaction.
- Overlap passes: run each pass so it overlaps the previous one by about half the plate width.
- Work uphill: compact from the low side toward the high side so material is not pushed downhill.
- Finish texture: the finished surface should be tight but not polished. A slightly coarser texture improves traction on a grade, especially where the driveway meets the street or garage apron.
Proper adhesion and curing depend on dry, warm conditions. Traffic stays off until the surface sets.
| Step | What Happens | Why Slope Makes It Harder |
|---|---|---|
| Clean and prepare | Remove dirt, oil, debris | Runoff carries debris downhill |
| Repair damage | Fill cracks, patch potholes | Edges take more water pressure |
| Apply overlay | Lay 1-2 inch asphalt layer in lifts | Material slides and shoves on steep grade |
| Compact | Plate compact in overlapping uphill passes | Gravity resists compaction; cooling mix stiffens fast |
Repairing Depressions in an Asphalt Driveway on a Grade
Repairing depressions in an asphalt driveway on a grade means finding the cause before filling the low spot.
Call (919) 824-5403 or email craigrfear@gmail.com for a free estimate →
Here is the distinction that matters:
- Surface dip: shallow, holds a thin film of water, fixable with patching
- Structural depression: deep, spongy, holds standing water, needs base repair
Patching a structural depression without fixing the base is wasted money. The patch sinks again within a year or two.
If you are weighing a small patch against a bigger fix, our guide on whether concrete patching is worth it for driveways walks through the cost and longevity trade-offs.
Sloped Driveway Drainage Solutions That Keep Water Moving
Sloped driveway drainage solutions fall into two groups: surface grading and added drainage. The right pick depends on where water actually goes when it rains.
Watch the driveway during a heavy rain. Note where water sheets, where it pools, and where it exits. Then match the fix:
- Re-grade the surface: adjust the pitch so water runs to a safe exit point
- Channel drains: a trench drain across the driveway catches sheet flow before it reaches a garage
- French drains: a gravel-filled trench redirects subsurface water
The goal is simple: no standing water on the pavement and no runoff into the garage or foundation. If water currently puddles against the garage door, resurfacing alone will not fix it.
Asphalt Driveway Resurfacing Cure Time and Traffic Control
Asphalt driveway resurfacing cure time depends on the mix and the weather, but most residential overlays need 24 to 48 hours before foot traffic and 3 to 7 days before vehicles. Full curing takes longer, often several weeks.
Traffic control on a slope needs care. Water and weight both move downhill, so keep heavy loads off the fresh surface longer than you would on flat ground. Park at the top only after the surface has set.
Plan around the weather. Cool, wet conditions slow curing and weaken adhesion. A dry stretch with mild temperatures gives the best result.
When Resurfacing Will Not Fix a Sloped Driveway
Resurfacing cannot correct faulty slope or pitch. This is the contrarian point most guides avoid: a new asphalt layer over a badly graded driveway just hides the problem.
A homeowner discussion on Houzz about repairing a new asphalt driveway's slope describes saw-cutting and repaving to establish proper pitch away from the garage, rather than relying on a surface treatment.
Resurfacing will not fix:
- Water that pools against the foundation
- A driveway that slopes toward the garage
- Collapsed base layers or subgrade failure
In these cases, replacement or partial reconstruction is the real fix. Our driveway repair vs replacement cost comparison lays out a decision framework for choosing between the two.
Getting a Professional Assessment for Your Sloped Driveway
A professional assessment answers one question: can this sloped asphalt driveway be resurfaced, or does it need more? That answer depends on grade, drainage, and base condition, and it is worth getting before you spend on materials.
A proper assessment includes:
- Measuring the actual grade and pitch
- Checking drainage paths and low spots
- Testing the base for soft or failing areas
For homeowners ready to move forward, contact Concrete-Enhancements for a free estimate. Their Driveway Repair & Resurfacing Raleigh NC page covers driveway resurfacing, repair, sealing, staining and apron restoration in Raleigh, Durham and Central NC. And if you are hiring a contractor, our guide on hiring professional concrete restoration services explains what to ask and how to check licensing.
Concrete-Enhancements brings 20+ years of experience and CTi Certified Dealer status to its concrete projects.
Frequently Asked Questions
Can a sloped asphalt driveway be resurfaced?
Yes, a sloped asphalt driveway can be resurfaced if the base layer is intact and the grade directs water away from structures. The slope itself is not a disqualifier, but it changes how the overlay is placed and compacted. If the grade is wrong, resurfacing alone will not correct it, and saw-cutting plus repaving may be needed to establish proper pitch.
How long does asphalt driveway resurfacing take to cure?
A new asphalt layer typically cures enough for foot traffic within 24 to 48 hours and for vehicles in three to seven days, depending on weather and thickness. Full cure takes several weeks to months. On a sloped asphalt driveway, keep heavy vehicles off longer because braking and turning stress the fresh surface. Hot, dry conditions speed curing; cool, damp weather slows it. Follow the contractor's specific traffic schedule.
How do you fix depressions in an asphalt driveway before resurfacing?
Repairing depressions in an asphalt driveway starts with finding the cause. If a low spot holds water, the base layer may be failing or the grade may be off. Skipping this step traps water under the new overlay and leads to puddling and premature failure.
How do you prevent water from pooling on a sloped asphalt driveway?
The surface should shed water within 24 to 48 hours after rain. If water still stands, the grade or base needs attention before any new asphalt is applied. A site assessment can confirm where the water is actually going.
A sloped asphalt driveway punishes shortcuts. Water finds every low spot, and a surface layer laid over a bad grade fails within a season or two. Concrete-Enhancements assesses grade, drainage, and base condition before recommending any resurfacing work, backed by over 20 years of experience and CTi Certified Dealer status. Get started with Concrete-Enhancements and resurface your driveway on a foundation that actually holds. Call (919) 824-5403 or email craigrfear@gmail.com for a free estimate.

Tags: sloped asphalt driveway, resurfacing a sloped asphalt driveway, asphalt driveway resurfacing steps, repairing depressions in an asphalt driveway, asphalt driveway resurfacing cure time
Frequently Asked Questions
Yes, a sloped asphalt driveway can be resurfaced if the base layer is intact and the grade directs water away from structures. The slope itself is not a disqualifier, but it changes how the overlay is placed and compacted. If the grade is wrong, resurfacing alone will not correct it, and saw-cutting plus repaving may be needed to establish proper pitch.
A new asphalt layer typically cures enough for foot traffic within 24 to 48 hours and for vehicles in three to seven days, depending on weather and thickness. Full cure takes several weeks to months. On a sloped asphalt driveway, keep heavy vehicles off longer because braking and turning stress the fresh surface. Hot, dry conditions speed curing; cool, damp weather slows it. Follow the contractor's specific traffic schedule.
Repairing depressions in an asphalt driveway starts with finding the cause. If a low spot holds water, the base layer may be failing or the grade may be off. Skipping this step traps water under the new overlay and leads to puddling and premature failure.
The surface should shed water within 24 to 48 hours after rain. If water still stands, the grade or base needs attention before any new asphalt is applied. A site assessment can confirm where the water is actually going.