listicle
Concrete Resurfacing Mistakes: 7 Errors That Cause Peeling and Failure
Last Updated: November 11, 2026
Quick Summary
The most common concrete resurfacing mistakes are skipping a pre-project inspection, poor surface preparation, ignoring cracks and moisture, mixing the resurfacer incorrectly, applying the wrong thickness, and rushing the cure. Each one can cause peeling, cracking, or early failure, so a structural and moisture check should come before any material is ordered.
- Inspect structure, surface condition, and moisture separately before buying any material.
- Treat a single no on structure, cracks, or moisture as a no-go until the problem is fixed.
- Use mechanical prep such as shot blasting or diamond grinding, then vacuum thoroughly.
- Check surface profile against the CSP chart and run a pull-off adhesion test.
- Follow the manufacturer's mix ratio exactly and keep traffic off the surface for the full cure period.
Table of Contents
- Skipping a Pre-Resurfacing Inspection on the Existing Slab
- Poor Concrete Surface Preparation and Contaminant Removal
- Ignoring Cracks, Drainage and Moisture Problems
- Mixing the Resurfacer Incorrectly
- Applying Concrete Overlay Too Thin or Too Thick
- Rushing Cure Time and Weather Conditions
- Booking Your Resurfacing Project With a Professional Crew
- Frequently Asked Questions
Skipping a Pre-Resurfacing Inspection on the Existing Slab
Most concrete resurfacing failures start before a single bag of material is opened. Crews often skip the inspection and go straight to ordering product, which is the fastest way to waste money on a slab that was never ready. The inspection is not a formality; it is the decision point that tells you whether a surface treatment can last or whether the slab needs structural work first.
A proper inspection looks at three layers: structure, surface condition, and moisture. Structure means checking for active movement, heaving, settlement, and hollow spots that sound dull when tapped with a hammer. Surface condition means flaking, delamination, spalling, and areas where previous coatings are lifting. Moisture means standing water, persistent dampness, and vapor transmission that can lift a new layer from below. Each layer can independently disqualify a slab, so evaluate them separately rather than letting a clean-looking surface override a structural problem.
A Go/No-Go Checklist Before You Buy Material
Before buying material, run through this list. If you answer "no" to any of the first three items, stop and address that problem first. The checklist is designed as a decision framework, not a suggestion list: a single "no" on structure, cracks, or moisture means the project is a no-go for resurfacing until the underlying issue is corrected.
- The slab is structurally sound with no active movement, heaving, or settlement
- Cracks are identified and mapped, with their width and depth noted
- There is no standing water or persistent dampness on the surface
- Previous coatings or sealers are identified and removal is planned
- The surface can be profiled to the manufacturer's specified texture
- Weather over the next several days fits the product's application window
Write the answers down. A written record helps you compare what the slab looked like against what the crew actually found once work started, and it gives you a defensible basis for recommending repair instead of an overlay when the slab fails the checklist.
Watch out: a slab that passes the surface items but fails the structural item is the most expensive mistake in this list, because the overlay will look good for a season and then crack along the same movement lines. When structure is in question, the honest recommendation is often repair or replacement, not resurfacing.
Reading the Inspection Results
Not every "no" carries the same weight. Active movement, widespread cracking, and persistent moisture are stop signs; isolated hairline cracks, a few hollow spots, or a single low area are usually repairable before resurfacing. The purpose of the inspection is to separate the two categories so you do not spend a resurfacing budget on a slab that needs a structural fix, and so you do not walk away from a slab that only needs routine repair. Document the findings with photos and notes, and use them to build the scope of work: prep, repair, moisture control, and cure planning all flow from what the inspection finds.
Poor Concrete Surface Preparation and Contaminant Removal
Preparation decides whether the new layer bonds or peels in concrete resurfacing. Oil, sealers, curing compounds, efflorescence, and loose laitance all block adhesion. Even a clean-looking slab can carry contaminants that prevent the resurfacer from gripping, and no amount of careful mixing or finishing will compensate for a surface that was not properly opened and cleaned.
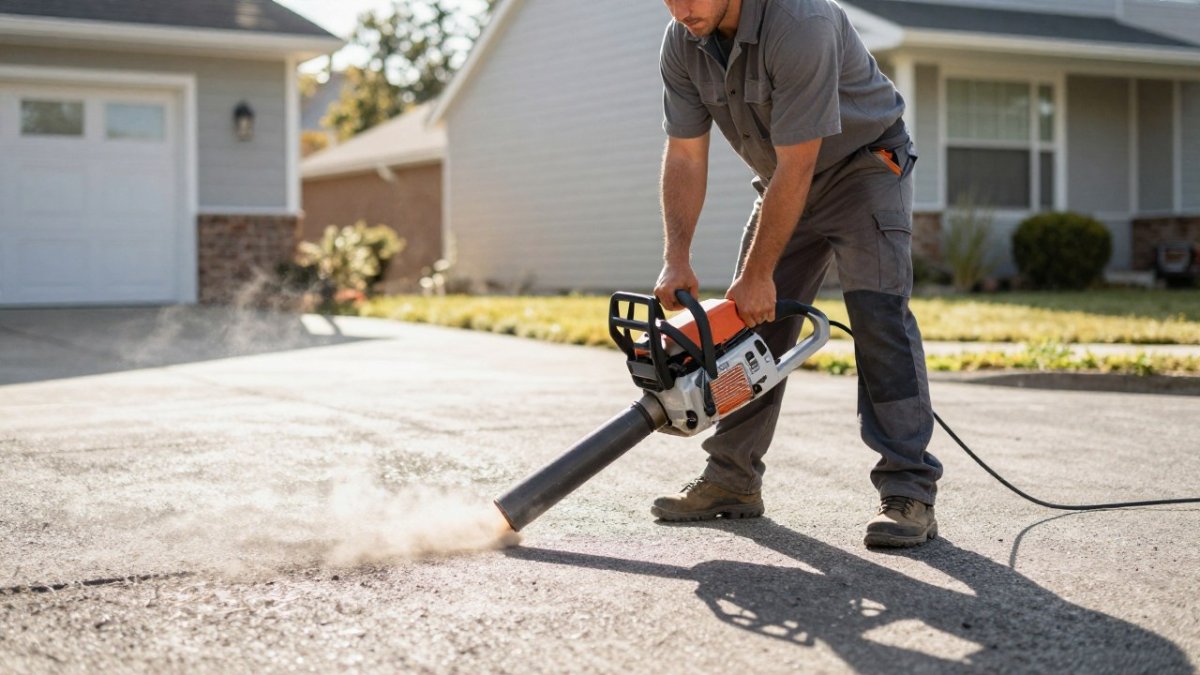
The standard approach is mechanical. Shot blasting or diamond grinding opens the pores and removes the weak top layer. Chemical cleaners alone rarely do enough on a neglected surface, and some cleaners leave residue that itself interferes with bond. After mechanical prep, vacuum thoroughly, because leftover dust is a common cause of delamination. Many failures trace back to rushed prep. A crew that spends two hours on a surface that needed a full day usually pays for it later.
Matching Preparation to the Product, Not to Habit
Preparation is product-specific. Resurfacers, epoxy coatings, and repair mortars each specify a target surface profile and a preferred preparation method in their technical data sheet, and those instructions vary by manufacturer and by product line. Read the data sheet before you start and treat its preparation section as the specification for the job. A method that worked on one product can be wrong for another, and a profile that is too smooth will fail even when the slab is spotless. When the data sheet is silent or ambiguous, contact the manufacturer's technical line rather than guessing.
Testing Surface Profile and Adhesion
Surface profile is the texture that gives the overlay something to grip. The International Concrete Repair Institute publishes a Concrete Surface Profile (CSP) chart that rates texture from CSP 1, nearly smooth, to CSP 9, heavily roughened. For the CSP chart and testing methods, see the concrete surface profile guide for epoxy.
A simple adhesion check is a pull-off test. Bond a test dolly to the prepared surface with epoxy, let it cure, then pull it with a calibrated tester. If the failure happens inside the concrete rather than at the bond line, your prep is working. If the overlay separates cleanly from the slab, the surface needs more work.
Watch out: a surface that looks profiled can still fail a pull-off test if dust or residue remains in the pores. Vacuum and, where the data sheet allows, a damp wipe followed by full drying will remove the fines that a visual check misses.
The article's preparation guidance comes down to a few concrete checks and specifications:
| Check | Target or method | Note |
|---|---|---|
| Surface profile | CSP 1 to CSP 9 chart | Compare finished texture against the chart |
| Adhesion test | Pull-off test | Failure inside concrete means prep is working |
| Preparation method | Shot blasting or diamond grinding | Mechanical prep opens pores |
| After prep | Thorough vacuuming | Leftover dust causes delamination |
| Moisture screen | Plastic sheet test, 16 to 24 hours | Condensation signals a need for a barrier |
Ignoring Cracks, Drainage and Moisture Problems
Cracks, poor drainage, and trapped moisture cause more long-term failures than almost anything else. An overlay does not stop a crack from moving. If the slab keeps cracking underneath, the new surface will crack too, usually along the same line.
Address cracks before resurfacing. Route out active cracks, fill them with a compatible crack filler, and let the filler cure fully. Our guide explains how to apply concrete crack filler correctly, from tools to curing times. Hairline cracks that have stopped moving may only need a surface treatment.
Drainage matters just as much. Water pooling on a slab soaks into the substrate and pushes up through the new layer. Check slope before you start. Where water sits, the fix may be grading or a drainage correction, not a thicker coating.
Moisture is the hidden factor. A slab can look dry and still release vapor that lifts coatings from below. To stop peeling from vapor, review epoxy floor moisture barrier solutions and their testing methods.
Mixing the Resurfacer Incorrectly
Mixing errors are easy to make and hard to fix once the material sets. Every product has a mix ratio, and that ratio is not a suggestion. Too much water weakens the material and raises the risk of cracking and dusting. Too little makes it difficult to spread and leaves poor bond coverage.
Follow the manufacturer's instructions exactly. Measure water with a graduated container, not by eye. Mix for the full time stated on the data sheet, then let the material rest briefly if the product calls for it. Mix only the amount you can apply within the working time. Material that has started to stiffen should not be re-tempered with water.
Use the right tools. A low-speed mechanical mixer with a paddle gives more consistent results than a drill with an improvised bit. Clean buckets and tools between batches so that leftover material does not contaminate the next mix.
Applying Concrete Overlay Too Thin or Too Thick
Thickness is one of the most important specifications in any resurfacing job. Apply too thin and the overlay may not cover surface texture, leaving weak spots that wear through quickly. Apply too thick and the material can crack, shrink unevenly, or fail to cure properly.
Check the manufacturer's stated thickness range and measure as you go. Use screed rails or depth gauges to keep the layer consistent. Feather edges carefully where the overlay meets existing concrete or a transition strip.
Watch for bleed water, the thin film of water that rises to the surface during finishing. Wait for it to evaporate before troweling. Troweling over bleed water weakens the top layer and causes surface defects that show up months later.
Rushing Cure Time and Weather Conditions
Curing is where many good applications go wrong. Resurfacers gain strength through hydration, and that process needs time and the right conditions. Foot traffic, vehicles, or furniture placed too early can crack or dent a surface that looks finished.
Plan around weather. Most products perform best within a stated temperature range, and extreme heat or cold can shorten working time or stall curing. Rain or high humidity during the cure window can cause surface dampness and dusting. Check the forecast before you commit to a date.
Respect the cure schedule. Keep traffic off the surface for the full period stated on the data sheet, and protect the overlay from direct sun or standing water while it cures. A rushed cure is a common cause of peeling and premature wear.
Booking Your Resurfacing Project With a Professional Crew
Many of these mistakes disappear when an experienced crew handles the job. Concrete-Enhancements is a CTi Certified Dealer with over 20 years of experience in decorative overlays, epoxy coatings, and concrete repair across the Raleigh-Durham Triangle, NC Triad, and Coastal SC. The team can inspect your slab, recommend the right system, and explain what the surface needs before work begins.
When you contact us, ask for a written inspection and a clear scope of work that covers prep, repair, moisture control, and cure planning. Pricing depends on slab condition, square footage, and the system you choose, so please request a free estimate for an accurate figure. If you are comparing contractors, this guide covers how to find professional concrete resurfacing services, including vetting criteria and pricing factors. Call (919) 824-5403 or email craigrfear@gmail.com to get started.
Frequently Asked Questions
What are the most common mistakes to avoid during concrete resurfacing?
The most frequent errors are skipping surface preparation, leaving oil or sealers on the slab, ignoring active cracks and moisture, mixing the material outside the manufacturer's water ratio, applying the overlay too thin or too thick, and walking on or exposing the surface before it has cured. Each one can cause peeling, delamination or uneven wear. Following the product data sheet for mixing, coverage and cure time, and documenting your prep steps, prevents most of these failures.
Why does concrete resurfacing peel or flake?
Peeling usually traces back to poor adhesion. Common causes include a surface that was not cleaned of dirt, oil, curing compounds or old coatings, a slab that was not profiled enough for the material to grip, water trapped under the overlay from moisture or drainage problems, and mixing errors that weaken the bond. Testing surface profile and adhesion before applying the full overlay helps catch these issues early.
How long does concrete resurfacer take to cure?
Cure time varies by product, thickness, temperature and humidity, so the manufacturer's data sheet is the authority for your specific material. Most resurfacers need to stay protected from foot traffic for a period after finishing, and vehicles or heavy furniture should wait considerably longer. Cooler temperatures and high humidity slow curing, while heat and wind can cause the surface to dry too fast and crack. Do not expose the surface to rain or heavy dew until the product has reached its stated set time. Ask your contractor for the cure window before work begins.

Tags: concrete resurfacing, common mistakes to avoid during concrete resurfacing, concrete surface preparation, concrete resurfacer mixing instructions, concrete resurfacer curing time
Frequently Asked Questions
The most frequent errors are skipping surface preparation, leaving oil or sealers on the slab, ignoring active cracks and moisture, mixing the material outside the manufacturer's water ratio, applying the overlay too thin or too thick, and walking on or exposing the surface before it has cured. Each one can cause peeling, delamination or uneven wear. Following the product data sheet for mixing, coverage and cure time, and documenting your prep steps, prevents most of these failures.
Peeling usually traces back to poor adhesion. Common causes include a surface that was not cleaned of dirt, oil, curing compounds or old coatings, a slab that was not profiled enough for the material to grip, water trapped under the overlay from moisture or drainage problems, and mixing errors that weaken the bond. Testing surface profile and adhesion before applying the full overlay helps catch these issues early.
Cure time varies by product, thickness, temperature and humidity, so the manufacturer's data sheet is the authority for your specific material. Most resurfacers need to stay protected from foot traffic for a period after finishing, and vehicles or heavy furniture should wait considerably longer. Cooler temperatures and high humidity slow curing, while heat and wind can cause the surface to dry too fast and crack. Do not expose the surface to rain or heavy dew until the product has reached its stated set time. Ask your contractor for the cure window before work begins.